
This article is about
CapCut Premium
capcutdownload.com.pk · Tools
How to Fix CapCut Transitions Lagging on Android
GetApkFree Team
Fix CapCut transitions lagging on Android with practical steps for choppy previews, heavy effects, transition settings, device performance, and export testing.
- Source
- Developer
- Package
- CapCut Premium
How to Fix CapCut Transitions Lagging on Android
CapCut transitions can make a video feel smoother, more dynamic, and more professional. However, sometimes a transition stutters, freezes briefly, or appears choppy when you preview your project on an Android phone. The problem can be especially noticeable when you combine several transitions with filters, overlays, animations, or high-resolution footage.
Before changing your entire project, identify when the lag occurs. A transition that stutters only inside the editor may be a preview-performance issue. If the exported video also stutters at the same point, you may need to investigate the transition settings, source clips, effects, or export configuration.
This guide explains how to fix CapCut transitions lagging on Android, how to distinguish preview lag from a problem in the finished video, and how to create smoother scene changes without unnecessarily rebuilding your project.
Quick Answer: How to Fix CapCut Transitions Lagging
If transitions are lagging in CapCut on Android, try these steps:
- Play the transition several times to determine whether the lag is consistent.
- Close unnecessary background apps.
- Restart CapCut and your phone if needed.
- Reduce heavy effects, overlays, and animations around the transition.
- Check whether the transition duration suits the two clips.
- Test the transition with simpler footage.
- Make sure your phone has enough free storage.
- Update CapCut if an update is available.
- Export a short test clip to check whether the lag appears in the finished video.
- If the exported video is also choppy, simplify the edit and test a lower export resolution, such as 1080p instead of 4K.
Important: Do not immediately delete your project or reinstall CapCut. First determine whether the problem affects the editor preview, the final exported video, or only one particular transition.
What Does Transition Lagging Mean in CapCut?
Transition lagging occurs when the visual change between two clips does not play as smoothly as expected.
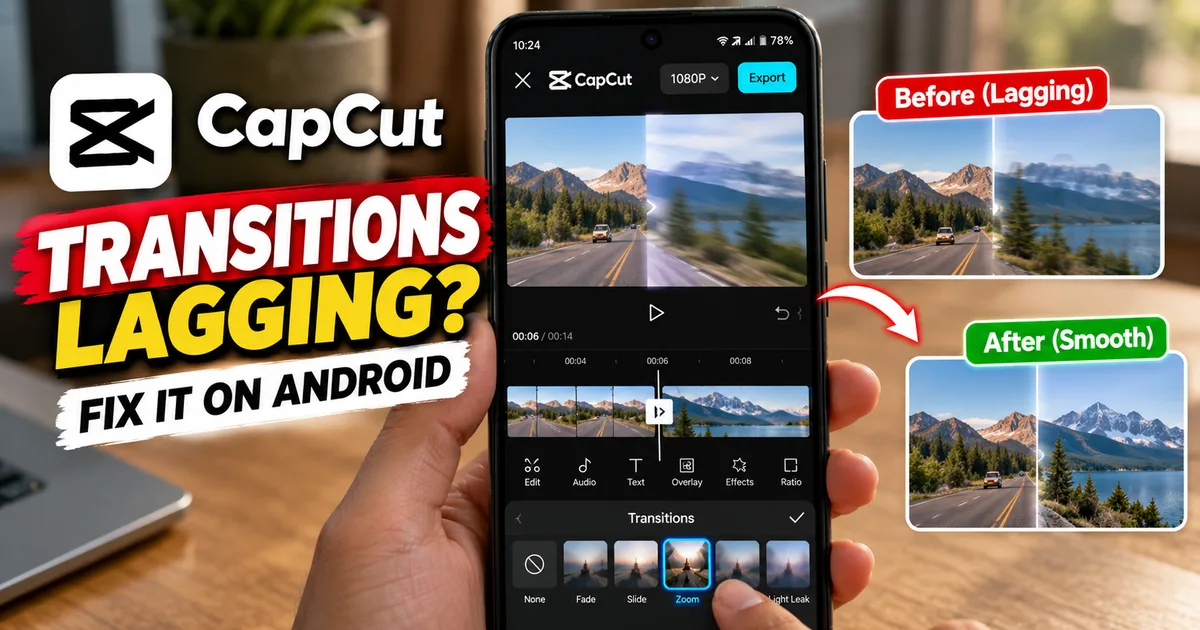
For example, imagine that you add a zoom transition between two video clips. Instead of moving smoothly from the first scene to the second, the preview may pause briefly, skip frames, or jump to the next scene.
The problem can take several forms.
1. The Transition Stutters During Preview
You press Play, but the transition looks choppy in the editing window.
This can happen when your phone struggles to process the timeline in real time. The final exported video may still look smooth.
2. The Transition Freezes Briefly
The preview stops for a moment at the boundary between clips and then continues.
This may happen when the editor has difficulty processing a demanding section of the project or loading particular media.
3. The Transition Looks Uneven in the Exported Video
The saved video contains the same stutter, freeze, or jump that you noticed while editing.
This deserves closer attention because the problem is not limited to the editor preview. The transition, source footage, effects, or export settings may need adjustment.
4. Only One Transition Causes Problems
Most transitions work correctly, but one particular effect looks choppy.
In this situation, test a simpler transition before changing other parts of the project. The issue may be specific to that effect or the way it interacts with your clips.
Why Are CapCut Transitions Lagging on Android?
Several factors can contribute to choppy transitions. The symptoms alone do not identify the exact cause, so use the following possibilities as a troubleshooting guide.
1. Your Phone Is Struggling to Process the Project
Video editing requires your phone to process footage, effects, animations, and multiple timeline layers.
When several demanding elements overlap, real-time playback may become less responsive.
This is more likely to be noticeable when your project contains high-resolution footage, complex effects, or many overlays.
2. Too Many Effects Are Active at Once
A transition may be combined with filters, motion effects, animated text, stickers, overlays, and other visual adjustments.
Each additional element can increase the amount of processing required.
If your project contains many effects around the same scene change, simplify that section and test playback again.
3. The Source Clips Are Difficult to Process
Some video files are more demanding to edit than others.
High-resolution footage, high frame rates, heavily compressed files, or media with unusual encoding characteristics can affect playback performance.
If the transition becomes choppy only when a particular clip is involved, test that clip separately.
4. The Transition Duration Does Not Suit the Edit
A transition that lasts too long can make a fast-moving video feel sluggish. A very short transition may look abrupt rather than smooth.
Although duration alone does not necessarily cause technical lag, adjusting it can help determine whether the problem is a timing issue or a genuine playback stutter.
5. The Editor Preview Is Struggling
The editing preview must display your changes while the project is being processed.
If playback is choppy in the editor, that does not automatically mean the exported video will have the same problem.
A short export test is one of the most useful ways to distinguish preview lag from an issue in the final file.
6. Your Phone Has Limited Available Resources
Other apps running in the background can compete for memory and processing resources. Very low available storage can also make working with large media projects more difficult.
Closing unnecessary apps, restarting your phone, and freeing storage are reasonable initial troubleshooting steps.
7. CapCut Needs an Update or Has a Temporary Glitch
An outdated app or temporary software issue may affect editing behavior.
Check whether an update is available from your usual trusted app source. If the problem started suddenly, restarting the app may also help.
Step 1: Check Whether the Lag Appears in the Final Video
Start here before changing any settings.
You need to determine whether the problem is limited to the preview or is also present in the exported file.
How to test the transition
- Open your project in CapCut.
- Locate a section containing a problematic transition.
- Play the section several times.
- Save your project if your current workflow provides a save option.
- Export a short section or a temporary copy of the project, if your version allows it.
- Play the resulting video in a compatible video player.
- Compare the transition with what you saw in the editor.
If you cannot export just a section, make a temporary copy of the project and shorten the copy for testing. Avoid making destructive changes to your original project.
How to interpret the result
If the exported video is smooth: The problem may be limited to preview performance. You may not need to change the transition itself.
If the exported video is also choppy: Continue with the transition, source-media, effects, and export checks below.
If the result is inconsistent: Repeat the test with another transition or a different section of the project.
This simple check prevents you from unnecessarily rebuilding an edit that is already exporting correctly.
Step 2: Close Background Apps
If your phone is struggling to play the timeline, free up resources before changing the project.
What to do
- Save or otherwise preserve your editing progress.
- Leave CapCut.
- Close apps that you do not need.
- Avoid running other demanding applications while editing.
- Reopen CapCut.
- Play the problematic transition again.
Do not assume that every background app is causing the problem. This is simply an easy first test.
If the transition becomes smoother, limited available resources may have contributed to the issue.
If nothing changes, continue to the next step.
Step 3: Restart CapCut and Your Android Phone
A restart can resolve temporary glitches and release resources being used by other processes.
Restart CapCut
- Save your project.
- Close CapCut completely from the recent-apps screen.
- Open the app again.
- Reopen the project.
- Test the transition.
Restart your phone
If the problem persists, restart your Android phone.
After the phone starts again, open CapCut without launching unnecessary apps and test the same section.
A restart will not fix every problem. If the stutter comes from a specific effect, source clip, or export setting, you will need to investigate that part of the project.
Step 4: Reduce Heavy Effects Around the Transition
If the transition still stutters, inspect the timeline around the affected section.
You do not need to remove every effect from your video. Start by testing the elements that overlap the transition.
Check filters and visual effects
Temporarily disable or remove a demanding effect near the transition if your current editing workflow allows it.
Preview the same section again.
If playback improves, restore the effects one at a time to identify which combination may be contributing to the problem.
Check overlays and animated elements
Look for additional video layers, animated stickers, moving text, and other elements that appear at the same time as the transition.
Temporarily simplify the section and test playback.
Check motion effects
If the transition overlaps with zooming, motion blur, keyframe animation, or other movement effects, test the transition without one of those elements.
The goal is to isolate the cause rather than remove creative elements permanently.
Use a simple test
For example, if your original section contains a zoom transition, a filter, animated text, and an overlay, temporarily test it with just the two video clips and the transition.
If that version plays smoothly, add the other elements back one at a time.
This approach is more useful than randomly changing multiple settings at once.
Step 5: Adjust the Transition Duration
A transition should fit the pace and movement of the footage.
If the effect feels too slow or looks awkward, changing its duration can help.
How to adjust the duration
- Open your project.
- Locate the transition icon between the two clips.
- Tap the transition.
- Choose a different duration if the control is available.
- Preview the result.
- Compare the new version with the original.
The exact controls depend on the current CapCut interface and the selected transition.
Choose a duration that suits the footage
A short transition can work well in fast-paced edits, action clips, and short-form social videos.
A longer transition may suit slower footage, cinematic scenes, or calm travel videos.
Do not automatically make every transition as short as possible. A technically smooth transition should also look natural.
If the transition still stutters at different durations, investigate playback performance and the effect itself.
Step 6: Test a Simpler Transition
Sometimes a particular transition looks worse than other effects in the same project.
To check whether the effect is the issue, replace it temporarily with a simpler option.
For example, test a basic fade or another less demanding transition that is available in your version of CapCut.
Follow this process
- Select the problematic transition.
- Note its current style and duration.
- Choose a simpler transition.
- Preview the same two clips.
- Export a short test if necessary.
- Compare the results.
If the simpler transition works well, the original effect or its combination with other elements may be contributing to the problem.
You can then decide whether to keep the simpler effect or experiment with the original one again.
For instructions on choosing and applying transitions, see our guide: How to Add Transitions in CapCut on Android.
Step 7: Check the Two Clips at the Transition Point
A transition connects two pieces of footage, so problems with either clip can affect how the scene change looks.
Check the clip boundaries
Make sure the two clips are arranged in the intended order and that the transition is positioned at the correct point.
If the transition seems to jump, inspect the last frames of the first clip and the first frames of the second.
Check for unexpected movement
Suppose the first clip contains rapid camera movement and the second clip begins with a sudden change in direction. Even a correctly applied transition may look visually abrupt.
Try footage with more compatible movement or adjust the transition style.
Test the clips without the transition
Temporarily remove or disable the transition, if possible, and play the cut between the clips.
If the footage itself looks choppy, the transition may not be the only issue.
If both clips play smoothly without the effect but stutter when the transition is applied, focus on the transition and the effects around it.
Check unusual source footage
If one clip consistently causes problems, test another compatible video file.
A source file that is damaged, unusually encoded, or difficult for the editor to process may behave differently from other footage.
Do not delete the original file until you have confirmed that another copy is available and that the replacement works.
Step 8: Free Up Storage Space
Video projects can contain large source files, temporary data, and exported videos.
If your phone is almost full, make some space before continuing.
Safe ways to free up space
- Remove duplicate downloads that you no longer need.
- Move completed videos to another storage location if appropriate.
- Delete unnecessary files after confirming that they are not part of an unfinished project.
- Review large files in your phone's storage settings.
- Keep enough free space for the media and exports you are working with.
Do not delete CapCut's project folders or source footage just to make room without checking what those files contain.
Freeing storage may help with general device operation, but it is not guaranteed to resolve a transition-specific problem.
Step 9: Clear the CapCut Cache Safely
Temporary cached data can sometimes contribute to unusual app behavior.
On many Android phones, you can clear an app's cache through the system settings.
How to clear the cache
- Open Android Settings.
- Select Apps or App Management.
- Find and select CapCut.
- Open Storage or Storage Usage.
- Tap Clear Cache, if available.
- Reopen CapCut.
- Test the transition again.
Menu names vary between Android manufacturers and software versions.
Choose Clear Cache, not Clear Data or Clear Storage. Clearing app data may remove local settings or affect access to local projects and other app information.
If your drafts are important, make sure you understand how they are stored and have appropriate backups before making any changes to the app's data.
Step 10: Update CapCut
If the problem continues, check whether a newer version of CapCut is available.
Updates may contain bug fixes and compatibility improvements, although an update is not guaranteed to fix a particular transition problem.
What to do
- Open the trusted app store or official source you normally use.
- Search for CapCut.
- Check whether an update is available.
- Review the update information if provided.
- Update the app if appropriate.
- Reopen your project and test the transition.
Avoid uninstalling CapCut as an initial troubleshooting step. Local drafts may be affected by uninstalling the app, so verify your backup or synchronization situation first.
For official guidance, see CapCut's update help.
Step 11: Test a Lower Export Resolution
If the transition is also choppy in the exported video, test whether the output settings are contributing to the problem.
High-resolution exports require more processing than lower-resolution outputs. CapCut's official guidance identifies 1080p instead of 4K as one possible way to reduce processing load when transitions lag.
How to test
- Open your project.
- Tap Export.
- Review the available resolution settings.
- If you were exporting at 4K, try 1080p for a test.
- Keep the other settings as consistent as possible.
- Export the video.
- Play the exported file and inspect the transition.
The available resolution and frame-rate options depend on your device, project, and current CapCut version.
This is a diagnostic test, not a requirement to export every video at 1080p. If the lower-resolution version is smooth, you can decide whether to simplify the project further before trying a higher-resolution export again.
Step 12: Check the Frame Rate and Source Footage
Frame rate describes how many frames are displayed each second.
If your source clips have different frame rates, the footage can have different motion characteristics. That alone does not prove that a transition will lag, but it is worth checking when the motion looks uneven in the final video.
What to check
- Whether the original clips already look choppy outside CapCut.
- Whether the issue appears with only one source clip.
- Whether the export frame rate is appropriate for the footage and intended use.
- Whether changing export settings improves the result.
Avoid changing several frame-rate settings at the same time. Test one adjustment, compare the output, and then decide whether another change is necessary.
A higher frame rate is not automatically better for every project, and it will not necessarily fix a transition that is struggling because of heavy effects or a specific source clip.
Step 13: Create a Small Test Project
If you still cannot identify the problem, make a separate test project.
This helps determine whether the issue affects CapCut generally or only your original edit.
Create the test
- Open CapCut.
- Start a new project.
- Import two short, compatible video clips.
- Place them next to each other.
- Apply a simple transition.
- Preview the result.
- Export a short test if needed.
Interpret the result
The test project works smoothly: The original project may contain a particular clip, effect, overlay, or combination of elements that contributes to the problem.
The test project also stutters: The issue may involve general app behavior, device performance, or the transition itself.
The preview stutters but the export is smooth: You may be seeing a playback-performance limitation rather than a defect in the final video.
This test is especially useful before making major changes to a long editing project.
How to Make CapCut Transitions Smoother
Once the technical problem is under control, a few editing practices can help your transitions look more natural.
Match the Movement Between Clips
A transition often feels smoother when the movement in the first clip connects naturally with the second.
For example, if the first shot moves from left to right, a second shot with a similar direction of movement may create a more cohesive sequence.
Avoid Stacking Too Many Effects
You can combine transitions with filters, overlays, animated text, and motion effects. However, using too many elements in the same moment can make editing more demanding and the final scene visually cluttered.
Add effects when they improve the story or emphasize an important moment.
Keep the Duration Consistent Where Appropriate
A video can feel more polished when similar scene changes use a consistent timing style.
This does not mean every transition must have the same duration. Use faster transitions for energetic sequences and slower ones for scenes that need more time.
Preview Before Exporting
Watch the transition in context instead of judging it only from the effect-selection preview.
Pay attention to the final frames of the first clip, the beginning of the second clip, and how the transition affects the rhythm of the entire video.
Test Complex Sections Early
If you plan to use several overlays, effects, or animations, test a small section before applying the same approach throughout a long project.
This can help you discover performance problems before you finish the entire edit.
Common Mistakes to Avoid When Fixing Transition Lag
Reinstalling CapCut Immediately
Reinstalling may create unnecessary problems, especially if you have unfinished local drafts.
Try simpler checks first and protect your projects before considering a reinstall.
Clearing App Data Instead of Cache
Clearing app data is not the same as clearing temporary cached files.
Use the cache option when that is what you intend to clear, and avoid changing app data without understanding the consequences.
Removing Every Effect at Once
If you disable all effects simultaneously, you may not discover which element was contributing to the problem.
Test one element at a time whenever practical.
Assuming Preview Lag Means Export Lag
A choppy preview does not automatically mean the final video will stutter.
Export a short test and inspect the saved file before rebuilding the project.
Increasing the Export Settings Without Testing
Higher resolution or frame rate does not automatically produce a smoother result. More demanding settings can increase the processing load on your device.
Choose settings that suit your footage, device, and intended destination.
Deleting Source Files to Free Storage
Do not remove source media that your project still needs. Free up space using files you have verified are unnecessary or backed up.
Frequently Asked Questions
Why are my transitions lagging in CapCut on Android?
Possible causes include limited device resources, heavy effects, demanding source footage, preview-performance limitations, or a temporary app issue. Test a simple transition and compare the editor preview with a short exported video to narrow down the cause.
Why do transitions look choppy in the preview but smooth after export?
The editor may be struggling to process the timeline in real time. If the exported file looks correct, the issue may be limited to preview playback rather than the final video.
Why is only one transition lagging in CapCut?
The issue may involve that particular transition or how it interacts with the source clips and other effects. Try a simpler transition and test the same clips without additional effects.
Does clearing the CapCut cache fix transition lag?
It may help if temporary cached data is contributing to unusual app behavior, but it is not a guaranteed solution. Clear the cache rather than app data, and protect important drafts before changing app settings.
Should I export at 1080p instead of 4K?
If transitions are choppy in the exported video, a 1080p test can help determine whether the export workload is contributing to the problem. You can decide whether to use the lower resolution or simplify the project before trying 4K again.
Will increasing the frame rate fix choppy transitions?
Not necessarily. A higher frame rate does not automatically solve performance issues and can increase processing demands. Check the source footage and compare export settings rather than changing frame rate without testing.
Can too many effects make CapCut transitions lag?
Combining transitions with multiple overlays, filters, animations, and other visual effects can increase processing demand. Temporarily simplify the affected section and restore effects one at a time to identify a possible cause.
Should I reinstall CapCut if transitions still lag?
Reinstallation should not be the first step. Try restarting the app and phone, updating CapCut, testing a simple project, and checking the exported video first. If you eventually consider reinstalling, make sure your important drafts and source files are protected.
Why do transitions lag only in a long CapCut project?
A long project may contain more clips, layers, effects, and high-resolution media than a small test project. Try simplifying the section around the transition and testing the same effect in a new project.
Where can I learn how to add transitions in CapCut?
Read our guide on How to Add Transitions in CapCut on Android for instructions on selecting transitions, adjusting duration, and improving scene changes.
Final Thoughts
CapCut transitions lagging on Android can be frustrating, but you do not need to rebuild your entire project immediately.
Start by determining whether the problem occurs only in the preview or also in the exported video. Then test a simpler transition, reduce demanding effects around the affected section, restart the app, check available storage, and update CapCut if necessary.
If the final video is also choppy, try a short export at a lower resolution and inspect the source clips and transition settings. If the problem occurs only in one project, use a small test project to help isolate the cause.
Make one change at a time and compare the results. This approach helps you identify the likely problem while preserving the rest of your edit.