
This article is about
CapCut Premium
capcutdownload.com.pk · Tools
How to Add Transitions in CapCut on Android
GetApkFree Team
Learn how to add transitions in CapCut on Android, choose transition effects, adjust duration, and fix common transition problems.
- Source
- Developer
- Package
- CapCut Premium
How to Add Transitions in CapCut on Android
When two video clips are placed next to each other, CapCut normally cuts from one clip to the next. If you want the change between scenes to feel smoother or more stylized, you can add a transition between them.
CapCut includes a variety of transition effects that can be used for videos, Reels, Shorts, travel edits, montages, tutorials, and other projects.
This guide explains how to add transitions in CapCut on Android, how to adjust their duration, how to choose the right effect, and what to do when the transition option does not appear.
Quick Answer
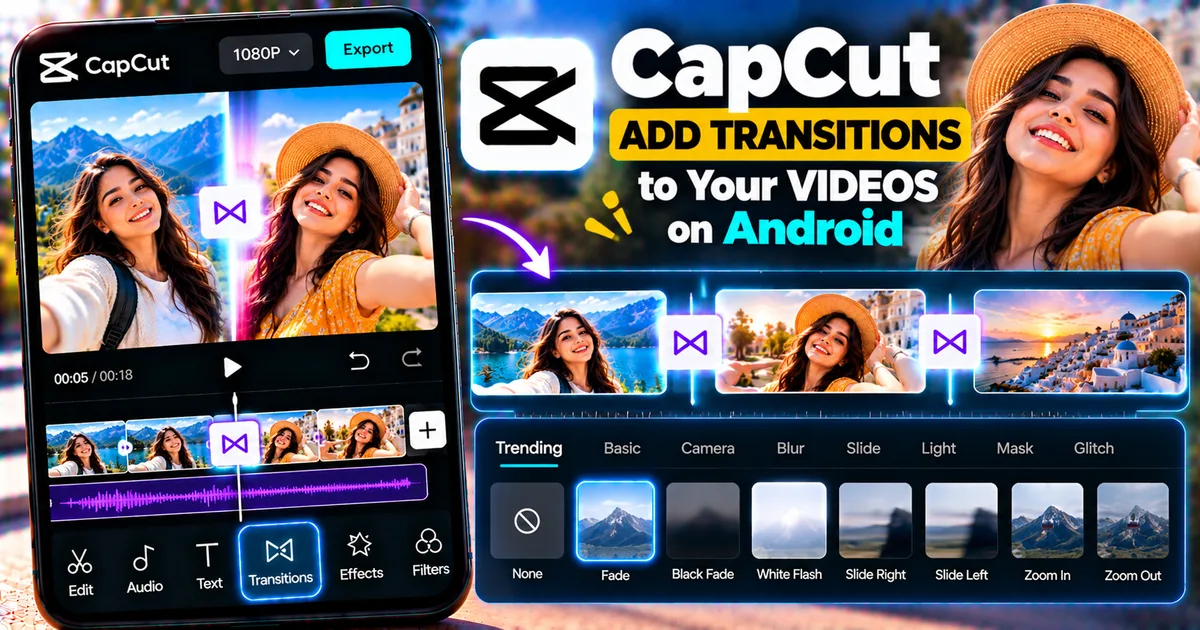
To add a transition in CapCut on Android, create or open a project with at least two video clips. Place the clips next to each other on the timeline, then tap the small transition icon between the clips. Browse the available transitions, select one, adjust its duration if needed, and preview the result.
Transitions work between clips, so you need at least two adjacent clips for the transition control to appear.
What Is a Transition in CapCut?
A transition is a visual effect that controls how one video clip changes into another.
Without a transition, the video may simply switch from Clip 1 to Clip 2.
With a transition, the change might use effects such as:
- Fade
- Blur
- Slide
- Zoom
- Wipe
- Camera-style movement
- Light effects
- Mask-style changes
- Other creative effects
The exact transition library can change between CapCut versions, devices, regions, and accounts.
A transition is different from a video effect.
A video effect is generally applied to footage, while a transition is placed at the point where two clips meet.
How to Add a Transition in CapCut on Android
Follow these steps to add a transition between two clips.
Step 1: Open CapCut
Launch CapCut on your Android phone.
Create a new project or open an existing project containing the clips you want to edit.
Step 2: Add at Least Two Video Clips
If you are creating a new project, select the videos you want to use.
Tap Add to place them on the editing timeline.
You need at least two clips because a transition needs two sides to connect.
For example:
Clip 1 → Clip 2
The transition will be placed at the point where these two clips meet.
Step 3: Make Sure the Clips Are Next to Each Other
Look at the timeline and make sure the two clips are positioned directly next to each other.
The transition control appears at the junction between adjacent clips.
If there is a gap or the timeline is difficult to see, zoom in or adjust the timeline view.
Step 4: Tap the Transition Icon
Look between the two clips on the timeline.
You should see a small transition control or square icon at the point where the clips meet.
Tap it to open the transition options.
Step 5: Browse the Transition Effects
CapCut provides different transition styles and categories.
Browse the available options and tap a transition to preview it.
Depending on the current version of CapCut, you may see categories or styles related to effects such as:
- Basic
- Blur
- Overlay
- Camera
- Light
- Slide
- Mask
- Other creative styles
The exact categories can change over time.
Step 6: Select a Transition
Tap the transition you want to use.
CapCut applies it between the two clips.
Preview the result before moving on.
If you do not like the effect, return to the transition controls and choose another one.
Step 7: Adjust the Transition Duration
Many transitions allow you to control how long the effect lasts.
A shorter duration can make a transition feel quick and energetic.
A longer duration can create a slower, more noticeable scene change.
The best duration depends on the footage and the style of the video.
Step 8: Preview the Result
Play the section containing the transition.
Watch for:
- Sudden movement
- Flashing
- Unwanted cropping
- Audio problems
- A transition that feels too slow
- A transition that feels too aggressive
If necessary, select another effect or adjust its duration.
How to Add Transitions Between Multiple Clips
You can use transitions throughout a project containing multiple clips.
For example:
Clip 1 → Transition → Clip 2 → Transition → Clip 3 → Transition → Clip 4
Each transition is placed between two clips.
You can use the same transition throughout the video or use different transitions for different scene changes.
However, using too many different effects can make a video feel inconsistent.
For a cleaner editing style, consider using one or two transition styles throughout the project.
How to Choose the Right CapCut Transition
The best transition depends on the type of video you are creating.
Fade
A fade can work well for calm videos, introductions, endings, memories, and cinematic edits.
Blur
Blur-style transitions can create a softer movement between scenes.
They can work well for lifestyle videos, travel edits, and fast-paced social content.
Slide
Slide transitions can create a directional movement from one scene to another.
They can work particularly well when the movement matches the direction of the footage.
Zoom
Zoom-style transitions can create a more energetic change between clips.
They can be useful in short-form videos and dynamic edits.
Camera-Style Transitions
Camera-style effects can make scene changes feel more energetic.
Use them when the visual style of your footage supports the effect.
Mask-Style Transitions
Mask-based transitions can create more creative scene changes by revealing one clip through another.
These can be useful for more stylized edits.
How Long Should a CapCut Transition Be?
There is no single duration that works for every video.
Consider the pace of your footage.
For fast social-media edits, a shorter transition may work better.
For cinematic or slower footage, a longer transition may be appropriate.
The important thing is that the transition should support the edit rather than distract from the content.
Preview the transition several times before deciding on the final duration.
How to Make Smooth Transitions in CapCut
Adding a transition does not automatically make an edit look professional.
The clips themselves should also work well together.
Here are some ways to create smoother transitions.
Match Movement
If one clip has movement toward the right, transitioning into another clip with similar movement can make the change feel more natural.
Match the Subject
Try transitioning between clips where the subject stays in a similar position or moves in a predictable direction.
Match the Scene
Similar lighting, colors, locations, or camera angles can make a transition feel less noticeable.
Keep the Timing Tight
If the transition lasts too long, it may distract from the video.
Try different durations and choose the one that fits the pace of the edit.
Use Sound
Music and sound effects can make visual transitions feel more connected.
For example, a whoosh sound can emphasize a fast movement transition.
You can learn more about adding sound effects in CapCut here:
https://getapkfree.com/blog/how-to-add-sound-effects-capcut-android
How to Add Transitions to a Travel Video
Transitions can work particularly well in travel videos because footage often contains many different locations.
For example:
Airport → Transition → Hotel → Transition → Beach → Transition → Restaurant
You can use simple fades for calm scenes or more energetic effects for fast-moving travel footage.
Try to keep the transition style consistent throughout the video.
How to Add Transitions to a Reel or Short
Short-form videos usually benefit from quick editing.
When creating a Reel or Short:
- Add your clips.
- Remove unnecessary footage.
- Arrange the clips in the correct order.
- Add transitions where they improve the flow.
- Add music or sound effects.
- Preview the entire video.
- Export the final result.
Do not feel that every cut needs a transition.
Sometimes a simple cut is more effective.
Should You Add a Transition Between Every Clip?
No.
A transition is optional.
If two clips already connect naturally, a normal cut may look better.
Using a transition between every single clip can make a video feel overly edited.
Instead, use transitions when they help communicate a change in:
- Location
- Time
- Subject
- Mood
- Scene
- Action
This usually produces a cleaner result.
How to Change or Replace a Transition
If you do not like an existing transition, tap the transition control between the clips again.
Browse the available effects and select another transition.
Preview the new result before continuing with your edit.
You can also adjust the duration when that option is available.
How to Remove a Transition in CapCut
If you decide you no longer want a transition, open the transition controls between the clips.
Choose the available option for removing or replacing the transition, depending on the current CapCut interface.
You can then preview the clips as a normal cut.
The exact controls may vary between CapCut versions.
How to Add Music to a Video With Transitions
Music can help establish the rhythm of a video.
For example, you can time scene changes around beats in the music.
A simple workflow is:
- Add your video clips.
- Arrange them in the correct order.
- Add transitions.
- Add background music.
- Adjust the music volume.
- Preview the video.
- Adjust transition timing if necessary.
- Export the finished video.
If you need a detailed guide, see:
https://getapkfree.com/blog/how-to-add-music-video-capcut-android
How to Combine Transitions With Speed Effects
You can combine transitions with speed changes to create more dynamic edits.
For example, you might:
- Speed up a clip
- Transition into another clip
- Slow down the next clip
- Add music
- Add a sound effect
However, combining several effects can quickly make an edit difficult to follow.
Use each effect for a specific purpose rather than adding effects simply because they are available.
How to Use Transitions With Overlays
Overlays can also be used as part of more creative scene changes.
For example, an overlay can introduce a graphic, image, light effect, or another video layer.
If you want to learn more about overlays, see:
https://getapkfree.com/blog/how-to-add-overlays-capcut-android
CapCut Transitions Not Showing
If you cannot find the transition icon, check the timeline first.
Make Sure You Have Two Clips
Transitions require two clips.
If there is only one clip on the timeline, there is no point where a transition can be applied.
Make Sure the Clips Are Adjacent
The clips should be positioned next to each other.
If there is a gap between them, the transition control may not appear.
Zoom In on the Timeline
The transition icon can be small.
If the timeline is zoomed too far out, zoom in and check the point where the clips meet.
Check the Correct Tool
Transitions are different from animations and effects.
Make sure you are selecting the transition control between the clips rather than looking inside another editing category.
Check for App Problems
An outdated app version or temporary software issue can sometimes affect editing features.
If the transition controls still do not appear, restart CapCut and check whether an update is available.
CapCut Transition Not Working
If you select a transition but it does not appear correctly, check the following.
Check the Clip Length
Some transitions require enough footage from the clips they connect.
If the clips are extremely short, certain effects may not work as expected.
Check the Timeline
Make sure the clips are directly adjacent.
Try Another Transition
The problem may be related to a specific effect.
Select another transition and preview it.
Restart CapCut
Close CapCut completely and reopen the project.
Then try applying the transition again.
Update CapCut
If the problem continues, check whether a newer version of CapCut is available for your device.
Can You Add Transitions to Photos in CapCut?
Yes. You can create projects using photos and use transitions between visual elements where the current CapCut project setup supports them.
This can be useful for:
- Photo slideshows
- Birthday videos
- Travel albums
- Memories
- Product presentations
- Social media posts
Transitions can help make a sequence of still images feel more dynamic.
Can You Use Different Transitions in the Same Video?
Yes.
You can use different transitions at different points in a project.
For example:
Scene 1 → Fade
Scene 2 → Slide
Scene 3 → Zoom
Scene 4 → Blur
However, using too many unrelated styles can make the video feel inconsistent.
A consistent visual language usually works better.
Can You Add a Transition After Splitting a Video?
Yes.
If you split one long video into multiple clips, you can then use the transition controls between the resulting clips when supported by the project.
This can be useful when you want to create a stylized change within a single recording.
Transition vs Cut in CapCut
A cut is the direct change from one clip to another.
A transition adds a visual effect to that change.
For example:
Normal cut:
Clip 1 → Clip 2
Transition:
Clip 1 → Fade/Blur/Zoom/etc. → Clip 2
Neither approach is automatically better.
Choose the method that fits the footage.
Common CapCut Transition Mistakes
Using Too Many Effects
A different transition for every clip can make the video distracting.
Making Transitions Too Long
Long transitions can slow down a fast-paced video.
Ignoring the Music
If a transition happens at an important beat, adjusting its timing can make the edit feel more synchronized.
Using an Effect That Does Not Match the Footage
A dramatic transition may look out of place in an otherwise simple video.
Forgetting to Preview
Always watch the transition in context.
A transition may look good in the selection preview but feel wrong when combined with your actual footage.
Frequently Asked Questions
How do I add a transition between two videos in CapCut?
Add both videos to the timeline, make sure they are next to each other, tap the transition icon between them, select an effect, adjust the duration if available, and preview the result.
Why can't I see the transition button in CapCut?
Make sure there are at least two clips on the timeline and that they are directly next to each other. If the timeline is zoomed out, zoom in to see the transition control.
Can I change the transition duration?
Yes, transition duration can be adjusted when the selected transition provides that control.
Can I use transitions between every clip?
Yes, but you do not have to. Some edits look better with simple cuts between certain clips.
What is the smoothest transition in CapCut?
There is no single transition that is best for every video. Fade, blur, slide, and other simple transitions can work well depending on the footage and editing style.
Can I use transitions in CapCut on Android?
Yes. CapCut's current mobile guidance supports adding transitions between adjacent clips.
Do transitions reduce video quality?
A transition itself is an editing effect. Final output quality depends on the source footage and export settings as well as the editing process.
Final Thoughts
Adding transitions in CapCut on Android is a simple way to control how one scene changes into another.
Start by placing at least two clips next to each other on the timeline, tap the transition control between them, choose an effect, adjust its duration, and preview the result.
For a professional-looking edit, focus on timing and consistency rather than using as many effects as possible.
A well-timed simple transition can often look better than a complicated effect that does not match the footage.
Related Articles

How to Fix CapCut Video Lagging After Export on Android
Fix CapCut video lagging after export on Android. Learn how to troubleshoot choppy playback, frame-rate mismatches, heavy effects, storage issues, and export settings.
GetApkFree Team

How to Fix CapCut Preview Not Matching Export on Android
Fix CapCut preview not matching the exported video on Android. Troubleshoot missing effects, text, transitions, timing, colors, and rendering differences.
GetApkFree Team

How to Fix Couldn't Apply AI Background in CapCut on Android
Getting "Couldn't Apply AI Background" in CapCut on Android? Check usage limits, clip selection, video quality, app updates, and practical troubleshooting steps.
GetApkFree Team

How to Fix CapCut Effects Not Applying on Android
CapCut effects not working on Android? Check clip selection, effect layers, timeline timing, conflicting adjustments, and app performance with these practical fixes.
GetApkFree Team