

This article is about
CapCut Premium
capcutdownload.com.pk · Tools
How to Fix CapCut Preview Not Matching Export on Android
GetApkFree Team
Fix CapCut preview not matching the exported video on Android. Troubleshoot missing effects, text, transitions, timing, colors, and rendering differences.
- Source
- Developer
- Package
- CapCut Premium
How to Fix CapCut Preview Not Matching Export on Android
Have you edited a video in CapCut, checked the preview, and exported it only to discover that the finished video looks different? Perhaps an effect disappears, text moves out of position, a transition looks incorrect, or the timing changes in the exported file.
This can be frustrating when the project looks perfect inside the editor. However, a mismatch between the preview and the final video does not automatically mean your project is damaged. The issue may involve preview rendering, an effect's timing, overlapping layers, media compatibility, export settings, or a temporary app problem.
The best solution depends on exactly what changes between the preview and the exported video. A color difference requires different troubleshooting from missing text or a transition that plays at the wrong time.
In this guide, you'll learn how to fix CapCut preview not matching export on Android, identify the source of the mismatch, test individual sections, and protect your original project while troubleshooting.
Quick Answer: How to Fix CapCut Preview Not Matching Export
If your CapCut exported video looks different from the preview on Android, try these steps:
- Play the project from the beginning and inspect the exact section that looks wrong.
- Check whether text, effects, overlays, and transitions cover the correct timeline positions.
- Close and reopen CapCut to refresh the preview.
- Temporarily disable recently added effects or adjustments to identify conflicts.
- Confirm that the original video and other imported media play correctly.
- Export a short test section and compare it with the editor preview.
- Check the export resolution, frame rate, and other available settings.
- Clear CapCut's cache without clearing app data.
- Restart your phone and check for an available CapCut update.
- Rebuild only the problematic section if the issue is limited to a specific clip or effect.
Keep your original project intact while testing these fixes. Avoid deleting app data or uninstalling CapCut before protecting your local drafts.
Why Does CapCut Preview Not Match the Exported Video?
CapCut's editor preview and the final exported file are not necessarily produced under identical playback conditions. The editor may use a lower-resolution preview or temporary rendering resources to keep editing responsive, while exporting processes the finished video.
Some differences are normal, but missing elements, incorrect timing, or substantially different effects deserve investigation.
1. The Preview Has Not Refreshed Correctly
Sometimes the editor preview does not immediately reflect the latest change. You might move text, adjust an effect, or change a clip's timing and continue seeing an outdated frame.
If the preview is stale, the exported result may not match what you thought you were viewing.
2. An Effect Is Applied to the Wrong Timeline Section
Effects and adjustments may have their own durations or apply to particular clips. An effect can appear correct at one point in the timeline but end before the section you intend to export.
3. Text or Overlays Are Positioned Incorrectly
Text, stickers, and overlays may be visible in one part of the preview but disappear, overlap another element, or appear at a different time in the final video.
The problem may come from their timeline placement, duration, or relationship to the underlying clip.
4. A Transition Does Not Render as Expected
A transition may appear smooth in the preview but look abrupt in the exported file. This can happen when the transition overlaps a clip boundary incorrectly or the surrounding footage does not provide enough usable frames for the intended effect.
5. The Export Settings Are Different From Your Expectations
Resolution, frame rate, and compression can affect the appearance and smoothness of the final video.
For example, the exported video may look softer than the editing preview, or fast movement may look different after export. These differences do not always indicate an editing error.
6. A Media File or Effect Causes a Rendering Problem
A particular video, image, audio track, effect, or animation may not render as expected. If the mismatch occurs at the same point every time, inspect the elements used in that section.
7. CapCut Has a Temporary Software or Device Issue
Rendering glitches, cache problems, app bugs, and device-specific limitations can also contribute to discrepancies between editing and export.
The most reliable approach is to isolate the problem before changing multiple settings.
Method 1: Find the Exact Point Where the Export Changes
Start by identifying what is different. Do not rebuild the entire project before you know which section is affected.
Step 1: Open the exported video
Open the final video in your phone's Gallery or Photos app.
Step 2: Compare it with the project preview
Return to CapCut and navigate to the same moment in the timeline.
Compare the two versions carefully.
Check whether:
- Text is missing or appears in a different position.
- An effect disappears or changes intensity.
- A transition looks different.
- A sticker or overlay appears at the wrong time.
- A clip starts or ends at the wrong point.
- Colors or brightness look different.
- Audio and video timing no longer match.
Step 3: Identify the affected section
Note the approximate timestamp where the mismatch begins.
For example, if the first 10 seconds look correct but a text animation disappears around the 12-second mark, concentrate on that text layer and its surrounding clips.
This makes troubleshooting faster and reduces the risk of damaging parts of the project that already work correctly.
Method 2: Refresh the CapCut Preview
If the preview looks outdated or does not reflect your latest edits, refresh it before changing the project.
- Save your project if possible.
- Tap outside the selected clip or editing control.
- Move the playhead to another point in the timeline.
- Return to the section where the mismatch occurs.
- Play the section again.
- Check whether the preview now displays the latest changes.
You can also leave the editor and reopen the project if necessary.
If the preview refreshes and the edit looks correct, export a short test to see whether the mismatch has been resolved.
Method 3: Check Text and Overlay Timing
Missing or misplaced text is one of the easiest problems to investigate because text and overlays often have separate timeline layers.
Check the text duration
- Open your project.
- Select the text layer that looks incorrect in the exported video.
- Inspect its position and duration on the timeline.
- Confirm that it covers the entire section where it should appear.
- Check whether the text begins or ends too early.
- Preview the section from a few seconds before the text appears.
If the text is supposed to remain visible throughout a clip, make sure its timeline duration covers that period.
Check overlay placement
If a sticker, image, or additional video layer disappears during export:
- Select the overlay.
- Inspect its start and end points.
- Confirm that it is positioned over the intended footage.
- Check whether another layer covers it.
- Play the affected section from beginning to end.
- Export a short test.
Remember that an overlay can be positioned correctly on the screen but still have the wrong timeline duration.
If you need help with this editing technique, see how to add overlays in CapCut on Android.
Method 4: Fix Effects That Disappear After Export
If an effect looks correct in the preview but disappears or changes in the final video, investigate the effect itself.
Step 1: Select the affected effect
Open the project and locate the effect associated with the problematic section.
Depending on the effect, it may appear on a separate timeline track or be associated with a selected clip.
Step 2: Check its duration
Make sure the effect covers the intended section.
If the effect ends before the clip finishes, the exported video may return to its normal appearance earlier than expected.
Step 3: Check its intensity
If the effect appears too weak or too strong, review its available intensity or adjustment settings.
A subtle effect may be less noticeable in the exported video, particularly if the final video is viewed on a different display.
Step 4: Temporarily disable other effects
If several effects are applied to the same clip, test the problematic effect without the others.
If it renders correctly in isolation, reintroduce the other effects gradually to identify which combination produces the mismatch.
Step 5: Test a short export
Export only the affected section if your editing workflow allows it.
Compare the result with the preview before making further changes.
For more help, see how to fix CapCut effects not applying on Android.
Method 5: Check Transitions and Clip Boundaries
Transitions can look different in the final export if their timing or surrounding clips are not configured as intended.
Inspect the transition
- Open the timeline.
- Locate the boundary between the two clips.
- Select the transition.
- Review its duration and available settings.
- Play the transition several times.
- Check the footage immediately before and after it.
If the transition appears abrupt in the exported video, try a shorter duration or a simpler transition as a diagnostic test.
Check the available footage
Some transitions need usable frames from both clips. If a clip is trimmed very tightly, there may be limited footage available around the cut.
Try adjusting the clip boundaries slightly and testing the transition again.
Test without additional effects
If the transition is combined with speed adjustments, filters, or other effects, temporarily simplify the test section.
This helps determine whether the transition itself or another editing operation is contributing to the mismatch.
Method 6: Fix Colors, Brightness, or Quality Differences
Sometimes the timing and layout are correct, but the exported video looks softer, darker, brighter, or less detailed than the preview.
First, distinguish between an actual rendering problem and a difference in how the video is displayed.
Compare the same video on the same screen
- Open the exported video in Gallery.
- Navigate to the same frame shown in CapCut.
- Compare the brightness, color, sharpness, and contrast.
- Make sure you are comparing the same moment.
- Check whether the difference appears throughout the video or only in one section.
Different display settings and playback applications can make the same video look slightly different.
Check the export resolution
Choose an export resolution suitable for your source footage and intended use.
A higher resolution does not automatically restore detail that was absent from the original video. Exporting low-resolution footage at a higher resolution cannot recreate all the missing information.
Check the frame rate
If movement looks less smooth after export, review the frame-rate setting available in CapCut.
Try a short export with a suitable frame rate and compare the result with your original test.
The best settings depend on your source footage, intended platform, and device capabilities.
Check brightness and filters
If the entire exported video looks too dark, too bright, or unusually saturated, inspect the adjustments applied to the clips.
Temporarily disable filters, brightness changes, contrast adjustments, and other color effects one at a time.
If the mismatch disappears after disabling one adjustment, investigate that setting before changing the rest of the project.
Method 7: Check Whether the Original Media Is Causing the Problem
A problematic source file may behave differently during editing and final rendering.
This is especially worth investigating when the mismatch occurs at the same point every time.
Test the original clip
- Open the original video in your phone's Gallery.
- Play it through the affected section.
- Check for freezing, black frames, or unusual playback.
- Return to CapCut.
- Test the same clip in a separate project if necessary.
If the original file behaves incorrectly outside CapCut, obtain a clean copy if possible.
If the original plays normally but the exported result does not, test the clip without its effects and overlays.
Reimport the media if necessary
If a particular clip continues to cause problems, try importing a clean copy of the file into a test project.
Do not delete the existing project or replace its media until you have confirmed that the new copy works correctly.
If CapCut displays a black screen or blank preview when importing footage, see how to fix a black screen when importing videos in CapCut on Android.
Method 8: Export a Short Test Video
A short test export is one of the most useful ways to identify whether a mismatch comes from a specific section of the project.
Instead of exporting the entire video repeatedly, test the affected part first.
How to test a section
- Save your original project.
- Create a separate test project or duplicate the project if that option is available.
- Isolate the section that looks incorrect.
- Include enough footage before and after the problem to observe its timing.
- Export the test using your intended settings.
- Compare the exported result with the preview.
If the short export matches the preview, the issue may involve another section of the full project or the way multiple elements interact.
If the short export still looks wrong, focus on the clip, effect, transition, or adjustment used in that section.
Important: Avoid trimming or deleting parts of your only project just to perform a test. Use a separate copy whenever possible.
Method 9: Clear CapCut's Cache
Temporary cached files can sometimes contribute to app glitches.
Clearing the cache is a reasonable troubleshooting step when the preview appears stale, the editor behaves unexpectedly, or rendering results are inconsistent.
Clear cache inside CapCut
If your version provides a cache-clearing option:
- Open CapCut.
- Navigate to your profile or settings area.
- Look for Clear Cache.
- Follow the on-screen instructions.
- Close and reopen the app.
- Reopen your project and test the affected section.
Clear cache through Android Settings
On many Android phones, you can also use:
Settings → Apps → CapCut → Storage or Storage & cache → Clear cache
The exact menu names vary by phone and Android version.
Clear Cache vs. Clear Data
These options are different.
- Clear Cache: Removes temporary cached files.
- Clear Data or Clear Storage: Can reset the app and remove locally stored application information.
Start with Clear Cache. Do not select Clear Data simply because the option is available.
Protect your important drafts and unfinished projects before attempting any operation that resets app storage.
Method 10: Restart CapCut and Your Phone
A temporary software or system problem can sometimes affect preview rendering.
Try restarting the app first.
- Save your project.
- Close CapCut completely.
- Open the app again.
- Reopen the affected project.
- Preview the problem section.
- Export a short test.
If the problem continues, restart your Android phone and repeat the test.
A restart can help clear temporary system problems, but it will not correct an effect that is applied to the wrong timeline section or a damaged source file.
Method 11: Update CapCut
An outdated version of CapCut may contain bugs or compatibility issues that affect editing and rendering.
To check for an update:
- Open the Google Play Store.
- Search for CapCut.
- Open the app's listing.
- Check whether an Update button is available.
- Install the update if appropriate.
- Reopen your project and test the affected section.
If no update is available, your installed version may already be current through that store, although updates can roll out gradually.
Use official distribution sources rather than installing unknown APK files to troubleshoot a rendering problem.
Before making significant app changes, make sure your important projects are safely stored.
Method 12: Simplify the Problematic Section
If the mismatch occurs only in a complicated section, temporarily simplify it.
For example, the section may contain several overlays, text animations, filters, keyframes, and transitions.
Try the following:
- Create a copy of the project.
- Identify the section that exports incorrectly.
- Temporarily remove or disable one nonessential effect.
- Export a short test.
- Compare the result with the preview.
- Repeat with other effects if necessary.
If the result becomes correct after removing one element, you have a useful lead.
You can then rebuild that section using simpler effects, different timing, or fewer overlapping elements.
Do not remove all your effects at once. Testing them individually makes it easier to identify the source of the problem.
Common CapCut Preview and Export Problems
Text Appears in the Preview but Is Missing From the Export
Check the text layer's duration, timeline position, and relationship to other layers. Export a short test after correcting the timing.
The Effect Looks Different After Export
Inspect the effect's duration and intensity. Temporarily disable other effects and test the same clip in a simpler project.
The Transition Looks Abrupt
Check the transition duration and the available footage around the clip boundary. Try a shorter transition or adjust the clip trims.
The Exported Video Looks Blurry
Compare the source video with the exported file, then review the resolution and available quality settings. Increasing export resolution cannot restore detail that was missing from the source.
The Video Looks Darker After Export
Compare the same frame in the editor and Gallery. Inspect filters, brightness, contrast, and other color adjustments before changing the entire project.
The Exported Video Has Different Timing
Check clip durations, speed adjustments, transitions, and the timing of text or overlays. If the difference begins at a specific timestamp, focus on that section.
Only One Part of the Project Looks Wrong
Test the affected section separately. Inspect the media and effects used there before rebuilding the entire project.
The Preview Is Correct but the Export Still Looks Wrong
Refresh the preview, export a short test, simplify the affected section, clear the cache, and check for an available update. If the problem persists, contact CapCut Support with a description of the mismatch and your device and app details.
Frequently Asked Questions
Why does my CapCut video look different after exporting?
The difference may be caused by preview rendering, effect timing, overlapping layers, export settings, media compatibility, or a software issue. Compare the same section in the editor and exported file to identify the specific change.
Why do my CapCut effects disappear after export?
The effect may not cover the intended timeline section, may interact with another adjustment, or may be rendering incorrectly. Check its duration and test it without other effects.
Why is my text in the wrong position after exporting from CapCut?
Inspect the text layer's position, duration, and animation settings. Check whether the text is affected by other layers or adjustments, then export a short test.
Does CapCut use a lower-quality preview than the final export?
Preview playback may use lower-resolution media or other performance optimizations. The final export is processed separately, so some visual differences are possible. However, missing text, incorrect timing, or a major layout change should be investigated rather than assumed to be normal.
Will clearing CapCut's cache fix preview and export differences?
It may help if temporary cached files or an app glitch contribute to the issue. It will not fix every problem, particularly incorrect timeline timing, incompatible media, or an effect applied to the wrong section.
Should I reinstall CapCut if the export does not match the preview?
Reinstallation should be a last resort. First test a short export, inspect the affected layers, restart the app, clear the cache, and check for an update. Protect your local projects before considering an uninstall.
Can I fix a preview and export mismatch without rebuilding my video?
Often, yes. If the problem is limited to one clip, effect, text layer, or transition, you may only need to correct that section. Test a copy of the project before making extensive changes.
What information should I provide to CapCut Support?
Describe what appears in the editor, what changes in the exported video, and the approximate timestamp where the problem occurs. Include your phone model, Android version, CapCut version, and a short example if possible. Avoid sharing private footage unless you are comfortable doing so.
Final Thoughts
When CapCut's preview does not match the exported video on Android, start by identifying exactly what changed. Missing effects, misplaced text, incorrect transitions, blurry footage, and timing differences can have different causes.
Check the relevant timeline layers first, then refresh the preview and export a short test. If the mismatch continues, inspect the original media, simplify the affected section, clear the cache, restart your phone, and update CapCut if an update is available.
Keep your original project safe throughout the process. You usually do not need to rebuild an entire video to troubleshoot a problem confined to one section.
If the exported result continues to differ significantly from the preview after these checks, contact CapCut Support and explain the exact discrepancy. A focused test and clear description will make it easier to narrow down the cause.
Related Articles

How to Fix CapCut Video Lagging After Export on Android
Fix CapCut video lagging after export on Android. Learn how to troubleshoot choppy playback, frame-rate mismatches, heavy effects, storage issues, and export settings.
GetApkFree Team

How to Fix Couldn't Apply AI Background in CapCut on Android
Getting "Couldn't Apply AI Background" in CapCut on Android? Check usage limits, clip selection, video quality, app updates, and practical troubleshooting steps.
GetApkFree Team

How to Fix CapCut Effects Not Applying on Android
CapCut effects not working on Android? Check clip selection, effect layers, timeline timing, conflicting adjustments, and app performance with these practical fixes.
GetApkFree Team
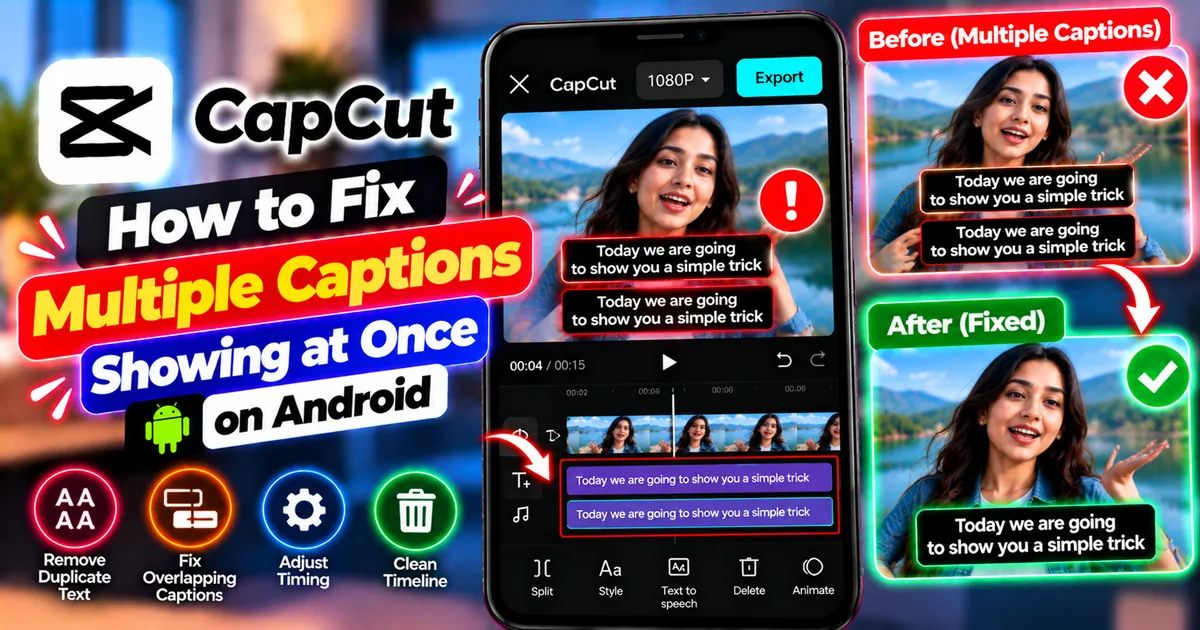
How to Fix Multiple Captions Showing at Once in CapCut on Android
Seeing duplicate or overlapping captions in CapCut on Android? Find extra text layers, fix overlapping subtitle clips, and export clean captions step by step.
GetApkFree Team