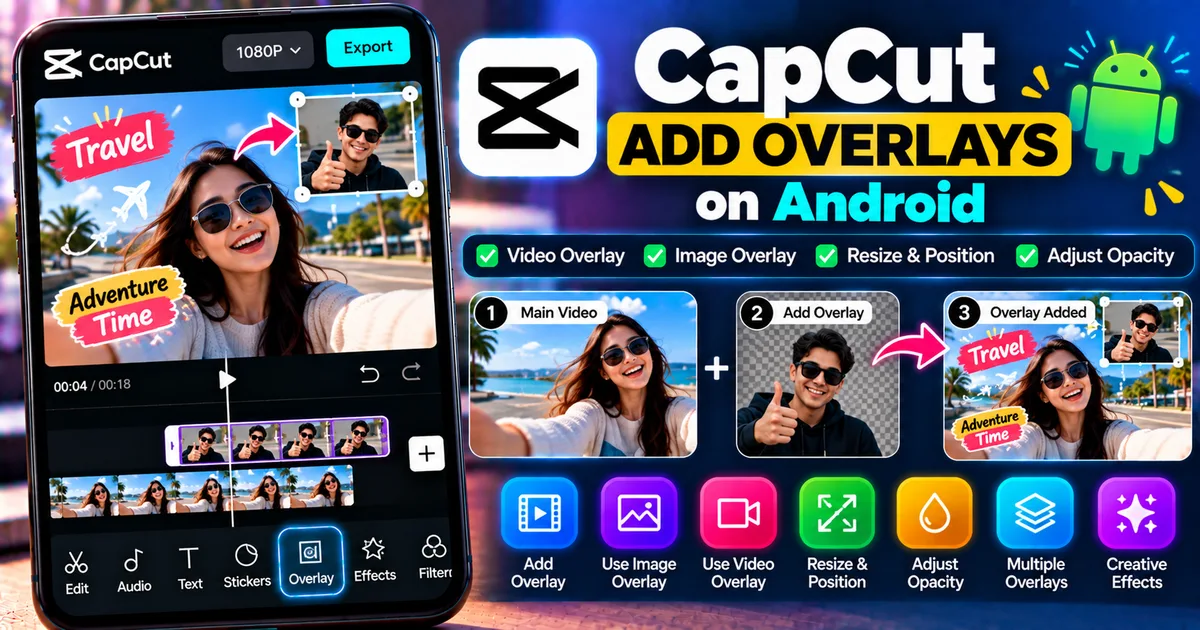

This article is about
CapCut - Download
ByteDance Pte. Ltd. · Education
How to Add Overlays in CapCut on Android
GetApkFree Team
Learn how to add video and image overlays in CapCut on Android, resize and position overlays, adjust opacity, and create layered video effects.
- Version
- Latest
- Source
- Google Play
- Package
- external.capcut.en.softonic.com.capcut-download
How to Add Overlays in CapCut on Android
Want to put another video, photo, logo, or graphic on top of your main video?
CapCut's Overlay feature lets you place additional visual content over a background video. You can resize the overlay, move it around the screen, and use it for everything from picture-in-picture videos to logos, reaction clips, screenshots, and creative effects.
In this guide, you'll learn how to add video and image overlays in CapCut on Android, resize and position them, adjust their appearance, use multiple overlays, and troubleshoot common problems.
Quick Answer
To add an overlay in CapCut on Android:
- Open CapCut.
- Start a new project.
- Add your main video.
- Tap Overlay.
- Tap Add overlay.
- Choose the video or image you want to place over the main video.
- Tap Add.
- Resize and reposition the overlay using your fingers.
- Adjust its duration and other available settings.
- Preview the result and export your video.
The exact layout of the editing controls can change between CapCut versions.
What Is an Overlay in CapCut?
An overlay is an additional video, image, or other visual element placed on top of your main video.
Think of your main video as the background layer.
The overlay sits above it.
For example:
Background video
↓
Overlay video
↓
Text or other elements
This layered approach allows you to combine multiple visual elements in a single project.
What Can You Use as a CapCut Overlay?
Depending on the media available on your phone and the tools supported by your version of CapCut, you can use overlays such as:
- Another video
- Photos
- Screenshots
- Logos
- Graphics
- Reaction videos
- Product images
- Screen recordings
- Other visual assets
This makes overlays useful for many different types of content.
How to Add a Video Overlay in CapCut on Android
Step 1: Open CapCut
Launch CapCut on your Android phone.
Tap New Project to begin a new video.
Step 2: Select Your Background Video
Choose the main video that will appear in the background.
Tap Add.
Your selected video will appear on the main timeline.
This is the base layer of your project.
Step 3: Open Overlay
Look at the editing toolbar at the bottom of the screen.
Tap Overlay.
CapCut's current mobile overlay documentation uses this section for adding another video or image over the background video. :contentReference[oaicite:1]{index=1}
Step 4: Tap Add Overlay
Choose Add overlay.
Your phone's media picker will open.
Select the video or image you want to place over the main video.
Tap Add.
The selected media will appear as an additional layer above your main video.
Step 5: Resize the Overlay
Use your fingers on the preview window to adjust the overlay.
You can generally:
- Pinch inward to make it smaller
- Pinch outward to make it larger
- Drag it to another position
For example, you could place a reaction video in the lower-right corner.
Step 6: Position the Overlay
Drag the overlay to the location where you want it to appear.
Common positions include:
- Top-left
- Top-right
- Bottom-left
- Bottom-right
- Center
Leave enough space around the overlay so that important parts of the background video remain visible.
Step 7: Adjust the Overlay Duration
The overlay appears as a separate track in the timeline.
You can adjust its start and end points so it appears only when needed.
For example:
Background video: 0:00–0:30
Overlay: 0:05–0:15
In this example, the overlay appears only during the middle section.
How to Add an Image Overlay in CapCut
You can use the same general Overlay workflow for images.
Step 1
Open your project and add the background video.
Step 2
Tap Overlay.
Step 3
Tap Add overlay.
Step 4
Select the image from your gallery.
Step 5
Tap Add.
Step 6
Resize and position the image.
An image overlay can be useful for:
- Logos
- Screenshots
- Product photos
- Memes
- Watermarks
- Illustrations
- Social media graphics
How to Add a Logo Overlay in CapCut
A logo can be placed over your video as an image overlay.
For example:
- Import your main video.
- Tap Overlay.
- Tap Add overlay.
- Select your logo image.
- Resize it.
- Place it in a corner.
- Adjust its duration to cover the desired part of the video.
- Preview the result.
If your logo has a transparent background, it can blend into the video more naturally.
How to Add a Picture-in-Picture Video in CapCut
Picture-in-picture, often abbreviated as PIP, means displaying one video inside another video.
For example:
Large background: gameplay
Small overlay: face-cam reaction
To create this effect:
- Add your main video.
- Tap Overlay.
- Tap Add overlay.
- Select the second video.
- Resize it.
- Move it to a corner.
- Adjust its duration.
- Preview the result.
This is particularly useful for:
- Gaming videos
- Reaction videos
- Tutorials
- Commentary
- Product demonstrations
- Educational videos
How to Put a Video Over Another Video in CapCut
The Overlay feature is designed for exactly this type of edit.
Your main video stays on the primary timeline.
The second video is added as an overlay layer.
You can then change the overlay's:
- Position
- Size
- Duration
- Opacity
- Other available properties
This gives you much more control than simply combining two clips one after another.
How to Make an Overlay Transparent in CapCut
You may want an overlay to blend into the background rather than completely covering it.
If your version of CapCut provides an Opacity control:
- Select the overlay.
- Look for Opacity.
- Reduce the opacity gradually.
- Preview the result.
- Adjust until the background and overlay balance correctly.
For example, reducing opacity can make a photo or graphic appear more subtly over a video.
The exact controls can vary by CapCut version.
How to Add Multiple Overlays in CapCut
You aren't limited to one overlay.
You can add additional overlay clips when your project and device support them.
For example:
Main video
-
Overlay 1: Reaction video
-
Overlay 2: Logo
-
Overlay 3: Screenshot
-
Overlay 4: Graphic
To add another overlay, use the Overlay option again and add another piece of media.
Be careful not to add too many layers unnecessarily.
Multiple high-resolution video layers can increase the processing requirements of the project.
How to Put Text Over a Video
Text is not necessarily an Overlay layer in CapCut because it has its own Text tools.
To add text:
- Select the project.
- Tap Text.
- Tap Add text.
- Enter your message.
- Position it on the video.
- Customize its style.
- Adjust its duration.
You can combine text with video overlays to create more advanced compositions.
For example:
Background: tutorial video
Overlay: phone screen recording
Text: instructions
This creates a layered tutorial format.
How to Put a Screenshot Over a Video
Screenshots can be added as image overlays.
This is useful for app tutorials where you want to show a phone screenshot while explaining something.
A basic workflow is:
- Add your main video.
- Open Overlay.
- Choose Add overlay.
- Select the screenshot.
- Resize it.
- Position it.
- Adjust its duration.
You can then add text or other elements around the screenshot.
How to Put a Reaction Video Over Another Video
Reaction videos commonly use picture-in-picture.
Start with the main content as the background.
Then add your reaction recording as an overlay.
Resize the reaction video and place it where it doesn't hide important parts of the background.
For example:
Main video: gameplay
Overlay: reaction camera
This lets viewers see both pieces of content at the same time.
How to Add a Screen Recording as an Overlay
Screen recordings are useful when creating tutorials.
For example, you could record an Android screen and place that recording over a presenter video.
The workflow is:
- Record your Android screen.
- Create a CapCut project.
- Add the main video.
- Tap Overlay.
- Add the screen recording.
- Resize and position it.
- Adjust its duration.
- Preview the final composition.
You can then use text, arrows, stickers, and other elements to explain what is happening on the screen.
How to Crop an Overlay in CapCut
If your overlay contains unnecessary areas, use the available crop or mask tools.
For example, suppose you added a rectangular video but only want to show one part of it.
Select the overlay and look for the available editing tools.
Depending on your version, you may have options such as:
- Crop
- Mask
- Resize
- Position
The exact controls vary by version.
How to Rotate an Overlay
If you want an overlay to appear at an angle, select the overlay and use the rotation gesture or available rotation control.
You can use rotation to create:
- Tilted screenshots
- Dynamic photo layouts
- Creative transitions
- Slanted picture-in-picture windows
Keep the rotation subtle when readability is important.
How to Make an Overlay Follow a Moving Object
An overlay doesn't necessarily have to stay in one fixed location.
If you want an element to follow a moving person or object, you can combine overlays with CapCut's motion-tracking capabilities where supported.
For example:
Background video: person walking
Overlay: label or graphic
Motion tracking: keeps the graphic aligned with the subject
This is different from simply adding a stationary overlay.
Our guide on motion tracking covers that workflow in more detail:
https://getapkfree.com/blog/how-to-use-motion-tracking-capcut-android
How to Put Text Behind a Person Using an Overlay
A more advanced effect is placing text so that part of the person appears in front of it.
CapCut's current mobile workflow for this effect uses a duplicated video layer, an overlay, and text positioning to create the depth effect. :contentReference[oaicite:2]{index=2}
A simplified workflow is:
- Add your video.
- Duplicate the video.
- Use the duplicate as an overlay layer.
- Add your text.
- Position the text between the appropriate visual layers.
- Use masking or other supported tools to control which parts appear in front.
- Preview the result.
This can create a 3D-style depth effect.
How to Adjust Overlay Volume
If your overlay is another video containing audio, its audio may play along with the main video.
Select the overlay and look for Volume.
You can:
- Increase the overlay audio
- Reduce the overlay audio
- Mute it
- Balance it against the main audio
For a reaction video, you may want both voices audible.
For a B-roll overlay, you may want to mute the overlay's original sound.
How to Fade an Overlay
If your version provides fade controls or animations, you can make an overlay appear more smoothly.
Another approach is to use available animation or transition tools.
For example:
Overlay appears → stays visible → disappears
This can look cleaner than having an image suddenly appear on screen.
Why Is My CapCut Overlay Not Showing?
If an overlay doesn't appear, check the following.
The Overlay Is Outside the Visible Timeline
Look at the overlay track and make sure its duration overlaps the section you're previewing.
The Overlay Is Too Small
It may have been resized accidentally.
Select it and check its size in the preview.
The Overlay Is Behind Another Layer
Multiple layers can overlap.
Check the timeline and layer arrangement.
The Overlay Is Transparent
If opacity has been reduced significantly, the overlay may be difficult to see.
Check the opacity setting.
The Media Wasn't Added Correctly
Try adding the overlay again.
Why Is My CapCut Overlay Blurry?
An overlay may look blurry because:
- The original image is low resolution.
- The original video is low quality.
- The overlay has been enlarged significantly.
- The project is still showing a lower-quality preview.
- The final export settings are reducing quality.
Whenever possible, use high-quality source media.
Avoid enlarging a small image dramatically.
Why Is My Overlay Cropped?
If part of your overlay is missing, check its size and position.
It may simply extend beyond the edge of the video frame.
Select the overlay and reposition it.
If you're deliberately cropping it, check the Crop or Mask controls.
Why Does My Overlay Have Black Bars?
Black bars can appear when the overlay and project have different aspect ratios.
For example:
Project: vertical 9:16
Overlay: horizontal 16:9
The overlay may not fill the frame in the way you expect.
You can resize, crop, or reposition it depending on the effect you want.
How to Make a Clean Overlay Layout
A good overlay isn't just about adding another video.
Think about where each element should appear.
For a vertical social-media video, you might use:
Top: title
Center: main subject
Bottom-right: small reaction video
Corner: logo
Avoid covering important faces, captions, or interface controls.
Tips for Better CapCut Overlays
Use High-Quality Source Media
A low-resolution overlay can make the entire composition look less polished.
Keep Important Content Visible
Don't place an overlay over the main subject unless that is intentional.
Use Consistent Sizing
If you have several overlays, keeping their sizes visually consistent can make the video easier to follow.
Don't Add Too Many Layers
Every additional element increases visual complexity.
Use overlays when they contribute something useful.
Match the Aspect Ratio
Consider whether the overlay is vertical, horizontal, or square before adding it.
Check the Audio
If an overlay contains sound, make sure it doesn't compete with the main audio.
Preview the Complete Video
An overlay can look fine at the beginning and become problematic later.
Watch the entire section before exporting.
Frequently Asked Questions
What is an overlay in CapCut?
An overlay is an additional video, image, or visual element placed over your main video.
How do I add an overlay in CapCut on Android?
Open a project, add your main video, tap Overlay, choose Add overlay, select your video or image, and then resize and position it.
Can I put a video over another video in CapCut?
Yes. Add the second video through the Overlay feature and position it over the main video.
Can I add a photo overlay in CapCut?
Yes. You can use an image as an overlay and resize or reposition it over your main video.
How many overlays can I add in CapCut?
The practical number depends on the project, device, CapCut version, and the type of media you're using. Multiple high-resolution overlays can increase processing requirements.
Can I make an overlay transparent?
Yes, if the relevant opacity control is available. Select the overlay and adjust its opacity.
Can I make an overlay follow a person?
You can combine an overlay with motion-tracking tools where supported to make an element follow a moving subject.
Why can't I see my overlay?
Check the overlay's duration, position, size, opacity, and layer arrangement. It may also be outside the portion of the timeline you're currently previewing.
Can I use overlays for reaction videos?
Yes. A reaction recording can be added as an overlay and resized into a picture-in-picture layout.
Can I add a logo as an overlay?
Yes. A logo image can be added as an overlay and positioned in a corner or another suitable location.
Final Thoughts
CapCut overlays make it possible to combine multiple pieces of visual content inside the same video.
On Android, the basic workflow is simple: add your main video, choose Overlay, add another video or image, then resize and position it.
From there, you can create picture-in-picture videos, reaction layouts, screen-recording tutorials, logo watermarks, layered graphics, and more advanced compositions.
For the cleanest results, use high-quality source media, keep the layout organized, check the overlay's timing and audio, and preview the complete video before exporting.
Related Articles

How to Fix CapCut Video Lagging After Export on Android
Fix CapCut video lagging after export on Android. Learn how to troubleshoot choppy playback, frame-rate mismatches, heavy effects, storage issues, and export settings.
GetApkFree Team

How to Fix CapCut Preview Not Matching Export on Android
Fix CapCut preview not matching the exported video on Android. Troubleshoot missing effects, text, transitions, timing, colors, and rendering differences.
GetApkFree Team

How to Fix Couldn't Apply AI Background in CapCut on Android
Getting "Couldn't Apply AI Background" in CapCut on Android? Check usage limits, clip selection, video quality, app updates, and practical troubleshooting steps.
GetApkFree Team

How to Fix CapCut Effects Not Applying on Android
CapCut effects not working on Android? Check clip selection, effect layers, timeline timing, conflicting adjustments, and app performance with these practical fixes.
GetApkFree Team