

This article is about
CapCut Premium
capcutdownload.com.pk · Tools
How to Fix CapCut Video Lagging After Export on Android
GetApkFree Team
Fix CapCut video lagging after export on Android. Learn how to troubleshoot choppy playback, frame-rate mismatches, heavy effects, storage issues, and export settings.
- Source
- Developer
- Package
- CapCut Premium
How to Fix CapCut Video Lagging After Export on Android
Have you exported a video from CapCut only to discover that it stutters, freezes briefly, or plays less smoothly than it did in the editor? This problem can be frustrating, especially when you have already spent time adjusting clips, adding transitions, and syncing your video to music.
CapCut video lagging after export on Android can have several causes. Your export settings may not match the original footage, the project may contain demanding effects, or your phone's video player may struggle to play the finished file smoothly. Sometimes, the problem is limited to a particular clip or editing operation.
The important first step is to determine whether the exported video itself is problematic or whether your phone is simply having trouble playing it.
This guide explains how to diagnose choppy CapCut exports, choose suitable export settings, test the finished video, and troubleshoot the problem without unnecessarily deleting your projects.
Quick Answer: How to Fix CapCut Video Lagging After Export
If your CapCut video is lagging after export on Android, try these steps:
- Play the exported video in another video player to check whether the problem is limited to one app.
- Restart CapCut and your phone.
- Check the export frame rate and compare it with your source footage.
- Try exporting a short section of the video.
- Reduce the export resolution or frame rate if your phone struggles with the current settings.
- Temporarily remove demanding effects, transitions, or speed adjustments from the affected section.
- Free up storage and close unnecessary background apps.
- Clear CapCut's cache without clearing its app data.
- Update CapCut and your phone's software if updates are available.
- Rebuild only the section that consistently causes choppy playback.
Save your project before making significant changes. Do not delete your original footage or unfinished drafts just to test an export setting.
Why Does a CapCut Video Lag After Export?
The term lagging can describe several different problems. Identifying the symptom helps you choose the correct fix.
1. The exported video has uneven motion
Movement may look jerky even though the video continues playing. This can happen when the export frame rate is unsuitable for the footage or when the original recording has an unusual frame rate.
2. The video freezes briefly
If playback pauses at specific moments, a demanding effect, problematic media file, or playback limitation may be involved.
3. The video plays smoothly in CapCut but stutters in Gallery
The issue may be related to the phone's playback software or the exported file's format and encoding characteristics rather than the editing timeline itself.
4. The video becomes choppy after a speed adjustment
Speed changes can affect how motion appears. Slow-motion edits may look uneven if the original footage does not contain enough frames to create the intended movement.
5. The entire exported video plays slowly or inconsistently
A demanding export, unsuitable frame-rate settings, or device-related processing limitations may contribute to the problem.
6. The video becomes choppy only when effects are applied
Some combinations of stabilization, overlays, transitions, animations, and other effects can make rendering more demanding. Testing the same section without those effects can help isolate the cause.
Method 1: Check Whether the Exported File Is Actually Lagging
Before changing your project, check whether the issue occurs in the exported file or only during playback.
Step 1: Open the exported video
Find the video in your phone's Gallery, Photos app, or file manager.
Step 2: Play the video from beginning to end
Pay attention to the moments where movement looks uneven or playback freezes.
Step 3: Try another video player
If another compatible video player is already installed, open the same exported file in it.
If the video plays smoothly in one player but stutters in another, the issue may be related to playback compatibility.
If the video stutters in multiple players at the same moments, investigate the export settings and project timeline.
Step 4: Check the original footage
Play the source video in Gallery.
If the original footage also looks choppy, the problem may have existed before you imported it into CapCut.
Why this matters: Re-editing a project will not necessarily fix a playback problem caused by the original recording or the app used to play the finished file.
Method 2: Check the Export Frame Rate
Frame rate describes how many frames are displayed per second. Choosing a suitable frame rate can help preserve smooth movement.
For example, footage recorded at 30 frames per second may be exported at 30 fps for a straightforward workflow. Footage recorded at 60 fps may benefit from a 60 fps export when your device, project, and intended platform support it.
These are starting points, not universal rules. Your source footage and intended result should guide the choice.
How to check the frame rate in CapCut
- Open your project.
- Tap Export.
- Look for the available frame-rate setting.
- Check the frame rate currently selected.
- If the setting is unsuitable for your footage, choose an appropriate alternative.
- Export a short test and compare the result.
The available settings may vary by CapCut version, device, and project.
Should you always export at 60 fps?
No. A 60 fps export does not automatically make every video smoother.
If the original footage was recorded at 30 fps, exporting at 60 fps does not recreate all the motion information that was never captured. It may increase processing requirements and file size without providing a meaningful improvement.
Choose a frame rate that matches the source footage and your intended result whenever practical.
Method 3: Reduce the Export Resolution
High-resolution exports can require more processing and produce larger files. Some phones may struggle to play demanding videos smoothly, particularly when other applications are running.
If your exported video stutters, test a lower resolution.
Steps to try
- Open the project in CapCut.
- Tap Export.
- Check the available resolution settings.
- If you selected 4K, try 1080p for a diagnostic test.
- Keep the other settings consistent where possible.
- Export a short section.
- Play the result in Gallery and compare it with the original export.
If the lower-resolution version plays smoothly, the original export may have been too demanding for your playback setup.
However, lowering the resolution will not correct every frame-timing or timeline problem. Use this test to identify the likely cause rather than assuming that 1080p is always the correct setting.
Method 4: Check the Original Video's Frame Rate
Sometimes, the source footage itself explains why an export looks uneven.
Videos can be recorded at different frame rates. Footage from a screen recorder, action camera, phone camera, or downloaded source may not have the same characteristics.
How to investigate
- Find the original video file.
- Open its details in a file manager or media-information tool, if available.
- Check the recorded frame rate.
- Compare it with the export frame rate selected in CapCut.
- If the values differ significantly, test a more suitable export setting.
Some recordings use variable frame rates, meaning the actual frame timing can change throughout the recording. Certain editing workflows may handle these files differently.
If one particular source video consistently causes stuttering, test a clean copy of the footage or convert a copy to a widely supported constant-frame-rate format using a trusted video tool.
Keep the original file unchanged until you confirm that the replacement works.
Method 5: Check Speed Adjustments and Slow Motion
Speed adjustments can change how motion looks in the final video.
For example, slowing down a short 30 fps clip to 25% speed requires the editor to create a much longer sequence from the available frames. Depending on the method used, the result may look less smooth than expected.
How to test a speed-related problem
- Open the project.
- Find the clip where movement looks choppy.
- Select the clip and inspect its speed settings.
- Note whether normal speed, slow motion, or a speed curve is applied.
- Temporarily return the clip to normal speed in a separate test copy.
- Export a short section.
- Compare the result with the original version.
If the normal-speed version plays smoothly, the speed adjustment may be contributing to the problem.
What if you want to keep slow motion?
Try using suitable high-frame-rate source footage when available. High-frame-rate recordings provide more original frames for slow-motion playback.
Some CapCut versions also offer frame-generation or optical-flow-style options for supported workflows. If such a feature is available, test it on a short section first. Availability and performance vary, and these tools can introduce visual artifacts.
For the most reliable result, preview the slow-motion section carefully before exporting the full video.
Method 6: Simplify Heavy Effects and Transitions
If the video becomes choppy at specific moments, inspect the effects applied to those sections.
A project with many simultaneous overlays, animations, transitions, and other effects can be more demanding to render.
Troubleshooting steps
- Save your project.
- Duplicate it or create a separate test version if possible.
- Locate the section that plays incorrectly.
- Temporarily remove or disable one nonessential effect.
- Export a short test.
- Compare the result with the original.
- Repeat with other effects if necessary.
Pay particular attention to sections containing multiple overlapping effects, long transitions, stabilization, or complicated animations.
If removing one effect resolves the problem, try adjusting its duration or intensity, or use a simpler alternative.
Do not remove all effects at once. Testing one change at a time makes it easier to identify the actual cause.
Method 7: Check Video Stabilization
Stabilization can improve shaky footage, but it adds processing to the editing workflow.
If your video stutters or freezes around a stabilized section, test whether stabilization is involved.
- Open your project.
- Identify the clip where the problem occurs.
- Check whether stabilization is enabled for that clip.
- Create a separate test version.
- Temporarily disable stabilization for the affected clip.
- Export a short section and compare the result.
If the export improves, consider applying stabilization only to footage that genuinely needs it.
You may also test a shorter stabilized section rather than applying the effect to an unnecessarily long clip.
This does not mean stabilization is always responsible for choppy playback. The test simply helps isolate its possible contribution.
Method 8: Free Up Storage and Close Background Apps
Limited storage or system resources can affect editing and video processing. Background applications may also compete for the resources needed to export and play a video.
Free up storage
- Open Android Settings.
- Navigate to Storage.
- Review the available space.
- Remove unnecessary files or move important media to another storage location.
- Keep your original footage and editing projects safe.
There is no single amount of free space that guarantees smooth performance for every project. Larger and higher-resolution videos can require more working space.
Close unnecessary apps
- Save your CapCut project.
- Close games, browsers, and other demanding applications.
- Restart CapCut if necessary.
- Try a short export again.
- Play the finished file without launching other demanding apps.
If playback improves, device resource limitations may have contributed to the problem.
Method 9: Clear CapCut's Cache
Temporary cached files can occasionally contribute to app glitches.
Clearing the cache is a reasonable troubleshooting step, although it will not fix an unsuitable frame rate or an incorrectly edited timeline.
Clear cache through Android Settings
- Open Settings.
- Tap Apps or App Management.
- Select CapCut.
- Open Storage or Storage & cache.
- Tap Clear cache.
- Reopen CapCut and test the project again.
The exact menu names vary between Android versions and manufacturers.
Important: Do not clear app data by mistake
Clear cache and Clear data are different options.
Clearing app data or storage may remove local app information and put unfinished projects at risk. Save or back up important drafts before performing any operation that resets the app.
Method 10: Restart Your Phone and Update CapCut
A temporary app or system problem may interfere with video processing or playback.
Restart the phone
- Save your project.
- Close CapCut.
- Restart your Android phone.
- Wait for the phone to finish starting.
- Play the exported video again.
Check for a CapCut update
- Open the Google Play Store.
- Search for CapCut.
- Open the app listing.
- Check whether an Update button is available.
- Install the update if appropriate.
- Test the affected project again.
If no update is available, your installed version may already be current through that store, although releases can roll out gradually.
Use official distribution sources rather than installing unknown APK files to solve a rendering problem.
Method 11: Export a Short Test Video
A short test export can help determine whether the problem comes from a particular section or the entire project.
Instead of exporting a long video repeatedly, isolate the section where playback becomes choppy.
How to perform the test
- Save your original project.
- Create a separate test project or duplicate the existing one if possible.
- Include the section that contains the problem.
- Add a little footage before and after the affected moment.
- Export using the same settings as the original test.
- Play the resulting file in Gallery.
- Compare it with the editor preview.
If the short export plays smoothly but the complete video does not, investigate the other sections and overall project complexity.
If the short export also stutters at the same moment, focus on the specific clip, effect, speed adjustment, or media file.
Method 12: Rebuild Only the Problematic Section
If the same section continues to lag after the other tests, try recreating that portion of the timeline.
This is preferable to rebuilding the entire project when most of the video works correctly.
Follow these steps
- Duplicate the project or create a safe copy.
- Identify the clip or group of effects associated with the problem.
- Reimport the source media if necessary.
- Recreate the affected edit using simpler settings.
- Add transitions, speed adjustments, or effects one at a time.
- Export a short test.
- Compare the result with the original.
If the rebuilt section plays smoothly, you may have identified a project-specific rendering problem.
Preserve the original version until the replacement has been tested successfully.
Common CapCut Export Problems and Their Solutions
The Video Stutters Throughout the Entire Export
Check the source frame rate, export frame rate, and playback compatibility. Test a lower resolution and play the same file in another compatible video player.
The Video Freezes at the Same Timestamp
Inspect the source clip and effects around that moment. Export the section separately to determine whether a specific media file or editing operation is involved.
Slow-Motion Footage Looks Choppy
Check the original recording's frame rate and the applied speed adjustment. Test the clip at normal speed and, if supported, experiment with an appropriate frame-generation option.
The Video Looks Smooth in CapCut but Not in Gallery
Test the exported file in another compatible player. If the issue occurs in multiple players, investigate the export settings and timeline rather than assuming Gallery is responsible.
The Video Becomes Choppy After Adding Effects
Create a test copy and disable effects one at a time. If the problem disappears after removing an effect, simplify or adjust that section.
The Export Is Blurry and Choppy
Investigate the resolution and frame rate separately. A lower resolution may improve playback on a resource-limited device, but it will not necessarily fix uneven motion caused by incorrect timing.
CapCut Also Lags While Editing
If the editor itself becomes slow or unresponsive, you may be dealing with a broader performance issue rather than an export-only problem.
See How to Fix CapCut Lagging on Android if that article is published and live.
CapCut Export Is Stuck at 99%
An export that never finishes is a different problem from a completed video that plays poorly. For that issue, see How to Fix CapCut Export Stuck at 99% on Android.
Frequently Asked Questions
Why does my CapCut video lag after exporting?
Possible causes include unsuitable export settings, source footage with inconsistent frame timing, demanding effects, device resource limitations, or playback compatibility. Compare the original footage, editor preview, and exported file to narrow down the cause.
Does exporting at 60 fps fix choppy video?
Not always. A higher frame rate can be useful when the source footage contains enough frames, but it does not automatically correct every playback problem. Choose a suitable frame rate based on the original recording and intended result.
Should I export at 1080p instead of 4K?
Testing 1080p is reasonable if your phone struggles to play a 4K export. However, lower resolution is not a universal fix for choppy movement, and the best setting depends on the source footage, device, and intended platform.
Why does my video lag only during slow motion?
Slow motion changes the relationship between source frames and playback time. If the original recording has insufficient frames for the selected speed, movement may appear uneven. High-frame-rate source footage can help when you need smooth slow motion.
Can clearing CapCut's cache fix lagging exports?
It may help with temporary app glitches, but it will not fix every issue. If the problem is caused by frame-rate settings, source footage, or timeline effects, investigate those areas as well.
Will reinstalling CapCut fix the problem?
Not necessarily. Reinstallation should be a last resort because locally stored projects may be at risk. First test another player, review export settings, clear the cache, and update the app if an update is available.
Why does the exported video lag in Gallery but play smoothly elsewhere?
Different video players can handle certain files differently. If another compatible player handles the file smoothly, the issue may be related to playback compatibility. If multiple players show the same stutter, inspect the export and source footage.
How can I prevent CapCut videos from lagging after export?
Use suitable export settings, check source footage, avoid unnecessary effects, and test complicated sections before exporting the entire project. Keep your app updated and ensure your phone has adequate available resources.
Final Thoughts
If CapCut video is lagging after export on Android, first determine whether the exported file itself is choppy or whether your phone's video player is struggling to play it.
Next, check the frame rate, test a lower resolution, inspect speed adjustments, and simplify demanding effects. If the problem occurs at one specific moment, export that section separately and investigate its media and timeline settings.
Restarting your phone, freeing up storage, clearing CapCut's cache, and updating the app may help with temporary performance issues. However, the most effective solution depends on the actual cause.
Protect your original footage and drafts throughout the process. By testing one change at a time, you can usually narrow down the problem without rebuilding your entire video.
Related Articles

How to Fix CapCut Preview Not Matching Export on Android
Fix CapCut preview not matching the exported video on Android. Troubleshoot missing effects, text, transitions, timing, colors, and rendering differences.
GetApkFree Team

How to Fix Couldn't Apply AI Background in CapCut on Android
Getting "Couldn't Apply AI Background" in CapCut on Android? Check usage limits, clip selection, video quality, app updates, and practical troubleshooting steps.
GetApkFree Team

How to Fix CapCut Effects Not Applying on Android
CapCut effects not working on Android? Check clip selection, effect layers, timeline timing, conflicting adjustments, and app performance with these practical fixes.
GetApkFree Team
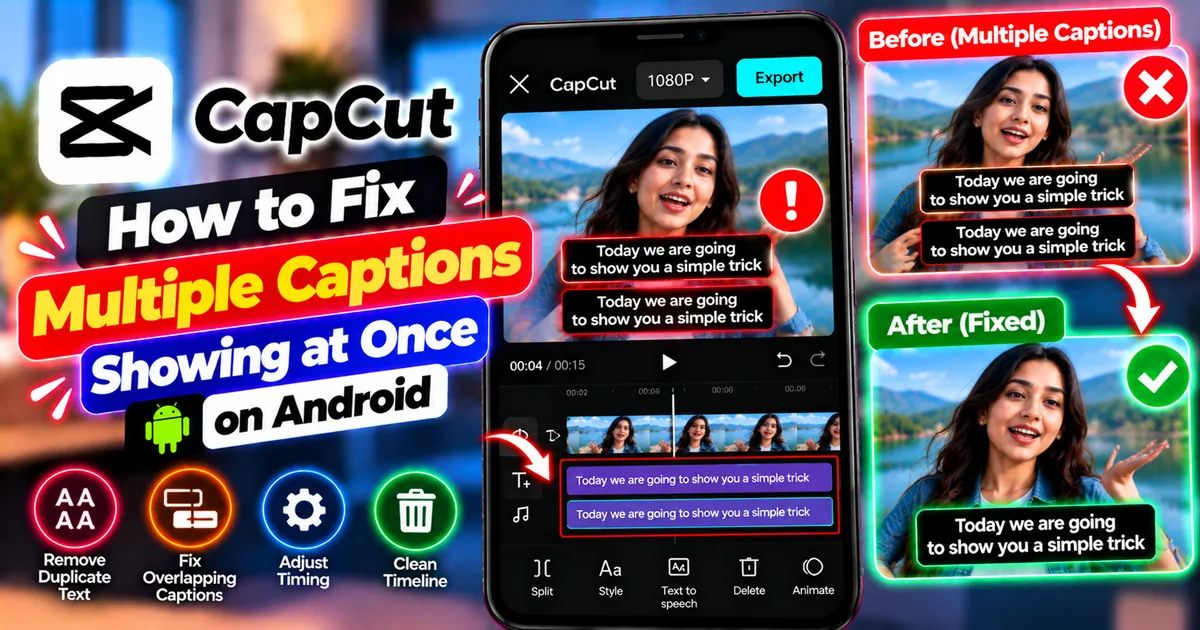
How to Fix Multiple Captions Showing at Once in CapCut on Android
Seeing duplicate or overlapping captions in CapCut on Android? Find extra text layers, fix overlapping subtitle clips, and export clean captions step by step.
GetApkFree Team