
This article is about
CapCut Premium
capcutdownload.com.pk · Tools
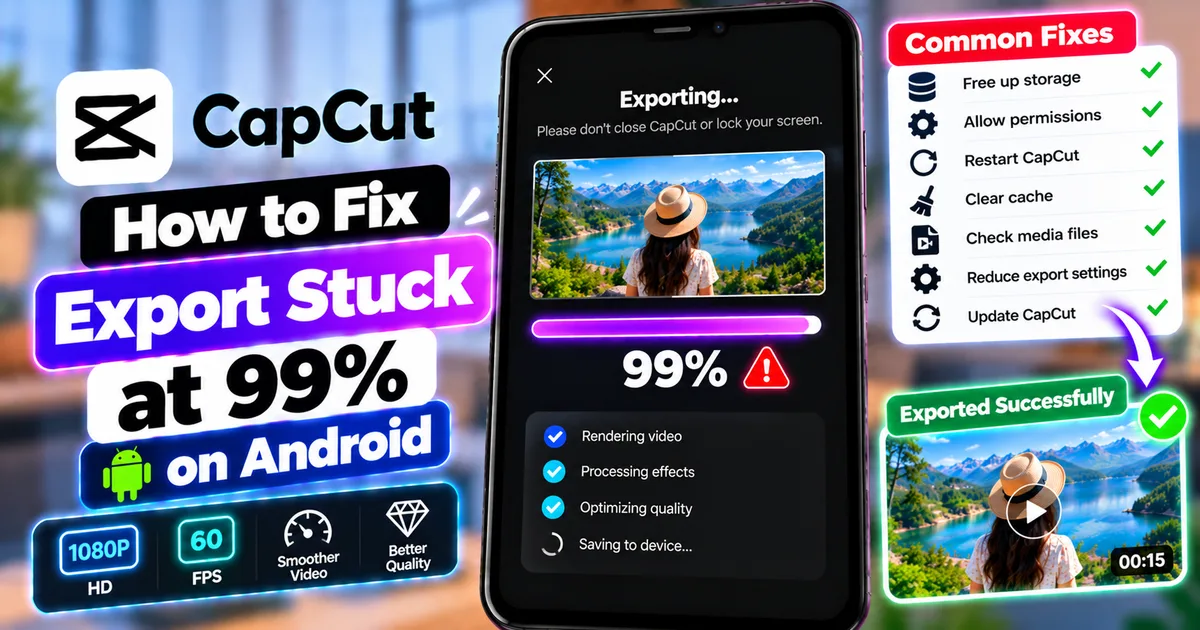
How to Fix CapCut Export Stuck at 99% on Android
GetApkFree Team
CapCut export stuck at 99% on Android? Learn why it happens and how to fix storage, permissions, corrupted media, cache, project, and export problems.
- Source
- Developer
- Package
- CapCut Premium
How to Fix CapCut Export Stuck at 99% on Android
Have you ever finished editing a video in CapCut, tapped Export, watched the progress reach 99%, and then waited for the final step that never seems to finish?
This can be especially frustrating because it may look as though the entire video has already been rendered successfully.
When CapCut gets stuck at 99%, the problem is often related to the final saving stage rather than the entire rendering process. CapCut's current support documentation identifies issues such as insufficient storage, problematic or corrupted media, and permission restrictions as possible causes of the 99% export problem.
The good news is that you usually do not need to rebuild your entire project immediately.
In this guide, you'll learn how to fix CapCut export stuck at 99% on Android, how to check storage and permissions, how to identify a problematic clip, when to clear cache, how to test a shorter export, how to reduce export settings, and what to do when the problem keeps happening.
Quick Answer
If CapCut is stuck at 99% while exporting on Android, try these fixes in order:
- Wait briefly to make sure the export is actually frozen.
- Check your phone's available storage.
- Make sure CapCut has permission to access photos and videos.
- Restart CapCut.
- Restart your Android phone.
- Clear CapCut's temporary cache.
- Try exporting a short section of the project.
- Check for a damaged or unsupported video, audio, image, or effect.
- Remove recently added media and test again.
- Lower the export resolution or frame rate.
- Duplicate or rebuild the problematic section of the project.
- Update CapCut.
- Avoid uninstalling CapCut before protecting important local drafts.
If the export consistently stops at 99%, the best troubleshooting method is to determine whether the problem comes from storage, permissions, or a particular piece of media in the project.
Why Does CapCut Get Stuck at 99%?
CapCut's export process involves more than simply rendering the video.
The app also needs to complete the final saving process and write the exported file to your device.
According to CapCut's current support documentation, an export that stops at 99% can occur because of:
- Low storage space
- Corrupted media files
- Permission restrictions
- Problems writing the finished file to the device
Other project-related problems can also interfere with exporting.
For example, a project may contain a particular video, image, audio file, effect, or other material that causes the export process to fail near the end.
The most useful approach is therefore to test the problem systematically instead of immediately deleting the project.
Does 99% Mean the Video Is Already Finished?
Not necessarily.
When CapCut reaches 99%, much of the video may already have been rendered, but the application may still need to complete the final processing and save the result.
CapCut specifically describes the 99% problem as an issue that can occur during the final saving stage.
This is why checking available storage and file permissions is particularly important.
Step 1: Wait Before Closing CapCut
Before changing anything, give the export a little time.
Large or complicated projects can take longer to complete.
This is especially true when the project contains:
- Long videos
- High-resolution footage
- Multiple layers
- Many effects
- Several overlays
- High frame rates
- Complex animations
- Large audio files
If the percentage remains at 99% for an unusually long time without creating an output file, continue with the troubleshooting steps below.
Step 2: Check Your Android Storage
One of the first things to check is available storage.
A video export requires space for the final file and may also require temporary working space during the export process.
If your phone is nearly full, CapCut may be unable to complete the final save.
How to Check Storage
The exact menu varies by Android phone.
A typical path is:
Settings → Storage
Look at how much free space remains.
If your storage is almost full, remove unnecessary files before trying the export again.
You can consider removing:
- Old downloaded videos
- Duplicate photos
- Unused screen recordings
- Large files
- Unused apps
- Old exported videos
Do not delete important project files simply to create storage space.
Step 3: Free Up Enough Storage
If storage is low, create some additional free space.
For example, if you have several large videos already exported to your phone, move important files to another safe location before deleting unnecessary copies.
Then reopen CapCut and try the export again.
Why Storage Matters
A video may be successfully rendered but still fail at the final stage if Android cannot provide enough space to save the completed file.
This is one reason an export can appear to be stuck at 99%.
Step 4: Check CapCut Permissions
CapCut needs appropriate access to media and storage-related resources to work with your files and save content.
Android permission names can vary between devices and Android versions.
A typical path is:
Settings → Apps → CapCut → Permissions
Check whether CapCut has the permissions required to access your photos and videos.
If Android displays a relevant permission as denied, review it and allow the access required for your workflow.
Do not grant unrelated permissions simply because they are available.
Step 5: Restart CapCut
If storage and permissions look fine, completely close CapCut.
Open the recent-apps screen and remove CapCut.
Then launch CapCut again.
Open the project and try the export one more time.
A temporary application problem may disappear after restarting the app.
Step 6: Restart Your Android Phone
If CapCut still stops at 99%, restart the phone.
A restart can clear temporary system resources and close background processes that may be interfering with video rendering or file saving.
After restarting:
- Open CapCut.
- Open the project.
- Wait for the project to load completely.
- Try exporting again.
Step 7: Clear CapCut Cache
Temporary application data can sometimes cause problems.
Android allows you to clear an app's cache without necessarily removing the application.
A typical path is:
Settings → Apps → CapCut → Storage → Clear Cache
The exact menu names depend on your phone.
Clear Cache vs Clear Data
These options are different.
Clear Cache removes temporary cached files.
Clear Data can reset application data and may have more serious consequences.
For this troubleshooting process, start with Clear Cache.
Do not select Clear Data simply because you see the option.
Step 8: Try Exporting a Short Section
If the complete project remains stuck at 99%, create a short test export.
Export approximately 5–10 seconds if your current CapCut workflow allows you to test a short section.
CapCut's current troubleshooting guidance recommends exporting a short test clip when trying to determine whether a preview or project problem is responsible.
If the short export succeeds, the issue may be associated with something later in the full project.
Step 9: Look for a Problematic Clip
A single problematic media file can prevent a complete project from exporting.
The problematic item could be:
- Video
- Audio
- Image
- Overlay
- Effect
- Animation
- Template element
- Imported media with compatibility problems
If the project contains a large number of clips, finding the problematic item manually can take time.
A useful method is to export sections of the project separately.
For example:
Section A → export
Section B → export
Section C → export
If Section B repeatedly fails while Sections A and C work, inspect the media used in Section B.
Step 10: Check Recently Added Media
Think about what you added immediately before the export problem started.
Did you recently add:
- A new video?
- An unusual audio file?
- A large image?
- A downloaded clip?
- A new effect?
- An overlay?
- A template?
- A complex animation?
Temporarily remove the newest item and test the export again.
If the export suddenly succeeds, the recently added material may be involved.
Step 11: Replace the Problematic Media
If you identify a problematic clip, try replacing it.
For example:
- Remove the suspicious video.
- Import the original source again.
- Place it in the same position.
- Reapply necessary edits.
- Export again.
If the original file itself is damaged or incompatible, importing a fresh copy may solve the problem.
Step 12: Test the Original Video Outside CapCut
If you suspect a video file is damaged, open it using your phone's normal video player.
Check whether it plays normally.
Look for:
- Playback freezing
- Missing audio
- Visual corruption
- Incorrect duration
- File-opening errors
If the file does not play properly outside CapCut, it may be damaged.
Replace it with a known-good copy before continuing.
Step 13: Reduce Export Resolution
If the project is large or demanding, test a lower export resolution.
For example, if you are attempting a high-resolution export, try 1080P if it is available and suitable for your project.
This can help determine whether the problem is related to the workload or export configuration.
Reducing resolution does not necessarily mean you need to keep the lower setting permanently.
Use it as a troubleshooting test.
Step 14: Reduce the Frame Rate
You can also test a lower frame rate.
For example:
60FPS → 30FPS
If the project exports successfully at 30FPS but repeatedly fails at 60FPS, the higher frame-rate configuration may be contributing to the problem.
This is especially useful for large projects containing high-resolution footage and many effects.
Step 15: Reduce Project Complexity
A complicated project can require significantly more processing.
Consider temporarily removing or simplifying:
- Heavy effects
- Multiple overlays
- Complex animations
- Large images
- Numerous transitions
- Multiple video layers
- Very long sections
Then test the export again.
You can add the elements back gradually after identifying the problem.
Step 16: Export the Project in Sections
If a complete export continues to fail, divide the project into smaller sections.
For example:
Part 1
Part 2
Part 3
Export each section separately.
This helps identify whether a specific portion contains problematic media.
CapCut's current export troubleshooting guidance also recommends exporting smaller sections as a way to locate problematic material for certain export errors.
Once the problematic section is identified, rebuild or replace the affected content.
Step 17: Check Your Audio Files
Video isn't always the source of an export problem.
Audio can also cause problems.
Check imported audio for:
- Unusual file formats
- Damaged files
- Extremely large files
- Audio that stops unexpectedly
- Recently added tracks
Temporarily remove an unusual audio track and test the export.
If the export works afterward, replace the audio with a compatible copy.
Step 18: Check Images and Overlays
Large images can increase project complexity.
If your project contains many high-resolution images or overlays, try temporarily removing some of them.
Then export again.
If the project succeeds, add the elements back gradually to identify which one causes the problem.
Step 19: Check Effects and Transitions
Effects can also increase processing requirements.
If the project contains many effects:
- Duplicate the project if your workflow allows.
- Temporarily remove some heavy effects.
- Export a test.
- Compare the result.
If the export works after removing a particular effect, recreate that section more simply.
Step 20: Update CapCut
Check your normal Android app store for a CapCut update.
If an update is available, install it and test the project again.
An outdated app version may contain compatibility or stability problems that have been addressed in a newer release.
Avoid downloading random modified versions of CapCut simply because they claim to fix export problems.
Use an official distribution source.
Step 21: Check Whether the Problem Is Project-Specific
Create a very small test project.
For example:
- Create a new project.
- Add one short video.
- Make a simple edit.
- Export it.
If the simple project exports normally while your large project remains stuck at 99%, the problem is likely related to the original project or one of its materials.
If even the simple project cannot export, investigate the app, device storage, permissions, or installation more broadly.
Step 22: Check Whether the Problem Is Device-Specific
If possible, test the same project through another supported workflow or device where your project is accessible.
This can help distinguish:
Project problem
from:
Device/app problem
If the project exports elsewhere but consistently fails on one Android phone, the device environment may be contributing to the issue.
Why Does CapCut Export Stop at 99% and Not Save?
If the progress reaches 99% and no video appears in your gallery, the final save process may not be completing.
Start with:
- Free storage
- Media permissions
- App restart
- Device restart
- Cache clearing
- Short test export
These are less disruptive than deleting the project.
CapCut Export Stuck at 99% but the Video Is in Gallery
Sometimes the export may have completed even though the interface did not immediately update.
Open your phone's gallery or video folder and check whether a new file was created.
If the video exists, play it from beginning to end.
Check:
- Video duration
- Audio
- Picture quality
- Final section
- Captions
- Effects
If the video is complete, you may not need to export it again.
CapCut Export Stuck at 99% With No Video
If there is no exported file, work through the troubleshooting process.
Start with:
- Storage
- Permissions
- Restart
- Cache
- Short test
- Problematic media
- Lower export settings
This sequence helps you identify the cause without immediately rebuilding the project.
CapCut Export Stuck at 99% After Adding a Template
If the problem began after using a template, test the project without the template-related elements.
A template can contain multiple assets and editing components.
Try creating a small project using a different template or manually recreating the relevant section.
If the new project exports successfully, the original template or one of its resources may be contributing to the problem.
CapCut Export Stuck at 99% After Adding Effects
If export worked before you added an effect, temporarily remove the effect.
Then test again.
If the project exports normally afterward, add the effect back in a simpler form or use an alternative effect.
Do not assume every export problem is caused by the app itself.
The specific project configuration can matter.
CapCut Export Stuck at 99% on a Long Video
Long videos require more processing and storage than short videos.
If a long project repeatedly fails:
- Export a short section.
- Export another section.
- Identify whether one section fails.
- Inspect that section for problematic media.
- Reduce export settings if appropriate.
- Consider dividing the project into smaller parts.
If all sections export successfully but the complete project does not, project complexity may be contributing to the problem.
CapCut Export Stuck at 99% With 4K Video
High-resolution projects can place greater demands on the device.
If 4K export repeatedly fails, test the same project at 1080P.
If 1080P works while 4K does not, the issue may be related to the higher processing workload or a particular 4K source file.
This does not prove that the phone cannot handle 4K, but it provides a useful troubleshooting clue.
CapCut Export Stuck at 99% With 60FPS
60FPS projects can also require more processing than equivalent 30FPS projects.
Try:
60FPS → 30FPS
as a diagnostic test.
If 30FPS exports successfully, compare the project and device requirements before deciding which final setting to use.
For a detailed guide, see our article on how to export 1080p 60FPS videos in CapCut on Android.
Should You Clear CapCut Data?
Be careful.
Clearing app data is more disruptive than clearing cache.
Before clearing application data, make sure important projects are protected and understand what information may be removed or reset.
For a normal 99% export problem, start with Clear Cache rather than immediately using Clear Data.
Should You Uninstall CapCut?
Uninstalling should not be the first solution.
If you have important local drafts, uninstalling can create unnecessary risk.
Before considering an uninstall:
- Protect important projects
- Check available storage
- Check permissions
- Clear cache
- Restart the app
- Restart the phone
- Test a short export
- Identify problematic media
- Update CapCut
Only consider reinstalling after less disruptive troubleshooting has been exhausted and your important work is safely preserved.
How to Prevent CapCut Export Problems
A few habits can reduce the chance of export failures.
Keep Enough Free Storage
Don't allow your phone to remain almost completely full.
Keep CapCut Updated
Install updates from your normal app source.
Use Compatible Media
Avoid repeatedly importing damaged or unusual media files.
Avoid Excessive Project Complexity
Large numbers of effects and layers can increase processing requirements.
Keep Important Projects Safe
Preserve important project files before making major changes to the app.
Test Before the Final Export
For a large project, a short test export can reveal problems before you spend a long time waiting for the complete render.
CapCut 99% Export Troubleshooting Checklist
Use this checklist when you need a quick sequence.
Basic Checks
- Wait briefly
- Check free storage
- Check CapCut permissions
- Restart CapCut
- Restart Android
App Checks
- Clear cache
- Check for an update
- Test a new simple project
Project Checks
- Export a short section
- Check recently added media
- Check video files
- Check audio files
- Check images
- Check overlays
- Check effects
- Check transitions
Export Checks
- Try 1080P
- Try 30FPS
- Reduce other demanding settings
- Export sections separately
Before Reinstalling
- Protect important projects
- Confirm your project is safely backed up where applicable
- Understand what uninstalling may remove
Common Problems and Their Fixes
CapCut Is Stuck at 99% With Almost No Storage
Free up storage and try again.
CapCut Is Stuck at 99% Even With Plenty of Storage
Check permissions, restart the app, clear cache, and test a short section.
A Short Video Exports but the Full Project Does Not
The full project may contain problematic media or excessive complexity. Export sections separately to locate the problem.
One Section Always Fails
Inspect that section for damaged or unsupported media, effects, audio, or other project elements.
1080P Works but 4K Does Not
The higher-resolution export may be too demanding for the current project or device configuration.
30FPS Works but 60FPS Does Not
The higher frame-rate export may be increasing processing requirements or exposing a project compatibility problem.
The Export Finishes but the File Is Missing
Check storage and CapCut's media/file permissions, then restart the app and try again.
CapCut Export Works in a New Project but Not the Old One
The problem is likely related to the original project's media, effects, structure, or another project-specific element.
Frequently Asked Questions
Why is CapCut stuck at 99% when exporting?
CapCut's current support documentation identifies low storage, problematic or corrupted media, and permission restrictions as possible causes of an export that stops at 99%.
What should I do if CapCut export is stuck at 99%?
Start by checking storage and permissions. Then restart CapCut and your phone, clear cache, and test a short section of the project.
Does 99% mean CapCut has finished exporting?
Not necessarily. The app may still need to complete the final processing and save the finished file.
Why does CapCut reach 99% but not save the video?
The final saving process may be unable to complete because of insufficient storage, permissions, or problematic project media.
Can low storage cause CapCut to stop at 99%?
Yes. CapCut specifically identifies insufficient storage as one possible cause of the 99% export problem.
Can a corrupted video cause CapCut export to fail?
Yes. Problematic or corrupted media can interfere with the export process.
Should I clear CapCut cache when export is stuck?
Clearing temporary cache is a reasonable troubleshooting step, particularly after checking storage and restarting the app.
Will clearing CapCut cache delete my projects?
Clearing cache and clearing app data are different operations. Cache clearing is intended to remove temporary files, while clearing app data can have more significant consequences.
Why does a short CapCut export work but the full video fails?
The complete project may contain a problematic section, media file, effect, or combination of elements. Exporting sections separately can help locate the problem.
Why does CapCut export at 99% after I add a particular video?
That video may be damaged, incompatible, unusually large, or otherwise causing the export process to fail. Test the project without it or replace it with another copy.
Why does CapCut export at 99% after adding music?
The audio file may be problematic or incompatible, or it may contribute to project complexity. Remove the track temporarily and test the export.
Why does CapCut export at 99% with 4K?
Higher-resolution projects can require more processing and storage. Try exporting the same project at 1080P as a diagnostic test.
Why does CapCut export at 99% with 60FPS?
60FPS can increase processing requirements. Try 30FPS as a test and compare the result.
Should I uninstall CapCut to fix a 99% export problem?
Not as a first step. Protect important projects and try storage, permissions, restart, cache, media, and export-setting checks first.
Can restarting my Android phone fix CapCut export?
It can resolve temporary application or system-resource problems, so restarting is a reasonable troubleshooting step.
What if CapCut exports normally in a new project?
That suggests the original project may contain a problematic media file, effect, template element, or project structure.
What if every CapCut project gets stuck at 99%?
If even a very simple test project fails, investigate device storage, permissions, app version, cache, and the CapCut installation more broadly.
How do I find which clip is causing CapCut export to fail?
Export different sections of the project separately. When one section consistently fails, inspect the media and effects in that section.
Can I export CapCut videos in smaller sections?
Yes. Exporting sections separately can be useful for troubleshooting and can help identify problematic project materials.
Does CapCut export quality affect whether export succeeds?
Higher resolution and frame rate can increase processing requirements. Testing a lower export setting can help determine whether the selected configuration is contributing to the failure.
Final Thoughts
CapCut getting stuck at 99% can look like a mysterious problem, but the final stage of an export depends on more than rendering the video.
The app still needs to complete the final processing and save the finished file to your Android device.
Start with the simplest checks:
Storage → Permissions → Restart → Cache → Short Test → Problematic Media → Lower Export Settings
If a short test works but the complete project fails, focus on the project itself. Export different sections to find the part that causes the problem, then inspect its video, audio, images, overlays, effects, transitions, or other elements.
If 1080P or 30FPS works while a higher setting fails, use that information as a diagnostic clue rather than immediately assuming the entire project is broken.
Most importantly, don't uninstall CapCut as your first response. If you have important local drafts, protect them before making major changes to the application.
With a systematic approach, you can usually narrow down whether the problem comes from storage, permissions, the application, the device, or one specific element inside the project.
Related Articles

How to Fix CapCut Video Lagging After Export on Android
Fix CapCut video lagging after export on Android. Learn how to troubleshoot choppy playback, frame-rate mismatches, heavy effects, storage issues, and export settings.
GetApkFree Team

How to Fix CapCut Preview Not Matching Export on Android
Fix CapCut preview not matching the exported video on Android. Troubleshoot missing effects, text, transitions, timing, colors, and rendering differences.
GetApkFree Team

How to Fix Couldn't Apply AI Background in CapCut on Android
Getting "Couldn't Apply AI Background" in CapCut on Android? Check usage limits, clip selection, video quality, app updates, and practical troubleshooting steps.
GetApkFree Team

How to Fix CapCut Effects Not Applying on Android
CapCut effects not working on Android? Check clip selection, effect layers, timeline timing, conflicting adjustments, and app performance with these practical fixes.
GetApkFree Team