
This article is about
CapCut Premium
capcutdownload.com.pk · Tools
How to Merge Videos in CapCut on Android
GetApkFree Team
Learn how to merge videos in CapCut on Android, combine multiple clips, arrange them in order, add transitions, adjust audio, and export one video.
- Source
- Developer
- Package
- CapCut Premium
How to Merge Videos in CapCut on Android
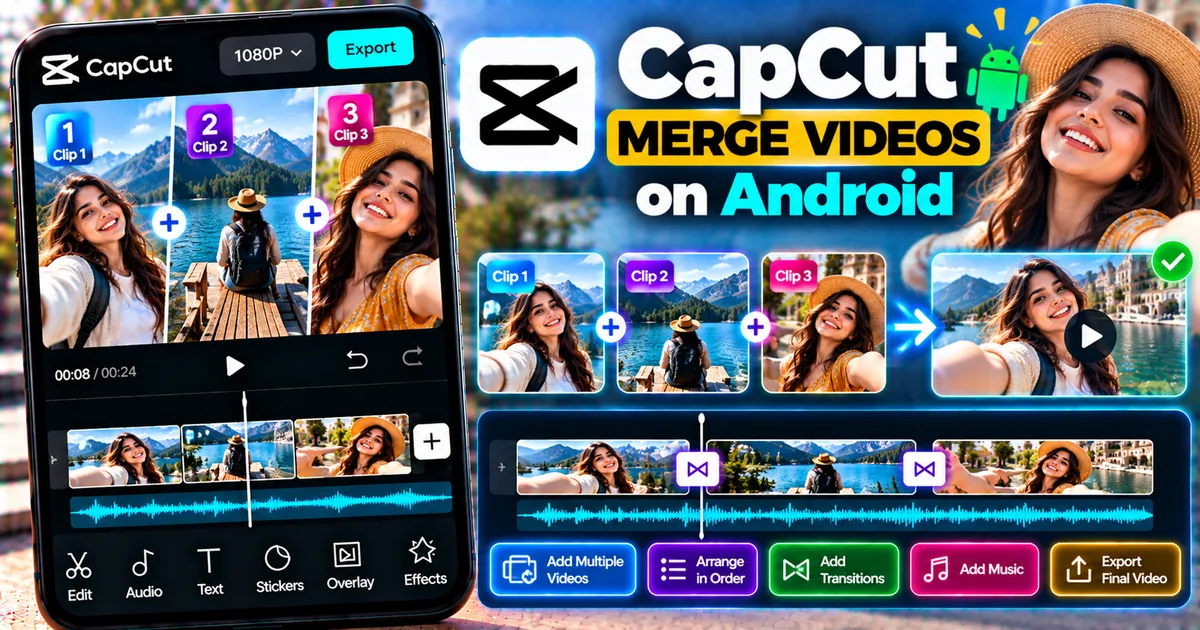
If you have several video clips on your Android phone and want to turn them into one continuous video, CapCut makes the process straightforward. You can add multiple clips to a project, arrange them in the order you want, trim unwanted sections, add transitions, adjust audio, and export the finished result as a single video.
This is useful for combining clips from a trip, creating a social media Reel or Short, joining parts of a tutorial, making a montage, or simply putting several recordings together.
Quick Answer
To merge videos in CapCut on Android, open CapCut, start a new project, select the video clips you want to combine, and add them to the timeline. Arrange the clips in the desired order, make any necessary edits, add transitions or music if needed, and tap Export when you're finished.
You do not need to create separate exported files first. You can bring the original clips into one CapCut project and edit them together on the same timeline.
What Does Merging Videos Mean in CapCut?
Merging videos means combining two or more separate video clips into one continuous project.
For example, suppose you recorded three clips:
- Clip 1: An introduction
- Clip 2: The main part of your video
- Clip 3: The ending
Instead of keeping them as three separate files, you can place them one after another on CapCut's timeline and export them as one finished video.
Merging is different from simply trimming a video. Trimming removes unwanted footage from the beginning or end of a clip, while merging brings multiple clips together.
How to Merge Two Videos in CapCut on Android
Follow these steps to combine two videos in CapCut.
Step 1: Open CapCut
Launch CapCut on your Android phone.
From the home screen, select the option to start a new project.
The exact wording or layout can change between CapCut versions, but the process begins by creating a new editing project.
Step 2: Select Your Videos
Choose the first video you want to use.
Then select the second video you want to add to the same project.
You can select multiple clips if you want to combine more than two videos.
After selecting your videos, tap Add.
CapCut will place the selected clips on the editing timeline.
Step 3: Check the Video Order
Look at the timeline after your clips have been added.
The order of the clips determines the order in which they will play.
For example:
Video 1 → Video 2 → Video 3
If the clips are not in the correct order, rearrange them before exporting.
This is particularly important when creating a story, tutorial, travel video, or social media post where the sequence matters.
Step 4: Rearrange Clips if Necessary
Press and hold a clip on the timeline and move it to the desired position when the current CapCut interface allows clip reordering this way.
Place the clips in the sequence you want viewers to see.
Preview the project from the beginning to make sure the story flows correctly.
How to Add a Transition Between Merged Videos
Simply placing two clips next to each other creates a direct cut from one video to the next.
If you want a smoother or more stylized change, you can add a transition between the clips.
To do this:
- Add two or more videos to the timeline.
- Locate the point where two clips meet.
- Tap the transition control between the clips if it is available.
- Browse the available transition styles.
- Select a transition.
- Adjust its duration if the option is available.
- Preview the result.
CapCut provides different transition categories and styles, although the exact selection can vary by version, platform, region, and account.
For most normal videos, a short and simple transition is often easier to watch than an overly long effect.
How to Merge Multiple Videos in CapCut
You are not limited to two videos.
You can create a project containing several clips and arrange them into one sequence.
For example:
Video 1 → Video 2 → Video 3 → Video 4 → Video 5
This can be useful for:
- Travel montages
- Birthday videos
- Instagram Reels
- YouTube Shorts
- YouTube videos
- Event highlights
- Tutorials
- Product demonstrations
- School projects
- Daily vlogs
- Before-and-after videos
After arranging the clips, preview the entire timeline before exporting.
How to Remove a Clip Before Merging
Sometimes you may select a video that you later decide not to use.
You can remove the unwanted clip from the timeline without deleting the original video from your phone.
Select the clip in the CapCut timeline and use the Delete option.
The remaining clips can then be arranged together.
How to Trim Videos Before Merging Them
You do not have to merge complete videos.
You can first remove unwanted portions from individual clips.
For example, imagine you have three recordings:
- Video 1 has five seconds of unwanted footage at the beginning.
- Video 2 contains a long pause in the middle.
- Video 3 has unnecessary footage at the end.
You can trim or split those clips before creating the final sequence.
This gives you more control over the finished video.
For a detailed guide to cutting and trimming clips, see:
https://getapkfree.com/blog/how-to-cut-trim-video-capcut-android
How to Add Music After Merging Videos
You can also add background music to a project containing multiple video clips.
A common workflow is:
- Add and arrange your videos.
- Review the complete timeline.
- Add your music.
- Adjust the music volume.
- Trim the music if necessary.
- Check the audio against the video.
- Export the finished project.
If the original videos already contain important speech, keep the background music low enough that it does not cover the dialogue.
You can also use separate audio tracks for narration, music, and sound effects when your project requires them.
For more information about adding music in CapCut, see:
https://getapkfree.com/blog/how-to-add-music-video-capcut-android
How to Add Sound Effects Between Clips
Merging videos does not mean you have to keep the original audio exactly as recorded.
You can add sound effects at important points in the timeline.
For example, you could use:
- Whoosh sounds
- Click sounds
- Impact sounds
- Notification sounds
- Camera sounds
- Transition effects
Place the sound effect at the point where the visual change happens and preview the result.
Learn more about adding sound effects here:
https://getapkfree.com/blog/how-to-add-sound-effects-capcut-android
How to Make Merged Videos Look Smoother
Combining clips is only the first step. The way those clips connect can make a significant difference to the finished video.
Keep Similar Clips Together
Try to place related footage next to each other.
A logical sequence makes the final video easier to follow.
Check the Beginning and Ending of Every Clip
Look for:
- Camera movement
- Long pauses
- Accidental recordings
- Blank frames
- Unwanted conversations
- Sudden audio changes
Removing these problems before export can make the final video feel much cleaner.
Use Transitions Carefully
Transitions can help connect clips, but not every cut needs one.
A simple cut can work perfectly when the two clips already fit together naturally.
Match Audio Levels
If one clip is very loud and the next is very quiet, the change can be distracting.
Preview the joins and adjust audio levels where necessary.
Can You Merge Videos With Different Orientations?
You may encounter situations where one video is vertical and another is horizontal.
For example:
- Video 1: 9:16 vertical
- Video 2: 16:9 horizontal
You can still place them in the same CapCut project, but the final result may require cropping, resizing, or adjusting the canvas.
Before exporting, check the preview carefully.
If your final destination is Instagram Reels, TikTok, or YouTube Shorts, a vertical project is generally the appropriate format for that type of content.
Can You Merge Videos of Different Resolutions?
Yes, you can place clips with different resolutions into the same editing project.
However, the final output is determined by the project and export settings, and lower-resolution source footage cannot be turned into genuine higher-resolution detail simply by exporting at a higher resolution.
For the cleanest result, use source videos with similar resolution and aspect ratio whenever possible.
How to Merge Videos Without Making the Final Video Too Large
The final file size depends on several factors, including:
- Video duration
- Resolution
- Frame rate
- Encoding settings
- Bitrate
- Amount of visual detail
A longer video generally requires more storage than a short video.
If the exported file is much larger than expected, review the export settings and choose an appropriate resolution and frame rate for your intended platform.
What Happens to Video Quality When You Merge Clips?
Merging clips does not automatically mean that the final video will become low quality.
However, the export process creates a new video file, and the final result depends on the source footage and export settings.
For example, combining several high-quality clips and exporting them with suitable settings can produce a good-quality final video.
On the other hand, exporting low-resolution footage at a much higher resolution does not recreate detail that was never present in the original recording.
How to Merge Videos for Instagram Reels
If you are creating a Reel, start by deciding which clips belong in the final sequence.
A simple workflow is:
- Create a new CapCut project.
- Select the clips you want to use.
- Arrange them in the correct order.
- Remove unnecessary sections.
- Add transitions where appropriate.
- Add music or sound effects.
- Add text or captions if needed.
- Preview the complete video.
- Export using settings appropriate for your intended platform.
Keep the most important part of the video early enough to maintain viewer attention.
How to Merge Videos for YouTube Shorts
For Shorts, you can use a similar workflow.
Combine your clips, remove unnecessary pauses, arrange the story logically, and check the final vertical framing before exporting.
You can also add captions, music, effects, overlays, or other editing elements after combining the clips.
If you need overlays in the same project, see:
https://getapkfree.com/blog/how-to-add-overlays-capcut-android
What If the Videos Have Different Frame Rates?
You may occasionally have clips recorded at different frame rates.
For example, one clip may have been recorded at 30 fps while another was recorded at 60 fps.
CapCut can work with multiple clips in the same project, but differences in source footage can affect how motion looks after editing and exporting.
If you notice an unusual change in motion between clips, preview the entire project before final export.
How to Check the Final Merged Video
Before exporting, watch the complete timeline rather than checking only the individual clips.
Pay attention to:
- Clip order
- Sudden cuts
- Audio changes
- Missing footage
- Unwanted pauses
- Transitions
- Text placement
- Video orientation
- Beginning and ending frames
A full preview can help you catch mistakes before creating the final file.
How to Export the Merged Video
When your editing is complete:
- Preview the full project.
- Tap Export.
- Review the available resolution settings.
- Choose the appropriate frame rate if available.
- Check the other available export options.
- Start the export.
- Wait for CapCut to finish processing.
- Check the exported video in your gallery or file manager.
Available export options can vary depending on your device, source footage, CapCut version, and other factors.
Common Problems When Merging Videos in CapCut
The Videos Are in the Wrong Order
Select and rearrange the clips on the timeline before exporting.
There Is an Awkward Gap Between Clips
Check the timeline carefully and make sure the clips are positioned next to each other where you want a continuous sequence.
The Transition Is Too Long
Select the transition and reduce its duration when the control is available.
The Audio Suddenly Changes
Different recordings may have different volume levels or background noise.
Adjust individual clip audio or use audio-editing tools to create a more consistent result.
The Merged Video Looks Cropped
Check the project aspect ratio and the framing of each clip.
A vertical video placed into a horizontal project, or vice versa, may require additional adjustment.
The Exported Video Is Too Large
Try a more appropriate resolution, frame rate, or export quality for your intended use.
CapCut Does Not Let You Select a Video
Check whether CapCut has permission to access the media on your Android device. Also make sure the video file is available locally and can be opened normally.
Merge vs Cut vs Trim in CapCut
These editing terms are related but they are not the same.
Merge
Combines multiple clips into one project and lets you export them as one finished video.
Cut or Split
Divides one clip into separate sections.
Trim
Shortens a clip by removing footage from its beginning or end.
For example, you might first split a long recording, delete an unwanted section, trim the remaining clips, and then arrange everything together into one final video.
Frequently Asked Questions
Can I merge two videos in CapCut on Android?
Yes. Start a new project, select the videos you want to combine, arrange them on the timeline, edit them as needed, and export the finished project.
Can I merge more than two videos in CapCut?
Yes. You can add multiple clips to a project and arrange them in the sequence you want.
Can I add transitions between merged videos?
Yes. CapCut provides transition controls between clips, although the available transition styles and options can vary by version and platform.
Does merging videos reduce quality?
Merging itself does not automatically make your source footage low quality. The final result depends on the original videos and the export settings you choose.
Can I add music after merging videos?
Yes. You can add background music and other audio elements to the same project before exporting.
Can I merge videos with different aspect ratios?
Yes, but you may need to adjust the framing or project aspect ratio so the final video looks correct.
Can I remove part of a video before merging it?
Yes. You can trim or split clips and remove unwanted sections before arranging the remaining footage.
Final Thoughts
Merging videos in CapCut on Android is useful when your footage is spread across multiple clips but you want one finished video.
The basic workflow is simple: create a project, select your clips, arrange them in the correct order, clean up the individual sections, add transitions or audio when needed, preview the complete timeline, and export the result.
For the best outcome, spend a little time checking every clip before exporting. Removing unnecessary footage and fixing awkward audio or transitions can make a bigger difference than adding lots of effects.
Related Articles

How to Fix CapCut Video Lagging After Export on Android
Fix CapCut video lagging after export on Android. Learn how to troubleshoot choppy playback, frame-rate mismatches, heavy effects, storage issues, and export settings.
GetApkFree Team

How to Fix CapCut Preview Not Matching Export on Android
Fix CapCut preview not matching the exported video on Android. Troubleshoot missing effects, text, transitions, timing, colors, and rendering differences.
GetApkFree Team

How to Fix Couldn't Apply AI Background in CapCut on Android
Getting "Couldn't Apply AI Background" in CapCut on Android? Check usage limits, clip selection, video quality, app updates, and practical troubleshooting steps.
GetApkFree Team

How to Fix CapCut Effects Not Applying on Android
CapCut effects not working on Android? Check clip selection, effect layers, timeline timing, conflicting adjustments, and app performance with these practical fixes.
GetApkFree Team