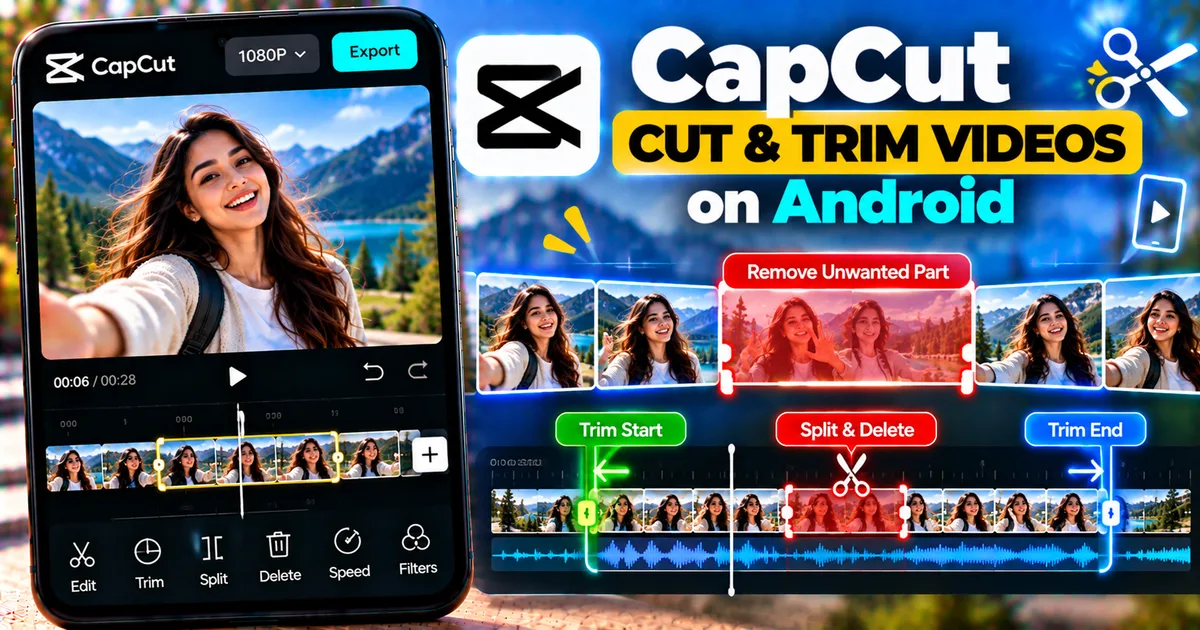

This article is about
CapCut Premium
capcutdownload.com.pk · Tools
How to Cut and Trim Videos in CapCut on Android
GetApkFree Team
Learn how to cut and trim videos in CapCut on Android, remove unwanted parts, split clips, shorten videos, and keep only the sections you need.
- Source
- Developer
- Package
- CapCut Premium
How to Cut and Trim Videos in CapCut on Android
Want to remove unwanted parts from a video or shorten a clip before sharing it?
CapCut makes basic video cutting and trimming straightforward on Android. You can shorten the beginning or end of a clip by trimming its edges, or use the Split tool when you need to remove a section from the middle.
This is useful when you want to remove mistakes, long pauses, unwanted scenes, or parts of a recording that you don't want in the final video.
In this guide, you'll learn how to cut and trim a video in CapCut on Android, how to remove a section from the middle, how to split clips, and how to avoid common editing mistakes.
Quick Answer
To trim a video in CapCut on Android:
- Open CapCut.
- Create a new project.
- Add your video.
- Tap the video clip on the timeline.
- Drag the left or right edge of the clip to shorten it.
- Preview the result.
- Export the video when finished.
To remove a section from the middle:
- Select the video.
- Move the playhead to the beginning of the unwanted section.
- Tap Split.
- Move to the end of the unwanted section.
- Tap Split again.
- Select the unwanted section.
- Delete it.
What Is the Difference Between Trimming and Cutting?
Although people often use the words "cut" and "trim" interchangeably, they can mean slightly different things when editing video.
Trimming
Trimming usually means shortening the beginning or end of a clip.
For example, if you recorded 60 seconds but only want the first 40 seconds, you can trim the end.
Cutting or Splitting
Cutting can refer to dividing a video into separate sections.
In CapCut, the Split tool lets you divide a clip at a specific point.
You can then delete, move, or edit the resulting sections independently.
How to Trim a Video in CapCut on Android
Step 1: Open CapCut
Open CapCut on your Android phone.
From the home screen, start a new project.
Select the video you want to edit from your device.
Once the video is imported, it will appear on the timeline.
Step 2: Select the Video Clip
Tap the video clip on the timeline.
The clip should become selected and CapCut will display editing controls.
If your project contains multiple clips, make sure you select the clip you actually want to trim.
Step 3: Trim the Beginning
Look at the beginning of the video clip on the timeline.
Drag the left edge toward the right.
As you move the edge, the beginning of the clip is shortened.
This is useful when your recording contains:
- An unwanted introduction
- A few seconds of setup
- Camera movement before the actual scene
- A mistake at the beginning
- An unnecessary pause
Stop when the section you want to keep begins.
Step 4: Trim the End
To shorten the end of the video, select the right edge of the clip.
Drag it toward the left.
This removes the portion after the selected point.
It can be useful when:
- You stopped recording late
- The final seconds contain unnecessary footage
- You want a shorter social-media clip
- You want the video to end immediately after an action
Step 5: Preview the Trimmed Video
Play the video from the beginning.
Check that you haven't accidentally removed an important moment.
If the cut is too early or too late, adjust the clip edge again.
How to Cut Out a Part of a Video in the Middle
Trimming the edges is not enough when the unwanted section is somewhere in the middle.
For example, imagine a 60-second video:
- 0–20 seconds: keep
- 20–35 seconds: remove
- 35–60 seconds: keep
In this situation, use Split.
Step 1: Find the Beginning of the Unwanted Section
Move the playhead to the exact point where the unwanted section starts.
For example, if you want to remove 20–35 seconds, position the playhead around 20 seconds.
Step 2: Tap Split
With the video selected, tap Split.
CapCut divides the original clip into two sections.
The first section contains the footage before the split.
The second section contains the footage after it.
Step 3: Move to the End of the Unwanted Section
Move the playhead to the point where the unwanted section ends.
In our example, move it to around 35 seconds.
Step 4: Split Again
Tap Split again.
You now have three sections:
- Footage you want to keep
- Unwanted footage
- Footage you want to keep
Step 5: Delete the Unwanted Section
Tap the middle section.
Then tap Delete.
The unwanted section is removed from the timeline.
The remaining clips can now play one after another.
How to Remove a Mistake From a Video
Splitting is especially useful for removing mistakes.
Suppose you're recording a tutorial and make a mistake halfway through.
You don't need to record the entire video again.
Instead:
- Find the beginning of the mistake.
- Split the clip.
- Find the end of the mistake.
- Split again.
- Select the mistake.
- Delete it.
- Preview the transition.
This allows you to clean up the recording while keeping the useful sections.
How to Cut Out a Long Pause
Long pauses are common in talking videos.
If you leave them in the final video, the pacing can feel slow.
To remove one:
- Find where the pause begins.
- Split the clip.
- Find where the person starts speaking again.
- Split again.
- Delete the silent section.
- Preview the transition.
For videos with lots of pauses, CapCut's automatic editing tools may also help, but manual splitting gives you direct control over exactly what is removed.
How to Shorten a Video for Social Media
If you recorded a long video but need a shorter version, first identify the parts that are essential.
Then remove:
- Long pauses
- Repeated explanations
- Mistakes
- Unnecessary introductions
- Empty sections
- Repetitive footage
You can use trimming for the beginning and end and Split for sections in the middle.
After cutting, watch the complete video to make sure the story still makes sense.
How to Cut Multiple Sections From One Video
You can remove multiple unwanted sections from the same clip.
For example:
- Remove the first mistake
- Remove a long pause
- Remove an unrelated scene
- Remove the ending
For each unwanted section:
- Split at its beginning.
- Split at its end.
- Select the unwanted segment.
- Delete it.
After several cuts, your timeline may contain many smaller clips.
That is normal.
You can rearrange or further edit those clips as needed.
How to Split a Video Into Separate Clips
The Split tool can also be used when you don't want to delete anything.
For example, you might want to divide a long video into several independent sections.
Position the playhead where you want the division and tap Split.
You can then edit each resulting clip separately.
This is useful when you want different:
- Speeds
- Filters
- Effects
- Audio levels
- Transitions
- Text
- Overlays
on different parts of the same original video.
How to Cut a Video Precisely
If you need a more precise cut, zoom into the timeline if your version of CapCut provides timeline zoom controls.
A closer timeline view makes it easier to position the playhead around the moment you want.
This can be particularly useful when cutting:
- Dialogue
- Music beats
- Sound effects
- Fast movements
- Short transitions
After making the cut, always preview the surrounding seconds.
The exact point that looks correct on the timeline may feel slightly early or late when you watch the actual video.
How to Undo a Cut
If you accidentally split or trim the wrong section, use the Undo control in the editor.
Undo can restore the previous editing state.
This is especially useful when experimenting with multiple cuts.
Don't worry about making every cut perfect on the first attempt.
Make the edit, preview it, and adjust it.
How to Join Clips After Cutting
When you remove a section from the middle of a video, the remaining clips are placed next to each other on the timeline.
For example:
Clip A + deleted section + Clip B
becomes:
Clip A + Clip B
You can then add a transition between them if the change feels too abrupt.
However, a transition isn't always necessary.
For a talking video, a clean cut can often look more natural than an obvious transition.
How to Add a Transition After Cutting
If two clips don't connect smoothly, you can add a transition between them.
A transition can be useful when the scene changes significantly.
However, don't automatically add a transition after every cut.
A simple cut can be better for:
- Tutorials
- Interviews
- Talking-head videos
- Educational content
- Screen recordings
Transitions may be more useful for:
- Travel videos
- Montages
- Music edits
- Cinematic sequences
How to Cut a Video Without Losing Quality
Cutting or trimming a video does not require you to intentionally lower the source resolution.
When exporting, choose appropriate quality settings for your project.
For example, if your source footage is high resolution, avoid unnecessarily exporting it at a much lower resolution unless you specifically need a smaller file.
Also remember that repeated re-encoding can affect video quality, so keep your editing workflow organized and export the finished project at suitable settings.
How to Cut a Video for Instagram Reels or Shorts
If you're preparing a short vertical video, remove anything that doesn't contribute to the final message.
A simple workflow is:
- Import your footage.
- Trim unnecessary beginning and ending sections.
- Split out mistakes.
- Remove long pauses.
- Rearrange important clips if needed.
- Add captions or text.
- Add music or sound effects.
- Preview the complete video.
- Export using settings appropriate for the platform.
The exact ideal length depends on the type of content you're creating.
How to Cut a Video for YouTube
For longer YouTube videos, cutting is often used to remove mistakes and improve pacing.
You can remove:
- Repeated sentences
- Long pauses
- Recording errors
- Unnecessary sections
- Empty screen time
After removing a section, watch the surrounding content carefully.
Make sure the edit doesn't make the speaker appear to suddenly change position or jump between sentences in a distracting way.
How to Cut a Video With Music
If your video already contains music, pay attention to the audio when making cuts.
A visual cut that occurs in the middle of an important musical phrase may sound unnatural.
You can move the cut slightly or adjust the music separately.
For music-editing guidance, see:
How to Add Music to a Video in CapCut on Android.
How to Cut a Video and Keep the Original Audio
If you only want to remove unwanted video sections while keeping your audio workflow intact, preview both the video and audio after every major cut.
This is particularly important for:
- Voiceovers
- Interviews
- Tutorials
- Presentations
- Talking-head videos
A cut that looks correct visually can sometimes create an awkward audio transition.
How to Cut a Video and Add Text Later
You can cut your video first and then add text.
This can make the editing process easier because you know the final timing of your clips before creating captions or titles.
A useful workflow is:
Cut → arrange → add text → add audio → effects → export
You don't have to follow this order for every project, but completing the basic structure first can reduce unnecessary re-editing.
Common CapCut Cutting Problems
I Can't Find the Split Button
First, tap the video clip on the timeline.
Editing controls can change depending on what is selected.
If a text, audio, or other layer is selected, you may see different controls.
I Split the Video at the Wrong Place
Use Undo or move the playhead to the correct position and make the split again.
Zooming into the timeline can help when you need greater precision.
I Deleted the Wrong Clip
Use Undo immediately if possible.
If you have already made many other edits, carefully check the timeline before deleting additional sections.
There Is a Gap After Cutting
Check the timeline and move the remaining clip toward the previous clip if necessary.
In many simple edits, the remaining sections can be positioned directly next to each other.
The Cut Looks Too Abrupt
Preview the surrounding footage.
You may need to:
- Move the cut slightly
- Keep a little more footage
- Remove a little more footage
- Add a subtle transition
- Adjust the audio
Trim vs Split: Which Should You Use?
Use Trim when you want to remove the beginning or end of a clip.
Use Split when you want to divide the clip at a specific point or remove a section from the middle.
Use Trim For:
- Removing the beginning
- Removing the ending
- Shortening a clip
- Quickly adjusting duration
Use Split For:
- Removing a middle section
- Removing mistakes
- Creating multiple clips
- Applying different effects to different sections
- Rearranging parts of a video
Knowing this difference makes basic CapCut editing much easier.
Final Thoughts
Cutting and trimming are two of the most useful basic editing skills in CapCut on Android.
Use the edge of a clip when you simply need to shorten its beginning or ending. When you need to remove something from the middle, use Split to isolate the unwanted section and then delete it.
Start with simple cuts before adding effects, transitions, music, or animations.
Once the basic timeline is clean, you can build on it with CapCut's other tools such as captions, overlays, keyframes, speed controls, sound effects, and transitions.
The goal isn't to make as many cuts as possible. The goal is to remove unnecessary footage while keeping the video clear, natural, and easy to watch.
Related Articles
How to Fix CapCut Reverse Not Working on Android
Fix CapCut reverse not working on Android with practical steps for stuck processing, failed reverse effects, unsupported clips, low storage, and app issues.
GetApkFree Team
How to Fix CapCut Templates Not Showing on Android
CapCut templates not showing on Android? Find the missing Templates tab, fix an empty template library, check regional availability, and troubleshoot loading issues.
GetApkFree Team
How to Fix CapCut Template Link Not Opening on Android
CapCut template links not opening on Android? Fix links that open the wrong template, redirect to the home screen, or fail to launch CapCut.
GetApkFree Team
How to Fix CapCut Drafts Disappeared on Android
CapCut drafts disappeared on Android? Check your project list, account, local storage, and recovery options without risking unfinished video edits.
GetApkFree Team