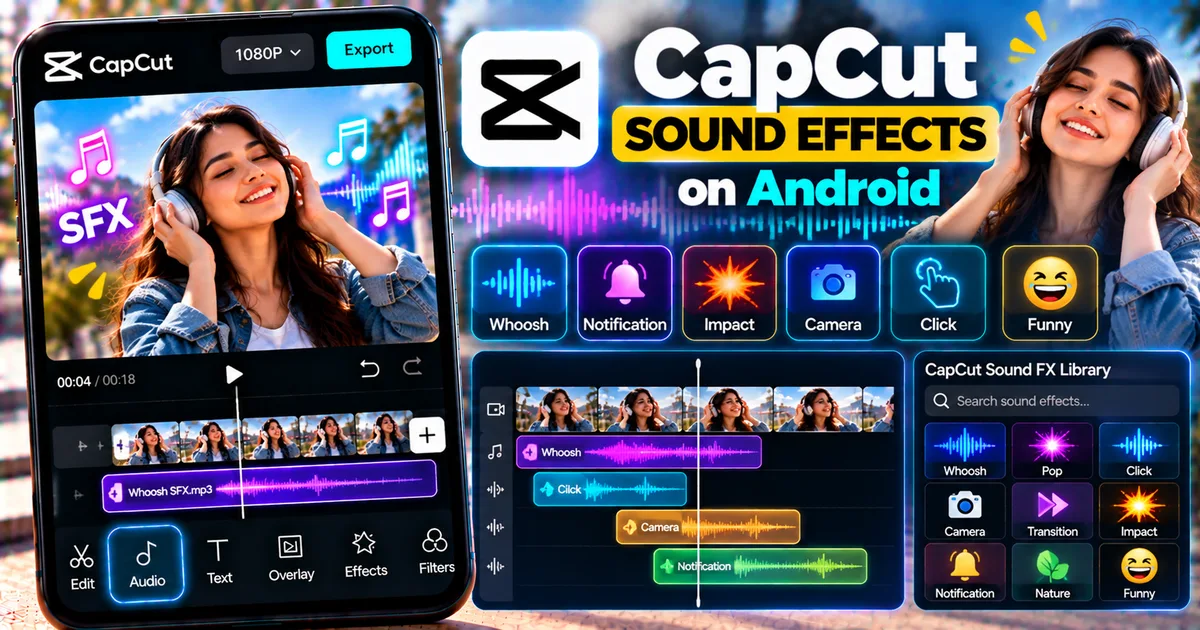
How to Add Sound Effects to a Video in CapCut on Android
GetApkFree Team
Learn how to add sound effects in CapCut on Android, find effects, place them on the timeline, trim audio, adjust volume, and sync effects with video.
Quick Answer
Learn how to add sound effects in CapCut on Android, find effects, place them on the timeline, trim audio, adjust volume, and sync effects with video.
How to Add Sound Effects to a Video in CapCut on Android
Sound effects can make a video feel more dynamic, engaging, and polished.
A simple whoosh can make a transition feel faster. A click can emphasize an on-screen action. A camera shutter can make a photo effect feel more realistic. Even a subtle ambient sound can make a short video feel more immersive.
CapCut includes sound-effect tools that let you add these types of audio elements directly to your video project on Android.
In this guide, you'll learn how to add sound effects in CapCut on Android, find the right effect, place it at the correct moment, adjust its volume, trim it, and make it work naturally with your video.
Quick Answer
To add a sound effect to a video in CapCut on Android:
- Open CapCut.
- Create a new project.
- Add your video.
- Tap Audio.
- Open Sound FX or Sound Effects.
- Browse or search for an effect.
- Add the effect to the timeline.
- Move it to the correct position.
- Trim it if necessary.
- Adjust the volume.
- Preview the video.
- Export when you're satisfied.
The exact wording or location of audio tools can vary between CapCut versions and regions.
What Are Sound Effects in CapCut?
Sound effects, often called SFX, are short audio elements added to a video to emphasize an action, transition, movement, or visual moment.
Unlike background music, a sound effect is usually connected to a specific event.
For example:
- A click when a button appears
- A whoosh during a transition
- A pop when text appears
- A camera shutter when showing a photo
- A notification sound when a message appears
- A hit sound during an impact
- Footsteps during a walking scene
The purpose is usually to support what viewers see on screen.
How to Add Sound Effects in CapCut on Android
Step 1: Open CapCut
Launch CapCut on your Android phone.
Start a new project and select the video you want to edit.
After the video is imported, it will appear on the timeline.
Step 2: Tap Audio
Look at the editing toolbar at the bottom of the screen.
Tap:
Audio
This opens CapCut's audio tools.
Depending on your version, you may see options for music, sound effects, extracting audio, recording, and other audio features.
Step 3: Open Sound Effects
Look for:
Sound FX
or
Sound Effects
Tap the option to open the available sound-effect library.
CapCut's current mobile guidance shows Sound FX inside the Audio section, where effects can be selected and added to the timeline.
Step 4: Browse the Sound Effects
Browse through the available effects.
Depending on what is available in your version, you may find different categories or recommendations.
Common types of sound effects include:
- Whoosh
- Pop
- Click
- Beep
- Camera
- Notification
- Impact
- Transition
- Nature
- Ambient sounds
- Crowd sounds
- Funny effects
If the library provides a search function, searching for a specific type of sound can be faster than manually browsing.
Step 5: Add the Sound Effect
When you find an effect you want to use, select it and add it to the timeline.
The sound effect will appear as a separate audio layer.
You can then move it to the exact moment where you want it to play.
How to Position a Sound Effect at the Right Moment
Timing is one of the most important parts of using sound effects.
Suppose your video shows a title appearing on screen.
You could place a short pop or whoosh effect exactly when the title appears.
To do this:
- Add the sound effect.
- Look at the audio waveform.
- Find the visual moment on the timeline.
- Drag the sound effect to that point.
- Preview the result.
- Move it slightly if necessary.
Even a small timing adjustment can make a noticeable difference.
How to Trim a Sound Effect
Some sound effects may be longer than you need.
To shorten one:
- Select the sound-effect track.
- Move the playhead to the point where you want to cut.
- Use the available split or trimming controls.
- Remove the unwanted section.
- Preview the result.
Shorter effects often work better when they are designed to emphasize a single action.
How to Move a Sound Effect
After adding an effect, you can reposition it on the timeline.
For example, if a whoosh plays too early:
- Select the sound effect.
- Drag it along the timeline.
- Align it with the transition.
- Preview the video.
Repeat until the sound and visual action feel synchronized.
How to Adjust Sound Effect Volume
A sound effect shouldn't automatically be played at maximum volume.
Select the audio effect and open its volume controls.
Lower the volume if the effect is too prominent.
Increase it slightly if the effect is difficult to hear.
The right volume depends on the other audio in your project.
For example:
Voiceover: primary
Background music: lower
Sound effect: noticeable but not overwhelming
How to Add Sound Effects Over Background Music
You can use sound effects together with music.
For example:
- Music continues in the background.
- A transition happens.
- A whoosh plays during the transition.
- Music continues.
You don't necessarily need to remove the music.
Instead, make sure the sound effect can be heard clearly without overpowering the soundtrack.
How to Add a Whoosh Sound to a Transition
Whoosh effects are commonly used with fast visual movements.
A simple workflow is:
- Add your video clips.
- Add a transition or movement between them.
- Open Audio.
- Find a whoosh-style effect.
- Add it to the timeline.
- Position it around the transition.
- Adjust the volume.
- Preview the result.
If the whoosh starts too early or too late, move it until it matches the visual movement.
How to Add a Click Sound to Text
Click sounds can work well when text appears or when an interface element is shown.
For example:
Text appears → click
To create the effect:
- Add your text.
- Add a suitable click sound.
- Move the sound underneath the moment the text appears.
- Adjust the volume.
- Preview the animation and sound together.
This can make simple text animations feel more responsive.
How to Add a Pop Sound
A pop sound can work well for:
- Emojis
- Stickers
- Text
- Icons
- Photos
- Small objects appearing on screen
Keep the effect short and position it close to the visual appearance.
A very loud pop can quickly become distracting, so adjust the volume after placing it.
How to Add a Camera Shutter Sound
If your video shows a photograph being taken, a camera shutter effect can make the moment feel more realistic.
For example:
Photo appears → shutter sound
You can also combine the effect with a flash or quick transition.
How to Add Notification Sounds
Notification sounds can be useful in:
- Chat demonstrations
- Phone tutorials
- Screen recordings
- Messaging videos
- Storytelling edits
Place the notification sound exactly when the message or notification appears.
If the notification is shown for only a moment, keep the sound effect short as well.
How to Add Impact Sounds
Impact sounds can emphasize:
- A dramatic cut
- An object hitting something
- A sports moment
- A title reveal
- A beat drop
- A visual punch
Impact sounds should be used carefully.
A strong impact can become distracting if it is added to every cut.
How to Use Sound Effects With Transitions
Sound effects can make transitions feel more connected.
For example:
Scene 1 → whoosh → Scene 2
or:
Zoom transition → rising sound → next scene
You can also combine sound effects with CapCut's transition tools.
For more information about transitions, see:
How to Use Transitions in CapCut on Android.
How to Use Sound Effects With Velocity Edits
Velocity editing changes the playback speed of a video.
Adding a sound effect at the moment where the speed changes can emphasize the effect.
For example:
Normal speed → acceleration → whoosh → slow motion
This can work particularly well for short-form videos.
See our guide:
How to Make a Velocity Edit in CapCut on Android.
How to Use Sound Effects With Overlays
Overlays can introduce another visual element into your video.
For example, you might add:
- A logo
- An image
- A sticker
- A graphic
- A screen recording
A short pop or whoosh can be placed at the same moment as the overlay appears.
See:
How to Add Overlays in CapCut on Android.
How to Use Sound Effects With Text
Text animations and sound effects can work together.
For example:
Text slides in → whoosh
Text pops up → pop
Text disappears → click
The important part is synchronization.
The sound should support the animation rather than play randomly in the background.
How to Use Multiple Sound Effects
You can add multiple sound effects to a project.
For example, a short video might contain:
- Whoosh for transitions
- Pop for text
- Click for an icon
- Camera shutter for a photo
- Impact for the final scene
However, more effects do not automatically make a video better.
Use each sound for a specific purpose.
How to Avoid Overusing Sound Effects
Too many sound effects can make a video feel noisy.
Avoid adding an effect to every single movement unless that style is intentional.
Instead, prioritize:
- Important transitions
- Major text appearances
- Key actions
- Important visual reveals
- Strong beats
Sometimes removing an unnecessary sound effect makes the final video better.
How to Make Sound Effects Match Music
If your video already has background music, listen to the rhythm before adding effects.
Try placing sound effects around major musical moments.
For example:
Music beat → visual cut → click
or:
Music buildup → transition → whoosh
The sound effect should complement the soundtrack.
How to Lower Music When a Sound Effect Plays
If a sound effect is difficult to hear because the music is too loud, you can reduce the music volume.
One simple approach is:
- Select the music track.
- Split it around the sound-effect section.
- Lower the volume of that section.
- Place the sound effect above it.
- Preview the result.
This creates more space for the effect without completely removing the music.
How to Use Sound Effects With Voiceovers
If your video contains narration, keep the voice easy to understand.
A useful priority is:
Voice → most important
Sound effects → supporting
Music → background
If an effect overlaps an important sentence, lower the effect volume or move it to a quieter part of the narration.
For voiceover-related editing, you can also see:
How to Use Text-to-Speech in CapCut on Android.
How to Fix a Sound Effect That Is Too Loud
If the effect sounds harsh:
- Select the effect.
- Lower its volume.
- Preview it together with the rest of the audio.
- Reduce it again if necessary.
Don't judge the effect in isolation.
A sound that seems quiet by itself may be very loud when combined with music and speech.
How to Fix a Sound Effect That Is Too Quiet
If you can't hear the effect:
- Select the audio layer.
- Increase its volume gradually.
- Check the music and original audio levels.
- Preview the entire scene.
Also make sure the sound effect is actually positioned at the correct point on the timeline.
Why Is the Sound Effect Not Playing?
If an effect does not play, check:
- Whether the audio track is muted
- Whether the volume is extremely low
- Whether the effect is positioned outside the visible video section
- Whether another audio setting is affecting playback
- Whether the CapCut app needs to be restarted
Move the effect slightly on the timeline and preview again.
Why Is My Sound Effect Out of Sync?
The most common solution is to move the audio track.
Zoom into the timeline if necessary and position the effect more precisely.
For example, if a text animation appears at 00:04.20, the sound effect should be positioned around that visual event rather than several frames later.
Small timing differences can matter with short effects.
Can You Import Your Own Sound Effects?
Depending on the CapCut version and available audio tools, you may be able to use audio files stored on your Android device.
A typical workflow is:
- Open Audio.
- Choose the available device or imported-audio option.
- Select the sound file.
- Add it to the timeline.
- Trim and position it.
- Adjust the volume.
If the option is not visible, check the current version of CapCut and the permissions available to the app.
Sound Effects vs Background Music
These serve different purposes.
Background Music
Usually plays continuously or across a larger section of the video.
Its job is to establish mood and pacing.
Sound Effects
Usually occur at specific moments.
Their job is to emphasize an action, transition, movement, or visual event.
A strong edit can use both.
Are CapCut Sound Effects Free to Use?
The availability and usage terms can vary by sound and CapCut's current licensing conditions.
Do not assume that every audio asset is unrestricted for every commercial or platform use.
Before publishing commercially, check the applicable licensing or usage information for the specific audio asset and the platform where you plan to publish.
Final Thoughts
Adding sound effects in CapCut on Android is a simple way to make video edits more engaging.
Start by choosing effects that have a clear purpose. Then place them precisely on the timeline, trim them when necessary, and adjust their volume so they work with the rest of your audio.
For the best results, don't add an effect to every movement.
Use sound effects to emphasize the moments that matter most: transitions, text animations, visual reveals, important actions, and major beats.
Once the audio feels balanced, preview the entire video before exporting.
Related Articles
How to Fix CapCut Reverse Not Working on Android
Fix CapCut reverse not working on Android with practical steps for stuck processing, failed reverse effects, unsupported clips, low storage, and app issues.
GetApkFree Team
How to Fix CapCut Templates Not Showing on Android
CapCut templates not showing on Android? Find the missing Templates tab, fix an empty template library, check regional availability, and troubleshoot loading issues.
GetApkFree Team
How to Fix CapCut Template Link Not Opening on Android
CapCut template links not opening on Android? Fix links that open the wrong template, redirect to the home screen, or fail to launch CapCut.
GetApkFree Team
How to Fix CapCut Drafts Disappeared on Android
CapCut drafts disappeared on Android? Check your project list, account, local storage, and recovery options without risking unfinished video edits.
GetApkFree Team