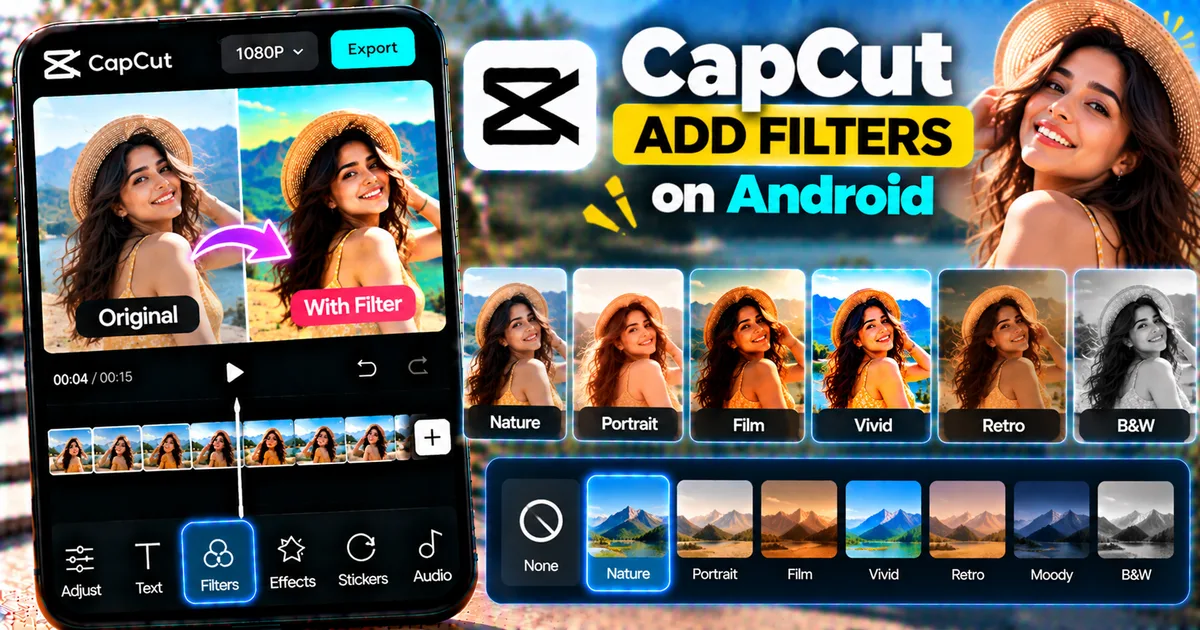

This article is about
CapCut Premium
capcutdownload.com.pk · Tools
How to Add Filters in CapCut on Android
GetApkFree Team
Learn how to add filters in CapCut on Android, choose different filter styles, adjust filter intensity, apply filters to clips, and fix common problems.
- Source
- Developer
- Package
- CapCut Premium
How to Add Filters in CapCut on Android
Want to quickly change the look and mood of your video? CapCut on Android includes a collection of video filters that can change the overall appearance of your footage without requiring you to manually adjust every color setting.
You can use filters to create a warmer look, give footage a cinematic appearance, make colors more noticeable, create a vintage style, or simply give several clips a more consistent visual appearance.
In this guide, you'll learn how to add filters in CapCut on Android, adjust filter intensity, apply filters to different clips, remove or change a filter, and fix common filter problems.
Quick Answer
To add a filter in CapCut on Android, open CapCut and create a new project. Import your video and select the clip on the timeline. Open the Filters tool, browse the available filter categories, and tap a filter to preview it. Choose the filter you want and adjust its intensity if the option is available. Preview the video and export it when you're satisfied.
The exact appearance and organization of CapCut's filter library can change as the app is updated.
What Is a Video Filter?
A video filter is a preset visual adjustment that changes the appearance of your footage.
Instead of manually changing several settings such as color, contrast, or saturation, you can start with a preset filter and adjust its strength.
Filters can be used to create different visual moods.
For example, you might want footage to look:
- Warm
- Cool
- Bright
- Dark
- Vintage
- Cinematic
- Natural
- Colorful
- Muted
- Dramatic
A filter doesn't automatically make every video better. The right choice depends on the original footage and the look you're trying to create.
How to Add Filters in CapCut on Android
Follow these steps to apply a filter to a video.
Step 1: Open CapCut
Launch CapCut on your Android phone.
From the home screen, start a new project.
Step 2: Import Your Video
Select the video you want to edit from your device.
Add it to the project timeline.
Once the video has loaded, you'll see the footage in the preview area and the clip on the timeline.
Step 3: Select the Video Clip
Tap the video clip on the timeline.
Selecting the clip gives you access to its editing controls.
If you have multiple clips, make sure you select the clip you want to edit.
Step 4: Open Filters
Look through the editing toolbar for Filters.
Tap Filters to open CapCut's available filter library.
CapCut organizes filters into different styles or categories, and the available options can vary depending on the current version of the app.
Step 5: Preview Different Filters
Tap different filters to preview how they change your video.
Don't immediately choose the first filter you see.
Compare several options and look at:
- Skin tones
- Sky colors
- Shadows
- Highlights
- Background colors
- Overall contrast
- Saturation
- Detail
A filter that looks attractive on one scene may not work well on another.
Step 6: Adjust Filter Intensity
After selecting a filter, look for the intensity control.
Use the slider to make the filter stronger or weaker.
A lower intensity can produce a more natural result.
A higher intensity creates a more noticeable visual change.
For many videos, reducing the strength of a strong filter can produce a cleaner result than applying it at maximum intensity.
Step 7: Preview the Entire Video
Play the video from beginning to end.
Check whether the filter works consistently across different scenes.
If the video contains several lighting conditions, a filter that looks good in one section may make another section too dark, bright, warm, or saturated.
Step 8: Export the Video
When you're satisfied with the result, tap Export.
Choose the available resolution and frame-rate settings that suit your project.
Wait for CapCut to process the video.
Your filtered video can then be saved or shared.
How to Change a Filter in CapCut
If you don't like the filter you selected, you don't need to start the project again.
Open the Filters controls and preview another option.
Select the new filter and adjust its intensity.
Always compare the new result with the original footage before deciding which look works better.
How to Remove a Filter in CapCut
If you decide that you don't want a filter, open the filter controls and look for the option to remove or reset the applied filter.
You can then return to the original appearance of the footage.
If you have already made additional adjustments, check the preview carefully after removing the filter because other editing changes may still remain.
How to Reduce Filter Strength
Sometimes a filter looks good but is simply too strong.
Instead of removing it completely, reduce its intensity.
For example, if a filter makes skin tones look overly orange, lowering the intensity can preserve some of the filter's color character while keeping the video more natural.
This is often useful for:
- Portrait videos
- Travel footage
- Food videos
- Outdoor videos
- Talking-head videos
- Product videos
How to Apply a Filter to a Video Clip
If your project contains only one main clip, applying a filter is straightforward.
Select the clip, open Filters, choose the desired look, adjust the intensity, and preview the result.
The filter should affect the selected footage according to CapCut's current editing workflow.
How to Apply a Filter to Multiple Clips
If your project contains several clips, you may want them to have a consistent appearance.
Depending on the current CapCut interface and editing options available, you can apply the same visual treatment to multiple clips or repeat the filter settings across the relevant clips.
Before doing this, compare the original lighting of each clip.
A filter that works well on an outdoor shot may look too dark on an indoor clip.
For a multi-clip project, consistency is usually more important than forcing every clip to look identical.
How to Use Filters for Different Types of Videos
Different video subjects can benefit from different visual styles.
Travel Videos
A subtle filter can enhance landscapes, skies, buildings, and natural scenery.
Avoid excessive saturation if the original scene already has strong colors.
Food Videos
Warm and vibrant looks can make food appear more visually appealing.
However, avoid pushing colors so far that the food looks unnatural.
Portrait Videos
Be careful with strong filters on faces.
Check skin tones at 100% attention before exporting.
A filter that looks attractive on the background may produce unnatural skin colors.
Dance Videos
More noticeable colors can work well with energetic edits.
You can also coordinate the visual style with music, transitions, and effects.
Gaming Videos
A stronger visual style can help create a particular mood, especially when combined with other effects.
Product Videos
A more neutral filter may be preferable because accurate colors can matter when showing a product.
Filter vs Effect in CapCut
Filters and effects are related but they aren't exactly the same.
Filters
A filter generally changes the overall visual appearance of the footage.
It can alter the colors, mood, contrast, or overall tone.
Effects
Effects can add additional visual elements or changes to the video.
Depending on the effect, this might include animation, distortion, motion, particles, blur, or other visual changes.
CapCut provides both filters and effects, so choose the tool based on the result you want.
For more information about other visual editing techniques, see our guide on [how to blur a video in CapCut on Android].
Filters vs Manual Adjustments
Filters are presets.
Manual adjustments give you more direct control over individual image properties.
For example, manual adjustments can let you fine-tune things such as:
- Brightness
- Contrast
- Saturation
- Exposure
- Temperature
- Highlights
- Shadows
A useful workflow is to start with a filter and then make small manual corrections if needed.
This can be faster than building a look entirely from scratch.
How to Make a Video Look Cinematic With Filters
A filter alone doesn't automatically make a video cinematic.
You can start with a suitable filter and then evaluate:
- Contrast
- Color temperature
- Saturation
- Exposure
- Highlights
- Shadows
- Framing
- Motion
- Music
The goal is to create a consistent visual mood rather than simply choosing the strongest cinematic-looking preset.
If the filter makes the footage extremely dark or saturated, reduce its intensity.
How to Make a Video Look Vintage
Vintage-style filters can give modern footage a more old-fashioned appearance.
Depending on the available filter library, you may find styles that introduce muted colors, warmer tones, faded contrast, or other characteristics associated with older footage.
For a convincing result, keep the effect controlled.
Adding too many effects at once can make the video look artificial.
How to Make Colors More Vibrant
If your original footage looks dull, you can experiment with a more colorful filter.
After applying it, check the most colorful objects in the scene.
Watch for:
- Oversaturated skin
- Extremely bright skies
- Clipped highlights
- Unnatural greens
- Excessively strong reds
If the colors become too intense, reduce the filter strength.
How to Use Filters on Short Videos
Filters can be particularly useful for short-form content because they allow you to establish a visual style quickly.
For a Reel or Short:
- Import the video.
- Select the clip.
- Open Filters.
- Preview several options.
- Choose a suitable filter.
- Adjust its intensity.
- Preview the entire video.
- Export.
Try to maintain a consistent visual style if your video contains multiple scenes.
How to Combine Filters With Text
Filters can be combined with text overlays.
For example, you might apply a subtle filter to the video and then add:
- A title
- A location
- A person's name
- A tutorial instruction
- A short caption
See our guide on [how to add text in CapCut on Android] for more information.
Make sure the filter doesn't reduce the contrast between the text and its background.
How to Combine Filters With Music
A filter can establish the visual mood while music establishes the audio mood.
For example:
- Travel footage + calm music + warm filter
- Fast dance edit + energetic music + vibrant filter
- Cinematic footage + dramatic music + muted color treatment
You can add music separately and synchronize your visual editing with the audio.
See our guide on [how to add music to a video in CapCut on Android].
How to Use Filters With Transitions
If your project contains multiple clips, filters and transitions can work together.
For example, you might use a consistent filter across several clips and transitions between them.
This can make the project feel more cohesive.
See our guide on [how to add transitions in CapCut on Android].
How to Use a Filter on an Overlay
If your project contains an overlay, check which layer is selected before applying visual changes.
This is important because editing controls can affect different layers depending on what you've selected.
For more information about working with additional video layers, see [how to add overlays in CapCut on Android].
Common Problems With CapCut Filters
I can't find the Filters option
First select the video clip on the timeline.
Then look through the current editing toolbar for Filters.
CapCut's interface can change between versions, so the location may differ from older tutorials.
The filter isn't changing my video
Make sure you have selected the correct clip.
Then check the filter intensity.
If the intensity is very low, the visual change may be subtle.
The filter is too strong
Reduce the intensity using the available adjustment control.
A filter doesn't have to be used at maximum strength.
My skin looks unnatural after applying a filter
This can happen when a filter changes skin tones too aggressively.
Try reducing the filter intensity or choosing a different filter.
The filter looks good in one scene but bad in another
Different lighting conditions can react differently to the same filter.
Consider using a more neutral filter or adjusting individual clips separately.
My video looks too dark after applying a filter
Try lowering the filter intensity.
You can also review the video's brightness or other adjustment settings if necessary.
My colors look oversaturated
Reduce the filter intensity or choose a more subtle filter.
If you've also increased saturation manually, review those settings as well.
The filter disappears from part of the video
Check the filter's duration or the selected clip.
Some visual adjustments may apply only to a particular section of the timeline.
Make sure the filter covers the section where you want it to appear.
Tips for Choosing the Right CapCut Filter
Start with a subtle filter
A subtle filter is easier to build on than an extremely strong one.
Check skin tones
Faces are often one of the easiest ways to detect an unnatural color change.
Compare with the original
Temporarily compare the filtered version with the original footage.
If the filter makes the video worse, choose another option.
Consider lighting
Indoor, outdoor, daylight, and nighttime footage can require different treatments.
Match your content
A filter should support the subject and mood of your video.
Keep your style consistent
If you're creating a multi-clip video, avoid switching between dramatically different visual styles without a reason.
Frequently Asked Questions
Can I add filters in CapCut on Android?
Yes. CapCut's Android/mobile editor includes video filters that can be applied to imported footage.
Are CapCut filters free?
CapCut provides a selection of filters that can be used in its editor. The available library and which features require additional access can change between versions and regions.
Can I adjust filter intensity?
Yes. CapCut provides an intensity adjustment for filters where supported, allowing you to make the visual effect stronger or weaker.
Can I remove a filter after applying it?
Yes. You can change or remove the applied filter through the filter controls.
Can I use filters on multiple clips?
Yes, depending on the current editing controls and workflow, you can apply consistent visual treatments across multiple clips. Check each clip individually because different lighting can produce different results.
Do filters reduce video quality?
A filter changes the appearance of the video, but the final exported quality also depends on the source footage and export settings.
What is the difference between a filter and an effect?
A filter generally changes the overall visual appearance, while an effect can add or modify visual elements in more specific ways.
Can I add text after applying a filter?
Yes. You can combine filters with text, overlays, music, transitions, and other editing tools.
Can I use filters for Instagram Reels?
Yes. Filters can be used as part of a CapCut project intended for short-form platforms such as Instagram Reels.
Can I use filters for YouTube Shorts?
Yes. You can apply filters to footage before exporting a video for YouTube Shorts.
Final Thoughts
Adding a filter in CapCut on Android is a quick way to change the visual style of your footage.
The basic process is:
- Open CapCut.
- Create a new project.
- Import your video.
- Select the clip.
- Open Filters.
- Preview different styles.
- Choose a filter.
- Adjust its intensity.
- Preview the complete video.
- Export the finished project.
The strongest results usually come from using filters with some restraint. Instead of automatically choosing the most dramatic preset, compare several options and choose the one that works with your footage, lighting, and subject.
If you're building a complete CapCut editing workflow, you can combine filters with text, music, transitions, overlays, and other tools to create a consistent visual style.
Related Articles

How to Fix CapCut Video Lagging After Export on Android
Fix CapCut video lagging after export on Android. Learn how to troubleshoot choppy playback, frame-rate mismatches, heavy effects, storage issues, and export settings.
GetApkFree Team

How to Fix CapCut Preview Not Matching Export on Android
Fix CapCut preview not matching the exported video on Android. Troubleshoot missing effects, text, transitions, timing, colors, and rendering differences.
GetApkFree Team

How to Fix Couldn't Apply AI Background in CapCut on Android
Getting "Couldn't Apply AI Background" in CapCut on Android? Check usage limits, clip selection, video quality, app updates, and practical troubleshooting steps.
GetApkFree Team

How to Fix CapCut Effects Not Applying on Android
CapCut effects not working on Android? Check clip selection, effect layers, timeline timing, conflicting adjustments, and app performance with these practical fixes.
GetApkFree Team