
This article is about
CapCut Premium
capcutdownload.com.pk · Tools
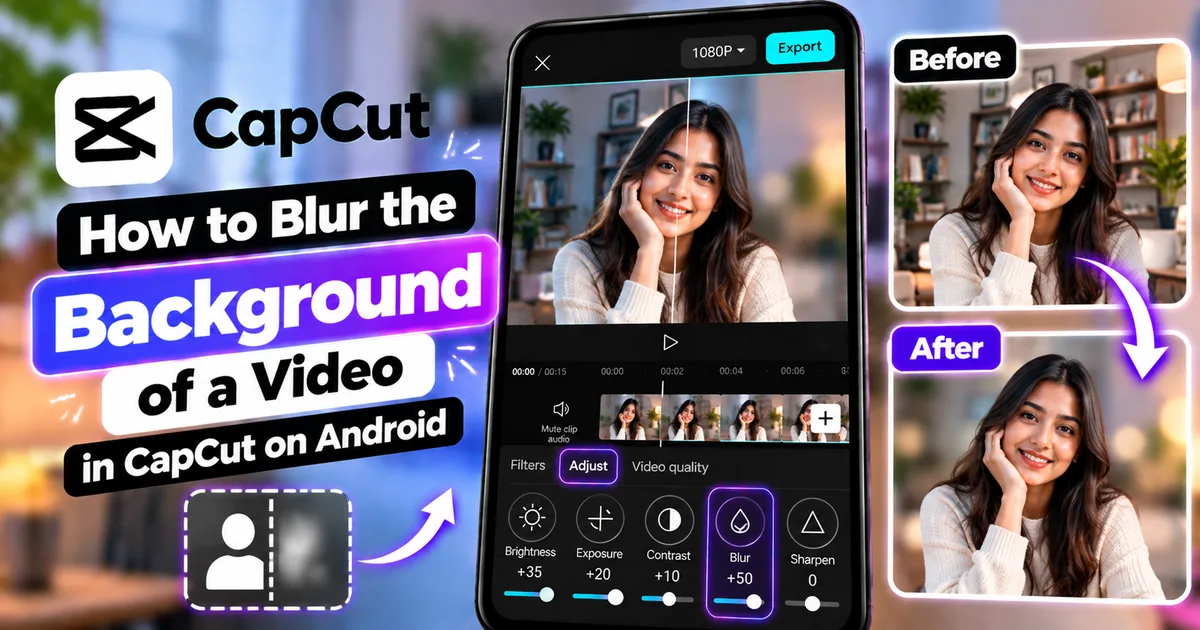
How to Blur the Background of a Video in CapCut on Android
GetApkFree Team
Learn how to blur the background of a video in CapCut on Android while keeping the main subject clear. Follow the steps to create a clean background blur or bokeh-style effect.
- Source
- Developer
- Package
- CapCut Premium
How to Blur the Background of a Video in CapCut on Android
Want to make the background of a video blurry while keeping the main subject sharp?
A blurred background can make a person, product, or other subject stand out more clearly. It can also help reduce distracting details in the background and create a softer, more cinematic appearance.
CapCut on Android can create this type of effect by combining video layers, blur effects, and background-removal tools. The basic idea is to create one blurred version of the video as the background and place a version with the subject separated from its background above it.
This technique can be useful for talking-head videos, product demonstrations, tutorials, interviews, travel videos, short-form content, and other projects where you want more visual focus on the subject.
In this guide, you'll learn how to blur the background of a video in CapCut on Android, keep the subject sharp, control the blur intensity, create a portrait-style effect, fix common problems, and make the result look more natural.
Quick Answer
To blur the background of a video in CapCut on Android:
- Open CapCut and create a new project.
- Import your video.
- Apply a blur effect to the original video.
- Add the same original video as an overlay.
- Align the overlay with the blurred background.
- Select the overlay and use Remove BG.
- Let CapCut separate the main subject from the background.
- Adjust the blur intensity on the background layer.
- Preview the result.
- Export the finished video.
The result should show a sharp subject in front of a blurred version of the background.
What Is a Background Blur Effect?
A background blur effect makes the area behind the main subject appear softer or less detailed while keeping the subject more visible.
For example:
Normal video:
Person + detailed background
Background blur:
Sharp person + soft background
This creates visual separation between the subject and the surroundings.
The technique is similar to the shallow-depth-of-field appearance produced by some cameras, although a software blur is created digitally rather than optically.
Why Blur the Background of a Video?
Background blur can be useful for several reasons.
Make the Subject Stand Out
A busy background can compete with the main subject.
Blurring it reduces visual distraction and directs attention toward the person or object you want viewers to notice.
Create a More Professional Look
A controlled background blur can give a video a polished appearance.
It can be particularly useful for:
- Vlogs
- Interviews
- Tutorials
- Product videos
- Presentations
- Short-form videos
- Talking-head videos
Hide Distracting Background Details
Sometimes the background contains objects that are not important to the video.
Blurring them can make the scene look cleaner without requiring you to remove every individual object.
Create a Cinematic Style
A softer background can create a visual style that resembles shallow depth of field.
The effect can make the subject appear more separated from the environment.
Reduce Attention on Background Information
A blurred background can also make text, objects, or other details behind the subject less prominent.
If the background contains sensitive information, however, don't rely on a blur effect alone unless you have carefully verified that the information is no longer readable.
How Does CapCut Background Blur Work?
The basic technique uses multiple layers.
Imagine the project like this:
Top layer: Sharp subject
Bottom layer: Blurred video
The bottom layer contains the full video with the blur effect.
The top layer contains the same video, but the background has been removed so only the subject remains visible.
The viewer therefore sees:
Sharp subject + blurred background
This layered approach gives you much more control than simply applying blur to the entire video.
How to Blur the Background of a Video in CapCut on Android
Step 1: Open CapCut
Launch CapCut on your Android phone.
Start a new project.
Choose the video you want to edit from your device and add it to the timeline.
Choose footage where the main subject is reasonably visible.
Step 2: Check the Original Video
Before adding any effects, watch the original video.
Identify:
- Main subject
- Background
- Camera movement
- Subject movement
- Lighting
- Important background objects
This helps you decide how strong the blur should be.
Step 3: Apply a Blur Effect to the Main Video
Select the original video.
Open the available Effects controls and find a blur effect.
Apply the blur to the video.
The entire video may now appear blurred.
That is expected.
At this stage, the blurred video will become the background layer.
Step 4: Adjust the Blur Intensity
Adjust the available blur controls.
Start with a moderate amount of blur.
You don't necessarily need an extremely strong blur.
A subtle blur can sometimes look more natural than a heavily blurred background.
Preview the result while adjusting the intensity.
Step 5: Add the Original Video as an Overlay
Now add the original, unblurred video again as an overlay.
Use:
Overlay → Add overlay
Select the same original video.
You now have two versions of the footage:
Bottom: Blurred video
Top: Original video
Step 6: Align the Overlay
The overlay needs to line up exactly with the blurred background.
Resize and position the overlay so it matches the original frame.
If the two layers are not aligned, you may see unwanted edges or a double-image effect.
Take your time with this step.
Step 7: Select the Overlay
Tap the top video layer.
Make sure you are editing the overlay rather than the blurred background layer.
The editing controls should now apply to the upper layer.
Step 8: Open Remove BG
Look for the Remove BG option.
Depending on your CapCut version, you may see options such as automatic background removal or other background-removal methods.
For a normal video containing a clearly visible person, automatic removal can be the easiest place to start.
Step 9: Let CapCut Remove the Background
Choose the appropriate automatic background-removal option.
CapCut processes the video and attempts to separate the subject from the background.
When the process finishes, the upper layer should contain the subject while the blurred video remains visible underneath.
Step 10: Preview the Result
Play the video.
The expected result is:
Sharp subject
over
Blurred background
Look carefully around the subject's edges.
Check:
- Hair
- Hands
- Shoulders
- Clothing
- Moving objects
- Fine details
If the subject has been cut out incorrectly, try the available refinement controls.
How to Make the Background More Blurry
If the background does not look blurred enough, select the bottom video layer.
Adjust the blur intensity.
Increase it gradually.
Avoid immediately using maximum blur.
A very strong blur can make the effect look artificial and can create a large visual difference between the subject and background.
A good starting point is to increase the blur until background details are no longer distracting.
How to Create a Bokeh-Style Background in CapCut
A bokeh-style effect attempts to make the background appear softly out of focus while the subject remains sharp.
The same basic layering technique can be used:
- Duplicate the video.
- Blur the bottom layer.
- Keep the subject visible on the top layer.
- Remove the top layer's background.
- Adjust the blur strength.
- Preview the result.
You can also experiment with available blur or light effects to create a softer background appearance.
However, software blur will not always look identical to optical lens bokeh.
How to Blur the Background Behind a Person
The easiest example is a talking-head video.
Imagine someone standing in front of a room.
Without blur:
Person + furniture + walls + objects
With background blur:
Sharp person + soft room
To create this effect:
- Import the video.
- Blur the base layer.
- Add the original video as an overlay.
- Use Remove BG on the overlay.
- Keep the person visible.
- Adjust the background blur.
- Preview the edges.
This can work particularly well when the person is clearly separated from the background.
How to Blur the Background of a Talking-Head Video
Talking-head videos are ideal for this effect.
For example, you might be recording:
- A tutorial
- A presentation
- A YouTube video
- A review
- An educational explanation
- A social-media video
Keep the person's face and upper body sharp.
Apply the blur primarily to the background.
Don't make the blur so strong that the background becomes completely unrecognizable unless that is the style you want.
How to Blur the Background of a Product Video
Background blur can also help emphasize a product.
For example:
Sharp: Smartphone
Blurred: Room behind the smartphone
This can make the product more visually prominent.
Make sure the background-removal process doesn't remove parts of the product.
Check the edges carefully, especially when the product has:
- Transparent sections
- Thin edges
- Reflective surfaces
- Similar colors to the background
- Small details
How to Blur the Background of a Travel Video
You can use background blur in travel content when you want attention focused on a person.
For example, if someone is standing in front of a scenic location, a moderate blur can keep the person visually prominent while preserving some sense of the location.
However, don't blur the background heavily if the destination itself is the main reason viewers are watching.
Use the effect according to the purpose of the shot.
How to Blur the Background of a Vertical Video
Vertical videos are commonly used for short-form content.
The same layering approach can be used with vertical footage.
When editing:
- Keep the project in the desired vertical format.
- Import the original video.
- Create the blurred background.
- Add the original as an overlay.
- Remove the overlay background.
- Adjust the subject position.
- Preview the complete frame.
Check the edges carefully because vertical footage can make the subject occupy a large percentage of the screen.
How to Blur Only the Background and Keep the Person Sharp
This is the main purpose of the layered technique.
The bottom layer is blurred.
The top layer contains the isolated subject.
The important part is making sure the top layer's background is removed correctly.
If background removal is inaccurate, parts of the background may remain sharp.
If that happens, inspect the subject edges and use available background-removal refinement tools where supported.
How to Blur the Background Without Blurring the Person
Simply applying a blur effect to the entire video will blur the person too.
Instead, use the layered method:
Bottom layer → Blur
Top layer → Remove background
This allows the subject to remain sharp while the background is softened.
The technique is especially useful for people-centered videos.
How Strong Should the Background Blur Be?
There is no universal blur value.
The correct amount depends on:
- Video resolution
- Camera distance
- Background detail
- Subject size
- Lighting
- Camera movement
- Desired style
A subtle blur can look realistic.
A stronger blur can produce a more obvious creative effect.
Start moderately and increase the intensity until the background stops competing with the subject.
How to Make Background Blur Look Natural
A natural-looking background blur requires more than simply increasing the blur slider.
Keep the Subject Sharp
The subject should generally have noticeably more detail than the background.
Avoid Excessive Blur
Extreme blur can make the background look artificial.
Watch the Subject Edges
Hair and hands are common areas where automatic background removal can struggle.
Match the Layers Precisely
Misaligned layers can create ghosting or unwanted outlines.
Keep the Blur Consistent
If the background blur changes unexpectedly, check the underlying layer and effect settings.
Consider Camera Movement
Fast camera movement can make background separation more difficult.
How to Blur a Moving Person's Background
Moving subjects are more challenging than stationary subjects.
As the person moves:
- Hair moves
- Hands move
- Arms cross the body
- The subject changes position
- Background details become visible around the edges
Preview the entire clip rather than checking only the first frame.
If the background-removal result becomes inaccurate during movement, use the available refinement options or consider dividing the video into smaller sections.
How to Blur the Background in a Video With Multiple People
If multiple people are visible, automatic background removal may identify the subjects differently depending on the footage and CapCut version.
Decide what you want to keep sharp.
If the purpose is to keep everyone in focus, make sure the background-removal result includes all relevant subjects.
If only one person should remain sharp, check whether the current background-removal controls allow the desired selection.
Always preview the complete video before exporting.
How to Blur a Background When the Subject Has Hair
Hair can be one of the most difficult areas for automatic subject separation.
Fine strands can blend into the background.
After applying background removal, zoom in and check:
- Hair edges
- Loose strands
- Hats
- Glasses
- Earrings
- Shoulders
If the edges look unnatural, try the available refinement controls.
A slightly softer separation can sometimes look better than an aggressive cutout.
How to Blur the Background When the Subject Is Moving Fast
Fast movement can make background separation more difficult.
For example:
- Dancing
- Running
- Sports
- Hand gestures
- Fast camera movement
In these situations, preview the video frame by frame if necessary.
Look for moments where the subject's edges become incorrect.
If one continuous correction does not work well, consider splitting the video into sections and correcting those sections separately.
Background Blur vs Regular Blur in CapCut
These are not exactly the same thing.
Regular Blur
A regular blur effect can blur the entire video or a selected region.
Background Blur
Background blur aims to keep the main subject relatively sharp while softening the surrounding background.
The background-blur technique therefore usually requires some form of subject separation.
For example:
Regular blur:
Person + background → blurred
Background blur:
Person → sharp
Background → blurred
Background Blur vs Background Removal
Background removal completely separates the subject from the background.
Background blur keeps the background visible but makes it softer.
They can be combined.
For example:
Bottom layer: Original video + blur
Top layer: Original video + background removed
This combination creates the background-blur effect.
Background Blur vs Masking
Masking controls which portion of a layer is visible.
Background removal attempts to separate a subject from its surroundings.
Both techniques can be used for advanced editing.
A mask can be useful when you want precise control over a particular shape or region.
Background removal can be more convenient when you want to isolate a person or object.
How to Blur a Specific Background Area
Sometimes you don't want to blur the entire background.
You may only want to soften one area.
For example:
- A distracting sign
- A private document
- A background screen
- A license plate
- A person in the distance
In that situation, a localized blur and masking workflow may be more appropriate than full background blur.
Select the appropriate blur effect and use available masking tools to limit where it appears.
How to Fix Background Blur That Looks Like a Cutout
If the subject looks like a sticker placed over the background, check the separation between the two layers.
Possible causes include:
- Incorrect alignment
- Excessive blur
- Hard subject edges
- Poor background removal
- Different scaling between layers
Try aligning the layers again.
Then adjust the blur intensity and inspect the subject edges.
How to Fix a Halo Around the Subject
A visible halo can appear around the subject when background removal leaves some pixels from the original background.
This is particularly noticeable around:
- Hair
- Shoulders
- Bright clothing
- High-contrast edges
Try the available background-removal refinement controls.
If the problem remains, reduce the visual strength of the effect or use a different clip if the original footage makes clean separation difficult.
How to Fix Background Blur Flickering
If the background appears to change or flicker while the person moves, the subject separation may not remain consistent throughout the clip.
Check the video at several points.
If the problem is limited to a particular section, you can consider splitting the footage and adjusting that section separately.
Also check whether the original footage itself contains lighting changes or camera movement that could make the effect appear inconsistent.
How to Fix the Subject Becoming Blurry
If the subject is blurry too, check the layer order.
The sharp subject should come from the upper layer.
The blurred video should remain underneath.
Also make sure the upper layer has been processed correctly with background removal.
If the upper layer itself has a blur effect applied, remove or adjust it.
How to Fix the Background Not Being Blurred
If the background still looks sharp:
- Select the bottom video layer.
- Check that the blur effect is applied.
- Increase the blur intensity gradually.
- Make sure the sharp overlay is aligned correctly.
- Preview the entire video.
If the sharp overlay still contains its original background, the background-removal step may not have been applied correctly.
How to Keep the Background Slightly Blurred
For a subtle cinematic appearance, don't maximize the blur.
Use a lower intensity.
The background should remain recognizable but less distracting.
This can work particularly well for:
- Interviews
- Vlogs
- Product videos
- Tutorials
- Presentations
Can You Blur a Video Background for Reels and Shorts?
Yes.
The effect can be used in vertical short-form videos.
Keep the subject large enough to remain visible on a phone screen.
A strong background blur can help separate a talking subject from a busy environment.
However, the effect should support the content rather than becoming the main attraction.
Can You Blur the Background of a Video Without a Green Screen?
Yes.
CapCut's background-removal workflow can separate a subject without requiring a traditional green screen when the footage is suitable.
The quality of the result depends on factors such as:
- Subject/background contrast
- Lighting
- Motion
- Hair and fine details
- Video quality
- Background complexity
A green-screen setup can still provide more controlled conditions for certain types of production.
Can You Blur the Background of a Video for Privacy?
Background blur can reduce the visibility of background details, but it should not automatically be treated as a guaranteed privacy solution.
If sensitive information is visible, inspect the exported video carefully.
For highly sensitive information, use a stronger and more deliberate redaction method and verify that the underlying information cannot be read.
Common Problems When Blurring a Video Background
The Entire Video Is Blurry
You probably applied the blur only to the original layer.
Add the original video as an overlay and remove its background.
The Person Is Also Blurry
Check the top layer.
The subject should come from the sharp overlay.
The Background Is Still Sharp
Check the bottom layer and make sure the blur effect is actually applied.
The Subject Has Jagged Edges
Background removal may be struggling with the subject.
Try refining the removal or using footage with clearer separation between the subject and background.
The Hair Looks Strange
Fine hair strands can be difficult to isolate.
Check the hair edges carefully and use available refinement tools.
The Subject Has a White or Dark Outline
This can happen when background pixels remain around the subject.
Inspect the background-removal result and adjust it if possible.
The Background Flickers
The subject separation may be changing between frames.
Check the affected section and consider splitting the video if necessary.
The Effect Looks Too Strong
Reduce the blur intensity.
A subtle effect often looks more natural.
The Background Blur Looks Fake
The blur may be too strong, the subject edge may be too sharp, or the layers may not be aligned correctly.
Reduce the blur and check the alignment.
Tips for Better Background Blur
Use Good Source Footage
Clear footage with good lighting usually produces better subject separation.
Choose a Simple Background
A subject that clearly contrasts with the background is generally easier to separate.
Avoid Excessive Blur
A moderate blur can look more realistic.
Check Hair and Hands
These areas can reveal background-removal problems.
Align Your Layers Carefully
Even a small misalignment can create visible ghosting.
Preview the Entire Video
Don't judge the effect from one frame.
Movement can change the result.
Export and Review the Final File
Always watch the exported video before publishing it.
Frequently Asked Questions
Can I blur the background of a video in CapCut on Android?
Yes. CapCut's mobile workflow can create a background-blur effect by combining a blurred video layer with an original overlay whose background has been removed.
How do I blur only the background in CapCut?
Blur the bottom video layer and place the original video above it as an overlay. Then remove the background from the upper layer so the sharp subject remains visible over the blurred layer.
Can CapCut blur a background automatically?
CapCut provides background-removal and blur tools that can be combined to create the effect. The exact tools and availability can vary by version and device.
Can I blur the background without blurring the person?
Yes. Use a separate sharp subject layer above the blurred background layer.
Can I blur the background of a talking-head video?
Yes. This is one of the most common uses for background blur.
Can I blur the background of a product video?
Yes. Background blur can help draw attention to the product while making the surrounding environment less distracting.
Can I create a bokeh effect in CapCut?
You can create a software-based bokeh-style appearance by separating the subject from a blurred background and adjusting the visual effect.
Why is my subject blurry after adding background blur?
Check the layer order. The sharp subject should be provided by the upper layer, while the blurred video should be underneath.
Why does my subject have a strange outline?
The background-removal process may have retained some pixels from the original background. Check the available refinement controls and inspect the subject edges.
Why does the background blur flicker?
The subject separation may change from frame to frame, especially when the subject moves quickly or has complex edges.
Can I blur a moving person's background?
Yes, although moving subjects can be more difficult to separate cleanly. Always preview the entire clip.
Can I blur the background of a vertical video?
Yes. The same general layering technique can be used with vertical footage.
Can I blur just one part of the background?
Yes. For localized blur, you can use blur effects together with masking or other available editing tools.
Is background blur the same as the Blur effect?
No. A normal blur can affect the entire video or a selected area. Background blur is designed to keep the main subject sharper while softening the background.
Does background blur reduce video quality?
The blur itself is an editing effect. Final quality also depends on the original footage, project settings, and export settings.
Can I remove the background instead of blurring it?
Yes. CapCut also provides background-removal tools. Removing the background and blurring the original background are different editing results.
Final Thoughts
Blurring the background of a video in CapCut on Android is a useful way to make the main subject stand out without completely removing the environment.
The most useful workflow is to create two layers: a blurred version of the full video underneath and the original video above it with the background removed.
Once the layers are aligned, you can adjust the blur intensity until the background becomes less distracting while the subject remains clear.
For the best results, start with good source footage, use moderate blur, check the subject edges carefully, and preview the entire video before exporting.
Remember that automatic background removal is not perfect in every situation. Hair, fast movement, similar colors, poor lighting, and complicated backgrounds can make separation more difficult.
With careful alignment and moderate adjustments, however, CapCut can create a clean background-blur effect suitable for tutorials, vlogs, product videos, interviews, Reels, Shorts, and many other types of content.
Related Articles

How to Fix CapCut Video Lagging After Export on Android
Fix CapCut video lagging after export on Android. Learn how to troubleshoot choppy playback, frame-rate mismatches, heavy effects, storage issues, and export settings.
GetApkFree Team

How to Fix CapCut Preview Not Matching Export on Android
Fix CapCut preview not matching the exported video on Android. Troubleshoot missing effects, text, transitions, timing, colors, and rendering differences.
GetApkFree Team

How to Fix Couldn't Apply AI Background in CapCut on Android
Getting "Couldn't Apply AI Background" in CapCut on Android? Check usage limits, clip selection, video quality, app updates, and practical troubleshooting steps.
GetApkFree Team

How to Fix CapCut Effects Not Applying on Android
CapCut effects not working on Android? Check clip selection, effect layers, timeline timing, conflicting adjustments, and app performance with these practical fixes.
GetApkFree Team