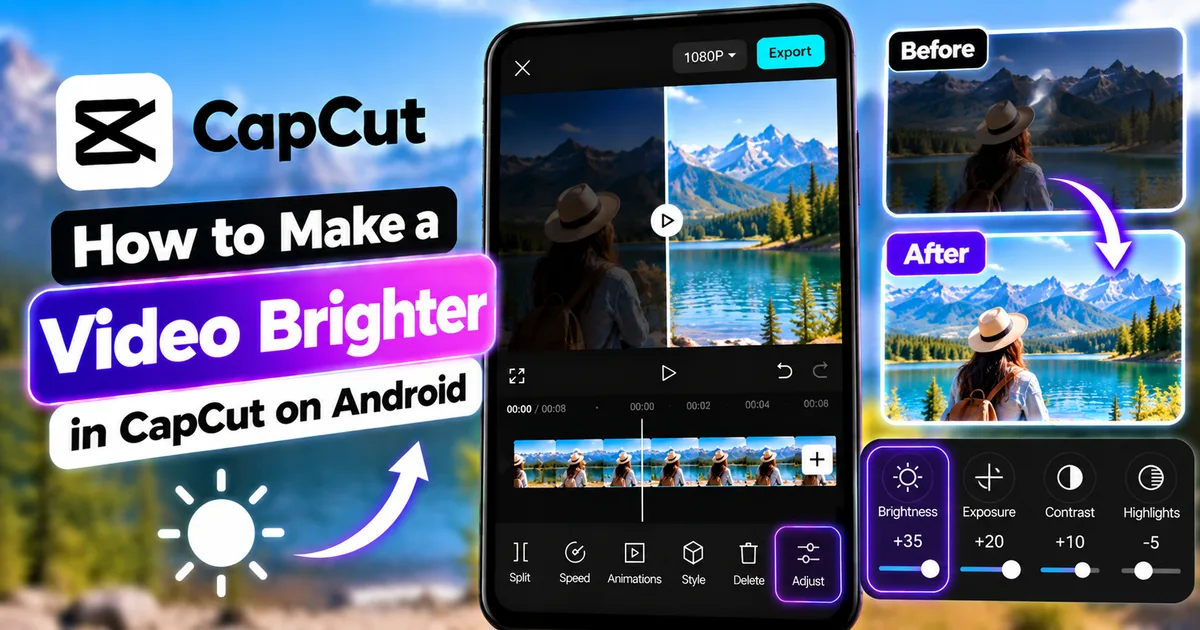

This article is about
CapCut Premium
capcutdownload.com.pk · Tools
How to Make a Video Brighter in CapCut on Android
GetApkFree Team
Learn how to make a dark video brighter in CapCut on Android. Adjust brightness, exposure, contrast, shadows, highlights, and other settings without overexposing your footage.
- Source
- Developer
- Package
- CapCut Premium
How to Make a Video Brighter in CapCut on Android
Have you recorded a video that looks too dark, underexposed, or difficult to see?
You don't necessarily need to record it again. If the original footage contains enough visible detail, you can often improve its appearance by adjusting brightness, exposure, contrast, shadows, and other color controls.
CapCut on Android includes adjustment tools that can be used to change the appearance of video footage. The exact controls and interface can vary between CapCut versions, but the general workflow is to select the video clip, open the available adjustment controls, and fine-tune the image until it looks brighter and more balanced.
In this guide, you'll learn how to make a dark video brighter in CapCut on Android, how brightness differs from exposure and contrast, how to brighten shadows without washing out highlights, how to fix an extremely dark video, and how to avoid making your footage look unnatural.
Quick Answer
To make a video brighter in CapCut on Android:
- Open CapCut.
- Create a new project.
- Import your dark video.
- Select the video clip on the timeline.
- Open Adjust.
- Increase Brightness or Exposure gradually.
- Adjust Contrast if necessary.
- Raise Shadows when dark areas need more detail.
- Reduce or adjust Highlights if bright areas become too strong.
- Preview the entire video.
- Export when the result looks natural.
Start with small adjustments rather than moving every slider to a high value.
Why Does a Video Look Dark?
A video can look dark for several reasons.
The camera may have recorded the scene with insufficient light. The subject may have been standing in front of a bright background. The camera's exposure may have been too low, or the original scene itself may have been very dark.
Common examples include:
- Night videos
- Indoor videos
- Videos recorded in poorly lit rooms
- Backlit subjects
- Videos recorded under cloudy conditions
- Concert footage
- Videos shot inside vehicles
- Dark gaming recordings
- Videos with strong shadows
- Footage recorded with incorrect camera exposure
Editing can improve the appearance of some dark footage, but it cannot always recover detail that was never captured by the camera.
If a completely black area contains no recorded information, increasing brightness may make it gray or noisy rather than restoring the missing details.
What Does Brightness Do in CapCut?
Brightness generally changes how light or dark the overall image appears.
Increasing brightness can make the entire video appear lighter.
For example:
Original: Dark footage
Higher brightness: Lighter footage
However, increasing brightness too much can make bright areas look washed out.
That's why brightness should normally be adjusted while watching the entire image rather than simply pushing the slider as far as possible.
Brightness vs Exposure in CapCut
Brightness and exposure are related, but they are not necessarily identical controls.
Brightness
Brightness is useful when you want to make the overall image lighter or darker.
Exposure
Exposure is associated with the overall amount of light in the image and can have a stronger effect on the tonal range.
If your version of CapCut provides both controls, make a small adjustment to one and then evaluate the result before changing the other.
You don't necessarily need to maximize both.
Brightness vs Contrast
Brightness changes the overall lightness of the image.
Contrast changes the difference between darker and lighter areas.
For example, if you increase brightness substantially, the video may become lighter but lose some visual depth.
Adding or adjusting contrast afterward can help restore separation between light and dark areas.
The goal is balance.
A brighter video is not automatically a better video.
How to Make a Video Brighter in CapCut on Android
Step 1: Open CapCut
Launch CapCut on your Android phone.
Start a new project.
If you already have a project containing the footage, you can open that project instead.
Step 2: Import the Dark Video
Tap New Project and select the video you want to brighten.
Add the video to the timeline.
The video will appear in the main editing area.
Step 3: Select the Video Clip
Tap the video clip on the timeline.
This makes the clip active and displays the editing controls associated with it.
If you have multiple clips, make sure you select the specific clip that needs brightness correction.
Step 4: Open Adjust
Look through the editing controls for Adjust.
CapCut's current mobile guidance places brightness and related controls within the adjustment workflow.
The exact position and available controls can change between app versions.
Step 5: Increase Brightness Gradually
Find the Brightness control if it is available.
Increase it slowly.
Don't immediately move the slider to the maximum.
Watch the preview as you make the adjustment.
Stop when the dark areas become easier to see without making the bright parts of the image look excessively pale.
Step 6: Adjust Exposure if Available
If your CapCut version provides an Exposure control, you can make a small adjustment after checking brightness.
Exposure can have a significant effect on the overall image.
Use small changes and compare the result with the original.
Step 7: Adjust Contrast
After brightening the footage, check its contrast.
A large brightness increase can make the image appear flat.
If the footage looks washed out, carefully adjust contrast to restore some separation between light and dark areas.
Don't increase contrast excessively.
Too much contrast can make shadows darker again and remove details.
Step 8: Raise Shadows When Necessary
If the main problem is that faces or objects disappear into dark areas, look for a Shadows adjustment if available.
Increasing shadows can help reveal detail in darker parts of the image without brightening the entire frame as aggressively as a global brightness adjustment.
For example, imagine a person standing inside a dim room.
The window behind them may already be bright, while their face is dark.
Increasing overall brightness may make the window even brighter.
A more controlled shadow adjustment may produce a better balance when the relevant control is available.
Step 9: Check Highlights
After brightening the footage, inspect the brightest parts.
Look at:
- Sky
- Windows
- Lamps
- White clothing
- Reflections
- Bright signs
- Light sources
If these areas become too bright, adjust the available highlight controls if your version provides them.
The objective is to make the dark parts easier to see without destroying the appearance of bright areas.
Step 10: Preview the Entire Video
Don't judge the adjustment from a single frame.
Watch the complete video.
Lighting can change during a recording.
A brightness setting that looks good indoors may look too bright when the camera moves outside.
Check the beginning, middle, and end of the video before exporting.
How to Fix a Very Dark Video in CapCut
If the footage is extremely dark, increasing brightness alone may not produce the best result.
Try a more controlled workflow.
Start With Brightness
Increase brightness moderately.
Check Exposure
If exposure is available, make a small adjustment.
Open Up the Shadows
If the main subject is hidden in dark areas, increase shadows when available.
Adjust Contrast
If the result looks flat, make a small contrast adjustment.
Check Highlights
Make sure bright areas are not becoming excessively white.
Compare With the Original
Temporarily compare the adjusted footage with the original.
This helps prevent over-editing.
How to Brighten a Dark Face in CapCut
Sometimes the entire video isn't dark.
Instead, the subject's face is underexposed.
For example, a person may be standing indoors near a bright window.
If you increase the overall brightness too much, the background can become extremely bright.
In this situation, a more localized editing approach may be better.
You can consider using layers, masks, or other available tools to control which portion of the footage receives the adjustment.
A simple global brightness adjustment is easier, but it affects the whole frame.
For more advanced localized editing, see our guide on masks in CapCut.
How to Brighten a Video Without Washing It Out
One of the most common problems with brightening footage is overexposure.
The video becomes lighter, but white areas lose detail.
To avoid this:
Make Small Changes
Increase brightness gradually.
Check Bright Areas
Look at skies, windows, lamps, and white objects.
Don't Max Out Every Slider
Brightness, exposure, contrast, and saturation do different things.
Increasing all of them at the same time can quickly create an unnatural image.
Compare Before and After
Always compare the corrected footage with the original.
The goal is improvement, not maximum brightness.
How to Brighten a Dark Video While Keeping Skin Tones Natural
Skin tones can become unnatural when brightness, saturation, or contrast is pushed too far.
When brightening a video containing people, pay particular attention to faces.
Watch for:
- Pale-looking skin
- Excessive orange tones
- Excessive red tones
- Loss of facial detail
- Overexposed highlights
Make brightness adjustments first.
Then evaluate the color.
If the image still looks unnatural, you may need to adjust other color controls rather than increasing brightness further.
How to Brighten a Night Video in CapCut
Night footage is naturally darker, so brightening it requires extra care.
Start with a small brightness or exposure adjustment.
Then inspect the shadows.
If raising shadows reveals useful detail, continue carefully.
However, dark footage can contain visible image noise.
When you brighten it, that noise may become more noticeable.
For night footage:
- Avoid extreme brightness
- Check dark areas for noise
- Watch bright lights carefully
- Preserve the nighttime mood when appropriate
- Compare the result with the original
A night video doesn't necessarily need to look like daytime.
How to Brighten an Indoor Video
Indoor videos can often benefit from moderate brightness adjustments.
Start by determining why the footage looks dark.
If the entire room is dark, brightness or exposure may help.
If the room is reasonably lit but the subject's face is dark, a more localized adjustment may be more appropriate.
Also check the color temperature if your version provides it.
Some indoor lighting can make footage appear unusually warm or cool.
How to Brighten a Backlit Video
Backlighting happens when a strong light source is behind the subject.
For example:
Camera → Person → Bright Window
The camera may expose for the bright window, leaving the person in shadow.
Increasing brightness may help, but it can also make the window extremely bright.
If your version of CapCut provides shadow and highlight controls, use them to balance the subject and background more carefully.
You can also consider using masking or other layer-based techniques when a localized correction is necessary.
How to Make a Video Look Brighter Without Increasing Saturation
Brightness and saturation are different.
Brightness controls lightness.
Saturation controls color intensity.
You don't need to increase saturation just because you're increasing brightness.
If the video looks dull after brightening, check the colors separately.
Increasing saturation too much can produce:
- Oversaturated skin
- Extremely bright greens
- Intense reds
- Artificial-looking skies
- Unnatural colors
Make color adjustments only when they are actually needed.
How to Make a Dark Video Look More Natural
A natural correction usually requires more than simply increasing one slider.
Try this general workflow:
- Start with the original footage.
- Increase brightness slightly.
- Check exposure.
- Open shadows if necessary.
- Adjust contrast carefully.
- Check highlights.
- Inspect skin tones.
- Check colors.
- Preview the entire video.
- Export only after reviewing the result.
This approach gives you more control than simply making the video as bright as possible.
How to Fix a Video That Looks Gray After Brightening
If a video becomes gray or flat after increasing brightness, the adjustment may have reduced the visual separation between light and dark areas.
Try checking contrast.
A small contrast adjustment may restore some depth.
However, don't automatically increase contrast dramatically.
Too much contrast can make the shadows extremely dark again.
Use the smallest adjustment that produces the desired result.
How to Make a Video Brighter and More Colorful
If the footage is both dark and dull, handle brightness first.
Then evaluate the color.
If the colors genuinely need more intensity, you can make a modest saturation adjustment.
A useful order is:
Brightness → Exposure → Shadows/Highlights → Contrast → Color
The exact order isn't mandatory, but separating these decisions makes it easier to see what each adjustment is doing.
If you want to use preset looks instead of manually adjusting colors, you can also explore CapCut's filter tools.
Brightness vs Filters in CapCut
Brightness adjustment and filters serve different purposes.
Brightness Adjustment
Brightness gives you direct control over how light or dark the footage appears.
It is useful when your main problem is exposure.
Filters
Filters apply a predefined visual style or group of adjustments.
They can change the overall mood of the video.
If your video is simply too dark, start with manual adjustments.
If you want a particular visual style after correcting the exposure, you can experiment with a filter.
See our guide on how to add filters in CapCut on Android for more information.
Brightness vs Video Quality Enhancement
Brightening a video and improving video quality are not exactly the same thing.
Brightness adjustments change the appearance of the footage.
Quality enhancement may involve additional processing intended to improve clarity or other visual characteristics.
If your footage is dark and blurry, increasing brightness alone won't necessarily make it sharper.
You may need a separate quality-enhancement workflow.
See our guide on how to improve video quality in CapCut on Android if the problem involves both exposure and image quality.
How to Apply Similar Brightness Adjustments to Multiple Clips
If your project contains several clips recorded under similar lighting, you may want them to have a consistent appearance.
Start by correcting one clip.
Then compare the other clips against it.
Depending on the CapCut version and available editing controls, you may be able to apply or copy adjustments between clips.
Even when a copy/apply function is available, check each clip individually.
Two clips recorded in different lighting conditions may require different corrections.
How to Match Brightness Between Two Videos
Suppose you are creating a video from two clips.
The first clip looks bright.
The second clip looks dark.
If you place them next to each other or cut directly from one to the other, the brightness difference can be distracting.
To improve consistency:
- Select the darker clip.
- Compare it with the brighter clip.
- Adjust brightness or exposure.
- Check contrast.
- Check shadows and highlights.
- Compare skin tones and major colors.
- Preview the transition between the clips.
The goal is not necessarily to make both clips mathematically identical.
The goal is to make the difference less distracting.
Common Problems When Making a Video Brighter in CapCut
The Video Is Still Too Dark
If brightness has already been increased but the video remains difficult to see, check exposure and shadows if those controls are available.
The original footage may also contain very little visible information.
Increasing brightness beyond a certain point may only reveal noise rather than useful detail.
The Video Became Too Bright
Reduce brightness or exposure.
Then check highlights.
If bright objects are losing detail, reduce the relevant highlight control if available.
The Video Looks Washed Out
A large brightness increase can reduce visual separation.
Check contrast and highlights.
Make smaller adjustments instead of trying to correct the image with one extreme setting.
The Video Looks Gray
If the image appears flat after brightening, check contrast.
A modest contrast adjustment can restore some separation between light and dark areas.
The Face Is Still Dark
If the overall video is bright but the face remains dark, a global brightness adjustment may not be enough.
Consider a more localized approach using available masking or layer tools.
Brightening Makes Noise More Visible
Dark footage often contains image noise.
When you increase brightness, that noise can become easier to see.
This is one reason to avoid extreme exposure adjustments.
The Colors Look Too Strong
Check saturation.
Brightness and saturation are separate controls.
You don't need to increase saturation simply because the video needs more light.
The Sky Became Completely White
The highlights may be overexposed.
Reduce the overall brightness or exposure and use highlight controls if available.
If the original sky was already overexposed, editing may not be able to restore missing detail.
The Adjustment Looks Good in One Scene but Bad in Another
The lighting may change during the video.
A single adjustment applied across the entire clip may not work equally well everywhere.
You may need to split the video into sections and adjust different sections separately.
I Can't Find the Adjust Option
Make sure you have selected the video clip rather than another timeline element.
CapCut's interface changes over time, so the exact location or name of a control can differ between versions.
If necessary, check the available clip-editing controls after selecting the footage.
Tips for Better Brightness Adjustments
Start With the Original Video
Keep an untouched copy of your footage.
This gives you a reference and lets you restart the correction if necessary.
Adjust One Control at a Time
If you change brightness, exposure, contrast, saturation, and temperature simultaneously, it becomes difficult to know which change caused a problem.
Make one adjustment and evaluate it.
Don't Chase Maximum Brightness
The objective is not to make every dark video bright.
The objective is to make the footage easier to see while preserving natural contrast and detail.
Protect Highlights
Pay special attention to bright areas after increasing exposure.
Check Skin Tones
When people are present, their faces are useful visual references.
Watch the Entire Video
Lighting can change throughout a clip.
Always check the complete result.
Check the Exported File
The exported video may look slightly different depending on the screen or playback environment.
Watch the final saved file before publishing it.
Frequently Asked Questions
How do I make a dark video brighter in CapCut on Android?
Import the video, select the clip, open the available Adjust controls, and increase brightness or exposure gradually. You can also adjust contrast, shadows, and highlights when those controls are available.
What is the best setting to brighten a dark video in CapCut?
There is no single brightness value that works for every video.
The correct adjustment depends on the original lighting, camera exposure, contrast, and amount of detail captured in the footage.
Can I brighten a video without making it look washed out?
Yes.
Use moderate brightness or exposure adjustments and check contrast, shadows, and highlights rather than maximizing the brightness slider.
Can CapCut fix an extremely dark video?
CapCut can improve the appearance of dark footage when useful image information was captured.
However, editing cannot fully restore details that were never recorded.
Why does my dark video become noisy when I brighten it?
Very dark footage can contain image noise that is difficult to see at its original brightness.
Increasing brightness can make that noise more visible.
Should I increase brightness or exposure?
Both can affect the overall lightness of the video, but they may behave differently.
Try a small adjustment and compare the result rather than automatically maximizing either control.
Should I increase contrast after increasing brightness?
Not always.
If the video becomes flat or washed out, a modest contrast adjustment may help restore depth.
If the footage already has strong contrast, increasing it further may make shadows too dark.
Can I brighten only one part of a video?
Yes, depending on the editing workflow and tools available in your version of CapCut.
You can use separate clips, layers, masks, or other localized editing techniques when you need more precise control.
Can I brighten a face without brightening the background?
A global brightness adjustment affects the whole frame.
For more localized corrections, you can explore masking and layered editing techniques to isolate the relevant area.
Why is my face dark but the background bright?
This commonly happens with backlighting.
The camera may have exposed for the bright background rather than the person.
A combination of brightness, exposure, shadow, and localized editing can help, depending on the footage.
Can I make a night video brighter?
Yes.
You can adjust brightness and exposure, and you may be able to raise shadows.
Be careful because excessive brightening can reveal noise and make the footage look unnatural.
Does brightening a video improve its quality?
Not necessarily.
Brightness changes exposure and appearance.
It does not automatically make a low-resolution or blurry video sharper.
Can I make a video brighter and more colorful?
Yes.
First correct the brightness and exposure.
Then evaluate saturation and other color controls separately.
Why does my video look gray after increasing brightness?
The brightness adjustment may have reduced the visual separation between light and dark areas.
Check contrast and make a modest adjustment if necessary.
Can filters make a dark video brighter?
Some filters may change the overall brightness and appearance of footage.
However, if your main problem is exposure, manual adjustment gives you more direct control.
Does CapCut have brightness adjustment on Android?
Yes. CapCut's current mobile guidance includes brightness/exposure adjustment through the clip's adjustment controls, although the exact interface can change between app versions.
Final Thoughts
Making a dark video brighter in CapCut on Android is usually straightforward, but getting a natural result requires more than simply increasing one slider.
Start by selecting the video and opening the available adjustment controls. Increase brightness or exposure gradually, then check contrast, shadows, and highlights. Pay special attention to faces, skies, windows, lamps, and other bright areas.
Remember that editing cannot recreate image detail that the camera never captured. If a portion of the original footage is completely black, extreme brightening may reveal noise rather than useful information.
For the best results, make small adjustments, compare the corrected footage with the original, preview the entire video, and check the exported file before publishing.
A good brightness correction should make the footage easier to see while still looking natural.
Related Articles

How to Fix CapCut Video Lagging After Export on Android
Fix CapCut video lagging after export on Android. Learn how to troubleshoot choppy playback, frame-rate mismatches, heavy effects, storage issues, and export settings.
GetApkFree Team

How to Fix CapCut Preview Not Matching Export on Android
Fix CapCut preview not matching the exported video on Android. Troubleshoot missing effects, text, transitions, timing, colors, and rendering differences.
GetApkFree Team

How to Fix Couldn't Apply AI Background in CapCut on Android
Getting "Couldn't Apply AI Background" in CapCut on Android? Check usage limits, clip selection, video quality, app updates, and practical troubleshooting steps.
GetApkFree Team

How to Fix CapCut Effects Not Applying on Android
CapCut effects not working on Android? Check clip selection, effect layers, timeline timing, conflicting adjustments, and app performance with these practical fixes.
GetApkFree Team