
This article is about
CapCut Premium
capcutdownload.com.pk · Tools
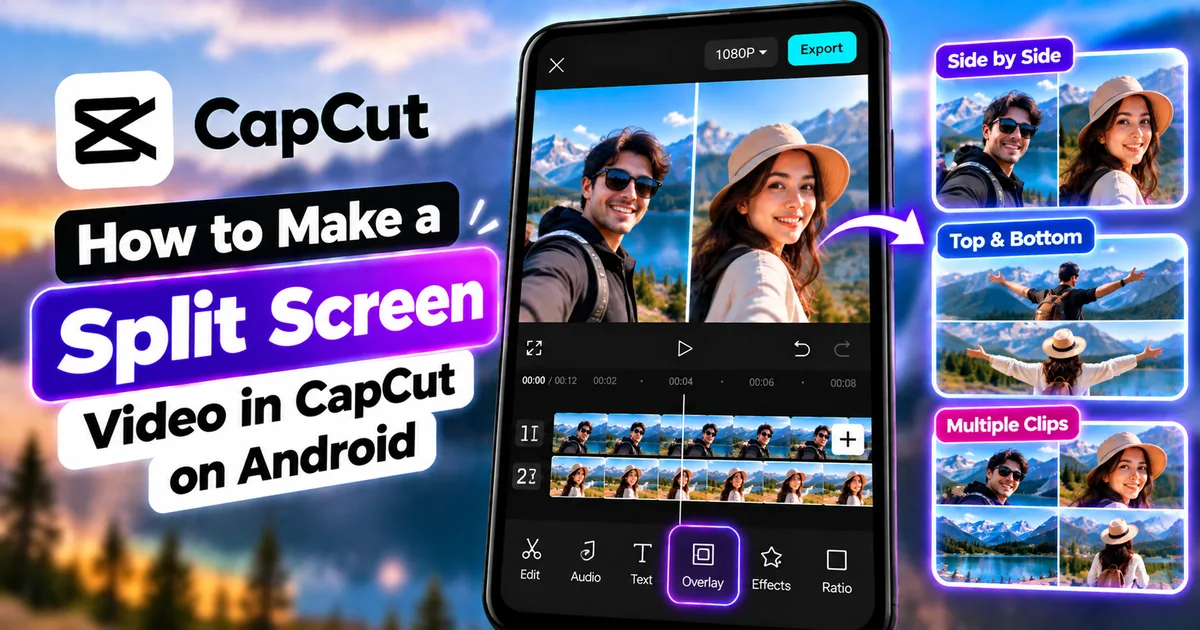
How to Make a Split Screen Video in CapCut on Android
GetApkFree Team
Learn how to make a split screen video in CapCut on Android, put two or more videos on one screen, align clips, resize layers, and create clean side-by-side layouts.
- Source
- Developer
- Package
- CapCut Premium
How to Make a Split Screen Video in CapCut on Android
Want to show two videos at the same time instead of switching between them?
A split-screen video lets you display multiple clips inside the same video frame. You can place two videos side by side, stack them vertically, or create a custom multi-video layout.
This can be useful for comparison videos, reaction content, tutorials, before-and-after videos, interviews, gameplay reactions, product demonstrations, and social media content.
CapCut on Android can create split-screen layouts by combining multiple video layers and adjusting their size and position. Depending on the version of CapCut you are using, the exact names and locations of editing controls may vary.
In this guide, you'll learn how to make a split-screen video in CapCut on Android, put two videos side by side, create top-and-bottom layouts, adjust the size and position of each clip, keep videos aligned, and fix common split-screen problems.
Quick Answer
To make a split-screen video in CapCut on Android:
- Open CapCut and create a new project.
- Add the first video as your main clip.
- Tap Overlay.
- Choose Add overlay and select the second video.
- Resize the second video with your fingers.
- Move it to one side of the screen.
- Adjust the main video so it occupies the other side.
- Align the clips and adjust their timing.
- Preview the complete video.
- Export the finished split-screen video.
For a cleaner layout, use videos with similar framing and aspect ratios whenever possible.
What Is a Split-Screen Video?
A split-screen video displays two or more visual clips within the same video frame at the same time.
Instead of showing:
Video A → Video B
a split-screen composition can show:
Video A | Video B
Both clips remain visible simultaneously.
The videos do not necessarily have to be exactly the same size. You can resize and reposition the clips to create different layouts.
For example, you could create:
- Two videos side by side
- Two videos stacked vertically
- One large video with a smaller video window
- Three or more video sections
- Before-and-after comparisons
- Reaction layouts
- Gameplay plus face-camera layouts
- Tutorial footage plus screen recordings
The exact design depends on how you arrange the video layers.
Why Use Split Screen in CapCut?
Split-screen editing is useful when showing information from multiple sources at the same time.
Compare Two Videos
You can show two versions of something simultaneously.
For example:
- Before and after
- Old footage and new footage
- Two products
- Two camera angles
- Two editing results
Viewers can compare both clips without waiting for one video to finish.
Create Reaction Videos
You can show the original video on one side and a reaction video on the other.
This allows both videos to remain visible throughout the scene.
Show Two Camera Angles
If you recorded the same event from different positions, split screen can show both perspectives at once.
Create Tutorials
You can place a screen recording next to a presenter or demonstration video.
This is useful when explaining what is happening on a phone or computer screen.
Show Before-and-After Results
A split-screen layout makes visual comparisons easy to understand.
For example:
Before | After
This can work well for:
- Video color correction
- Editing effects
- Makeup transformations
- Room transformations
- Photo editing
- Video enhancement
How to Make a Split Screen Video in CapCut on Android
The following method uses CapCut's mobile video layers.
Step 1: Open CapCut
Open CapCut on your Android phone.
Start a new project.
Choose the first video that you want to use as the main video.
Tap Add to place it into the timeline.
The first video becomes your base layer.
Step 2: Prepare the Main Video
Before adding the second video, check the framing of the first clip.
Decide how you want the final layout to look.
For a basic two-video side-by-side design, each video will occupy roughly half of the screen.
For example:
Left side: Video A
Right side: Video B
You don't have to divide the screen perfectly in half, but keeping the layout balanced usually makes the final result easier to watch.
Step 3: Add the Second Video as an Overlay
With the main video in your project, look for the Overlay option.
Tap:
Overlay → Add overlay
Choose the second video from your phone.
CapCut adds the second video as another layer above the main video.
This layered structure is important because both videos need to remain visible simultaneously.
Step 4: Resize the Second Video
Select the second video.
Use your fingers on the preview area to reduce its size.
Pinch inward to make the video smaller.
You can then drag the video around the screen.
For a side-by-side layout, move the second video toward one side of the frame.
For example, place Video B on the right side.
Step 5: Resize the Main Video
Now select the main video.
Adjust its size and position so that it occupies the other side of the screen.
The goal is to create a composition similar to:
Video A | Video B
Try to keep both clips at similar sizes.
If one clip is much larger than the other, the composition may look unbalanced unless that is intentional.
Step 6: Position the Videos Carefully
Positioning is one of the most important parts of a split-screen edit.
Move the first video toward the left.
Move the second video toward the right.
Check the center of the frame.
You want the two videos to meet cleanly without creating an unintended large gap.
You can also leave a small gap between them if you want a visible divider.
Step 7: Adjust the Video Timing
The two videos should normally begin and end at appropriate points.
Look at the timeline and compare their durations.
If Video B is shorter than Video A, the second section may disappear before the main video finishes.
You can solve this by:
- Trimming the longer video
- Extending the available section of the shorter video
- Choosing another clip
- Adjusting when the overlay starts
- Repeating or replacing footage when appropriate
The correct approach depends on the type of video you are creating.
Step 8: Align Important Moments
For comparison and reaction videos, timing matters.
Suppose Video A shows someone performing an action at the five-second mark.
If Video B shows the reaction to that action, you may want the reaction to happen at approximately the same point.
Use the timeline to move the clips until the important moments line up.
This can make the split-screen result feel much more synchronized.
How to Put Two Videos Side by Side in CapCut
A side-by-side layout is one of the simplest split-screen designs.
The basic structure is:
Video A | Video B
Start with the first video.
Then add the second video as an overlay.
Resize the second video and move it to the right.
Adjust the first video so that it occupies the left side.
Preview the composition and make small position adjustments until both videos fit naturally within the frame.
Keep the Original Proportions
Be careful when resizing clips.
If you stretch a video too far horizontally or vertically, people and objects inside the video can look distorted.
Whenever possible, resize the video proportionally.
If the source clips have different aspect ratios, you may need to crop or reposition them to make the final layout look consistent.
How to Make a Top-and-Bottom Split Screen
A split screen does not have to be left and right.
You can also create:
Video A
Video B
This layout can work particularly well for:
- Tutorial demonstrations
- Gaming videos
- Comparison videos
- Interviews
- Reaction content
- Educational content
Add the second video as an overlay and resize both clips so that one occupies the upper section and the other occupies the lower section.
Check the center boundary carefully so that important parts of either video are not hidden.
How to Create a Before-and-After Split Screen
Before-and-after videos are one of the most useful applications for split-screen editing.
For example:
BEFORE | AFTER
Start with the before video as your main layer.
Add the after video as an overlay.
Resize and position both clips so they occupy approximately equal areas.
Try to use footage with similar camera angles.
If both clips were recorded from very different positions, the comparison may be harder to understand.
For the strongest visual comparison, try to keep:
- Camera position similar
- Subject position similar
- Lighting reasonably consistent
- Framing similar
- Clip duration synchronized
How to Make a Reaction Split Screen
Reaction videos commonly use one large video and one smaller reaction window.
This is different from a perfectly equal 50/50 split.
For example:
Main video: Large
Reaction video: Smaller window
To create this:
- Add the main video.
- Tap Overlay.
- Add your reaction recording.
- Resize the reaction video.
- Move it to a corner.
- Make sure it doesn't cover important parts of the main video.
- Preview the complete video.
- Adjust the reaction window if necessary.
You can use a rectangular or other shaped presentation depending on the editing tools available in your version of CapCut.
How to Create a Three-Video Split Screen
You can also experiment with more than two video layers.
For example:
Video A | Video B
Video C
A three-video layout can be useful for:
- Multiple reactions
- Different camera angles
- Product comparisons
- Group interviews
- Tutorial demonstrations
However, adding more videos also reduces the available screen space for each clip.
If the videos contain small details or text, using too many sections can make them difficult to see.
How to Create a Four-Video Grid
A four-video grid can look like this:
Video A | Video B
Video C | Video D
This layout is useful when you want to show several perspectives at the same time.
For example, you could show four different camera angles of the same event.
The most important thing is consistency.
Try to keep the videos:
- Similar in size
- Properly aligned
- Properly timed
- Free from unnecessary gaps
- Clear enough to see
CapCut also provides split-screen-related templates and effects, which can be useful when you want a predefined layout rather than manually building every element.
How to Add a Divider Between Two Videos
A divider can make the separation between two videos more obvious.
You can use a simple visual element between the clips, depending on the tools available in your version of CapCut.
For example, you could use:
- A thin line
- A color strip
- A graphic
- A border
- A decorative element
A divider is particularly useful when the two videos have similar colors and their edges are difficult to distinguish.
Don't make the divider so large that it distracts from the videos.
How to Add Text to a Split-Screen Video
Text can help explain what viewers are seeing.
For example:
BEFORE
AFTER
or:
CAMERA 1
CAMERA 2
or:
ORIGINAL
EDITED
Add text after establishing the basic split-screen layout.
Place labels where they don't cover important visual information.
Keep the text short and readable.
For vertical social-media videos, avoid placing important labels too close to the edges because platform interfaces may cover those areas.
How to Sync Two Videos in CapCut
Synchronizing two clips can make a split-screen edit feel much more professional.
Start by identifying a clear synchronization point.
This could be:
- A clap
- A spoken word
- A movement
- A beat in the music
- A camera movement
- The beginning of an action
Then move the overlay clip along the timeline until the matching event occurs at approximately the same time.
Preview the result several times.
Small timing differences can become obvious when both videos are playing simultaneously.
How to Match Two Videos With Different Aspect Ratios
You may not always have two videos with identical dimensions.
For example:
- Video A may be horizontal.
- Video B may be vertical.
When this happens, simply shrinking both videos may leave large empty areas.
Instead, experiment with:
- Cropping
- Repositioning
- Scaling
- Background colors
- Blurred backgrounds
- Different split-screen proportions
The best choice depends on the footage.
Don't crop important faces, text, products, or other subjects just to make the two clips mathematically identical.
How to Make a Split-Screen Video for TikTok or Reels
Vertical video is commonly used for short-form social content.
If your final video is vertical, design the split-screen composition around the vertical frame rather than creating a horizontal edit and trying to fix it later.
For a two-video layout, you can use:
Left | Right
or:
Top
Bottom
For reaction content, a smaller overlay window may work better than a strict 50/50 split.
Before exporting, preview the entire video in the final aspect ratio.
Make sure:
- Faces are visible
- Text is readable
- Important objects aren't cropped
- Both videos remain synchronized
- Nothing important is hidden behind interface areas
Split Screen vs Overlay in CapCut
These terms are related, but they describe different things.
Overlay
An overlay is a video, image, or other visual layer placed above another layer.
It can be large, small, transparent, or positioned anywhere.
Split Screen
A split-screen composition uses multiple visible areas of the frame to show different videos simultaneously.
In CapCut, overlays can be used as part of the process for manually creating a split-screen layout.
So:
Overlay = layering method
Split screen = final visual layout
Understanding this distinction makes the editing workflow easier.
Split Screen vs Picture-in-Picture
A picture-in-picture layout normally places a smaller video window over a larger background video.
For example:
Large main video + small reaction video
A split screen more commonly gives each video a defined section of the frame.
For example:
Half Video A + Half Video B
Both approaches can be created using layered video editing, but the final composition is different.
Common Problems When Making Split-Screen Videos
The Second Video Covers the First Video
If the second video completely covers the main video, select the overlay and reduce its size.
Then move it to the desired position.
Remember that an overlay sits above the main video layer.
The Videos Do Not Fit on the Screen
If one or both clips extend beyond the frame, adjust their scale and position.
You may also need to crop the footage.
Avoid shrinking the videos excessively if important details become too small to see.
The Videos Look Stretched
Stretching can distort faces and objects.
Try resizing the clip proportionally instead of independently changing its width and height.
If the source aspect ratios are different, use cropping and repositioning rather than forcing the entire frame into an unsuitable shape.
There Is a Large Empty Gap Between the Videos
Move the clips closer together.
Check their position in the preview window and make small adjustments.
A small gap can be intentional, but a large accidental gap can make the composition look unfinished.
One Video Ends Before the Other
Check the duration of both layers.
If one clip is shorter, the split-screen effect may disappear when that clip ends.
Trim the longer clip or adjust the timing of the shorter clip.
The Videos Are Out of Sync
Move the overlay clip along the timeline.
Find a clear synchronization point and align it with the corresponding moment in the other video.
Preview the edit several times because even a small timing difference can be noticeable.
The Video Looks Too Small
This often happens when the original clips are vertical but the final layout has multiple sections.
Consider using a larger layout or fewer simultaneous clips.
Showing two clear videos is usually more useful than showing four videos that are too small to understand.
Text Gets Covered by the Other Video
Move the text to a clear area of the composition.
If you're using labels for each section, position them inside their respective video areas without covering faces or important objects.
CapCut's Interface Looks Different
CapCut regularly changes its interface and feature availability.
Buttons may appear in different locations depending on the app version, device, account, region, and editing context.
If you cannot find a particular control, look through the selected clip's editing options or update CapCut when appropriate.
The underlying workflow of using layers, positioning clips, and adjusting their timing can remain similar even when the interface changes.
Tips for Better Split-Screen Videos
Choose Compatible Footage
Two clips with similar framing are easier to combine.
If one video is extremely close-up and the other is very wide, the comparison may feel unbalanced.
Keep Important Subjects Visible
Before finalizing the layout, check the position of faces, products, text, and other important elements.
Don't allow the split boundary to cut through a person's face or important object.
Use Consistent Timing
If you're comparing two clips, synchronize their important moments.
This makes the comparison much easier to follow.
Avoid Too Many Videos
More layers don't automatically make a better video.
Two well-presented clips may communicate more clearly than four tiny clips.
Preview the Full Video
Don't check only the beginning.
Watch the entire project.
A video can look correct at the beginning but become misaligned later.
Check the Final Export
After exporting, watch the saved video.
Look for:
- Cropping problems
- Missing sections
- Audio issues
- Timing differences
- Text placement
- Unexpected gaps
- Quality problems
Frequently Asked Questions
Can I make a split-screen video in CapCut on Android?
Yes. You can create split-screen compositions by combining video layers, resizing them, and positioning them within the same frame.
The exact controls may vary between CapCut versions.
How do I put two videos side by side in CapCut?
Add the first video to a new project, add the second video through the Overlay option, resize the clips, and position one on the left and the other on the right.
Then adjust their timing and preview the result.
Can I put three videos on one screen in CapCut?
Yes, you can create multi-video compositions using additional video layers.
The more videos you display simultaneously, the less screen space each clip has.
Can I make a four-video grid in CapCut?
Yes. A four-video grid can be created by arranging multiple video layers into four sections of the frame.
You can also explore CapCut's split-screen templates if you want a predefined layout.
Can I make a vertical split-screen video?
Yes.
You can create a left-and-right layout for vertical videos or use a top-and-bottom arrangement depending on your content.
Can I make a reaction video with split screen?
Yes.
You can place the main video on the base layer and add the reaction recording as an overlay.
The reaction video can then be resized and positioned to create the desired layout.
How do I make a before-and-after video in CapCut?
Add the before footage and after footage as separate visible layers.
Resize and position them so both are visible at the same time.
For a simple comparison, place the before video on one side and the after video on the other.
Why does my split-screen video look stretched?
The source video may have been resized disproportionately.
Try resizing the clip while maintaining its original proportions.
You may also need to crop and reposition footage with a different aspect ratio.
Can I add text to a split-screen video?
Yes.
Text can be used to label each side, explain the comparison, or identify different clips.
Keep the labels short and place them where they don't cover important content.
Does CapCut have split-screen templates?
CapCut currently provides split-screen layouts, effects, and templates that can be used for multi-video compositions.
Templates can be useful when you want a predefined design instead of manually positioning every video layer.
Can I use different aspect ratios in a split-screen video?
Yes, but the clips may require cropping, resizing, or repositioning to fit the final frame properly.
Different source dimensions can create empty areas or cropping issues if they are not adjusted carefully.
Why is my second video covering the entire screen?
The second video is probably still at its full size.
Select the overlay and resize it using the controls in the preview area.
Then move it to the desired section of the frame.
Can I add music to a split-screen video?
Yes.
You can add music or other audio to the project, then adjust the volume of the individual video clips and additional audio layers as needed.
Be careful not to let multiple audio tracks become unnecessarily loud or distracting.
Does split screen reduce video quality?
Creating a split-screen composition can make individual video content appear smaller because each clip occupies less of the final frame.
Export quality also depends on the source footage and the export settings available in your CapCut version.
Using high-quality source clips and appropriate export settings can help preserve the final result.
Final Thoughts
Creating a split-screen video in CapCut on Android is mainly about combining multiple video layers and arranging them carefully within the same frame.
For a simple two-video comparison, add one video as the main clip, add the second through the Overlay option, resize both clips, and position them side by side.
For more advanced projects, you can create top-and-bottom layouts, reaction videos, before-and-after comparisons, three-video compositions, or four-video grids.
The most important part is not simply adding more videos. It is making sure that the final composition remains clear.
Choose suitable footage, keep important subjects visible, synchronize important moments, avoid unnecessary cropping, and always preview the entire video before exporting.
With a clean layout and well-timed clips, CapCut can turn multiple recordings into a single split-screen video that is easier to compare, explain, and watch.
Related Articles

How to Fix CapCut Video Lagging After Export on Android
Fix CapCut video lagging after export on Android. Learn how to troubleshoot choppy playback, frame-rate mismatches, heavy effects, storage issues, and export settings.
GetApkFree Team

How to Fix CapCut Preview Not Matching Export on Android
Fix CapCut preview not matching the exported video on Android. Troubleshoot missing effects, text, transitions, timing, colors, and rendering differences.
GetApkFree Team

How to Fix Couldn't Apply AI Background in CapCut on Android
Getting "Couldn't Apply AI Background" in CapCut on Android? Check usage limits, clip selection, video quality, app updates, and practical troubleshooting steps.
GetApkFree Team

How to Fix CapCut Effects Not Applying on Android
CapCut effects not working on Android? Check clip selection, effect layers, timeline timing, conflicting adjustments, and app performance with these practical fixes.
GetApkFree Team