
This article is about
CapCut Premium
capcutdownload.com.pk · Tools
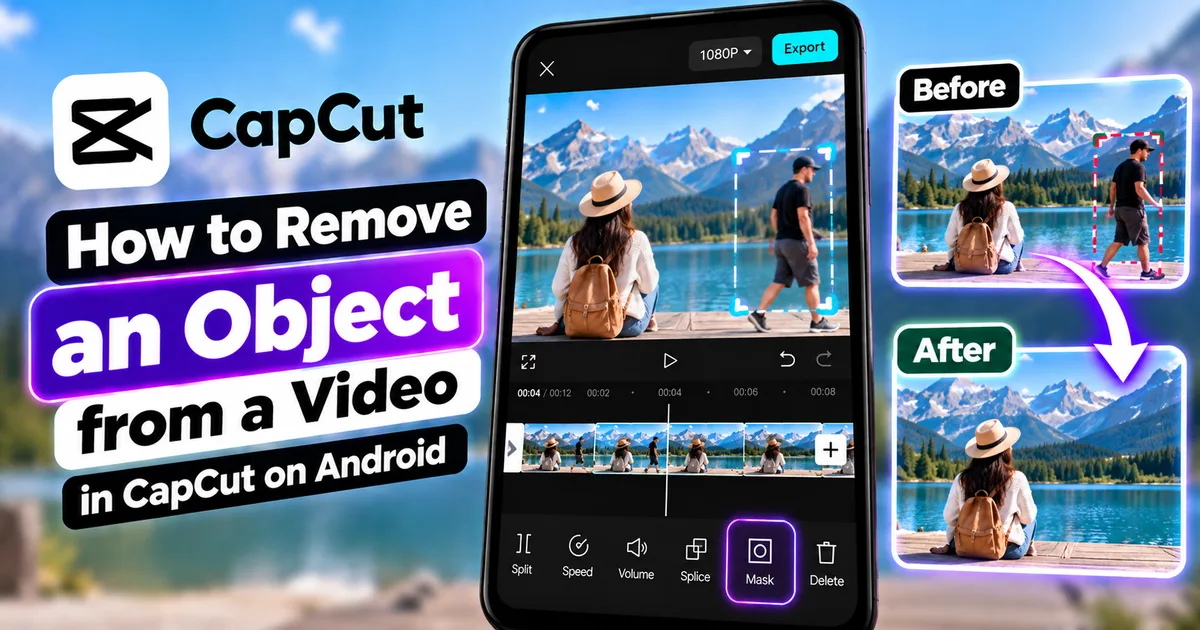
How to Remove an Object from a Video in CapCut on Android
GetApkFree Team
Learn how to remove an unwanted object or person from a video in CapCut on Android using overlays, masks, and keyframes, plus fix common problems.
- Source
- Developer
- Package
- CapCut Premium
How to Remove an Object from a Video in CapCut on Android
Have you ever recorded a video and later noticed an unwanted person, object, or distracting element in the frame?
Maybe someone walked through the background, a sign is distracting from the main subject, or an unwanted object appears in a part of the scene.
If the unwanted element is close to an edge, cropping may sometimes be enough. But when the object is inside the frame, you need another editing technique.
CapCut on Android can be used to hide or remove unwanted elements from video footage using techniques such as overlays, masking, and keyframes. The exact tools available can vary between CapCut versions, so the workflow may look slightly different on your device.
In this guide, you'll learn how to remove an unwanted object or person from a video in CapCut on Android, how masking and overlays can be combined, how to handle moving objects, how to improve the result, and what to do when the removal does not look natural.
Quick Answer
To remove an unwanted object from a video in CapCut on Android:
- Open CapCut.
- Start a new project.
- Import the video.
- Identify the unwanted object or person.
- Add another copy of the video as an overlay when needed.
- Position the duplicate footage so a clean part of the frame covers the unwanted element.
- Use a mask to control the visible area of the overlay.
- Adjust the mask size and position.
- Add keyframes if the unwanted object or camera moves.
- Preview the complete video.
- Adjust the mask and feathering if necessary.
- Export the finished video.
This technique works best when there is a suitable clean area of the surrounding footage that can be used to cover the unwanted element.
What Does Removing an Object From a Video Mean?
Removing an object from a video means making an unwanted element appear as though it isn't present in the original footage.
For example, you might want to remove:
- A person in the background
- A sign
- A small object
- A distracting item
- A piece of equipment
- An unwanted element near the edge
- Something that briefly appears in the scene
The difficulty depends heavily on the video.
A small object against a simple background can be easier to hide than a large person moving across a complicated background.
Video editing does not simply erase the object and automatically recreate every missing detail perfectly in every situation.
Instead, techniques such as masking, overlays, cloning, cropping, or background replacement can be used to make the unwanted element less visible.
Can You Remove an Object From a Video in CapCut on Android?
Yes, CapCut's mobile app can be used for object-removal-style edits using techniques such as overlays and masking.
The exact tools and interface can change between CapCut versions.
For simple scenes, you may be able to cover the unwanted object with a clean section of the surrounding footage.
For more complicated scenes, the edit may require multiple masks, keyframes, or more advanced tools.
Object Removal vs Background Removal
Object removal and background removal are not the same thing.
Object Removal
You want to remove a specific element while keeping the rest of the scene.
For example:
Remove one person from a street scene.
Background Removal
You want to remove the entire background behind a subject.
For example:
Remove the background behind a person and replace it with another image.
If you want to remove an entire video background, see:
How to Remove Video Background in CapCut on Android
Object Removal vs Cropping
Cropping is useful when the unwanted object is near the edge of the frame.
For example, if an unwanted person is standing at the far left edge, you may be able to crop that part of the video.
But cropping won't work well when the unwanted object is in the middle of the frame.
Object-removal techniques are more appropriate when the unwanted element is surrounded by useful content that you want to keep.
For more information, see:
How to Crop a Video in CapCut on Android
Object Removal vs Masking
Masking is one of the techniques that can be used to hide an unwanted object.
A mask controls which part of a layer remains visible.
For example, you can use a duplicate video layer and a mask to reveal a clean part of the duplicated footage over the unwanted object.
The mask itself doesn't magically recreate the missing background.
Instead, it lets you carefully combine different parts of the footage.
For a complete explanation of masking, see:
How to Use Masks in CapCut on Android
How to Remove a Static Object From a Video in CapCut
Removing a stationary object is usually easier than removing something that moves.
For example, imagine a small unwanted object sitting on a table while the camera remains relatively stable.
You may be able to use a clean section of the same video to cover the unwanted object.
Step 1: Open CapCut
Launch CapCut on your Android phone.
Start a new project.
Step 2: Import Your Video
Select the video containing the unwanted object.
Add it to the timeline.
Step 3: Find the Object
Move through the video and identify exactly where the unwanted element appears.
Pay attention to:
- Its size
- Its position
- Whether it moves
- The background around it
- Whether the camera moves
- How long it remains visible
These details determine how difficult the removal will be.
Step 4: Add the Video as an Overlay
Use the Overlay option to add another copy of the video to the project.
You now have the original footage and a duplicate layer.
The duplicate layer can be used to provide a clean portion of the frame.
For more information about overlays, see:
How to Add Overlays in CapCut on Android
Step 5: Position the Overlay
Move or scale the duplicate layer so that a clean portion of the footage is positioned over the unwanted object.
The goal is to cover the unwanted element with an area that looks similar to the surrounding background.
For example, if the unwanted object is in a plain wall, you may be able to use another part of the wall to cover it.
Step 6: Add a Mask
Select the overlay and open the Mask controls.
Choose a mask shape that works for the area you're covering.
A circle or rectangle may work for simple objects.
Adjust the mask size so that only the necessary portion of the overlay is visible.
Step 7: Adjust the Mask
Position the mask over the unwanted object.
Try to make the edges blend naturally with the surrounding scene.
Avoid making the mask larger than necessary.
Step 8: Use Feathering
If your CapCut version provides a feather control, use it to soften the mask edges.
A hard mask edge can make the edit obvious.
A softer edge can help the replacement area blend into the surrounding footage.
Don't use excessive feathering, however.
Too much feathering can make the replacement area look blurry or transparent.
Step 9: Preview the Result
Play the video.
Look closely at the area where the unwanted object was located.
Check whether:
- The background looks consistent
- The mask edge is visible
- The replacement area moves incorrectly
- Lighting changes are noticeable
- The object appears again
Make adjustments if necessary.
How to Remove a Person From a Video in CapCut on Android
Removing a person can be more difficult than removing a small stationary object.
The difficulty depends on the background and movement.
For example, removing a person standing in front of a plain wall may be easier than removing someone walking through a crowded street.
A common mobile approach is to use a duplicate video layer and masking to cover the person with a clean portion of the scene.
Basic Workflow
- Import the video.
- Duplicate the video as an overlay.
- Find a clean area close to the unwanted person.
- Position the overlay so the clean area covers the person.
- Apply a mask.
- Adjust the mask size.
- Feather the edges if appropriate.
- Add keyframes if the scene moves.
- Preview the result.
- Correct any visible problems.
The more the camera and background move, the more adjustments may be required.
How to Remove a Moving Object From a Video
Moving objects are more difficult because a fixed mask may stop covering the correct area.
For example, imagine a person walking across the frame.
At the beginning:
Object → Left
Later:
Object → Center
Later:
Object → Right
A mask positioned in one location won't work for the entire clip.
You may need to animate the mask or overlay position.
How to Use Keyframes for Object Removal
Keyframes can help you move a mask or overlay as the unwanted object changes position.
For example:
Keyframe 1
The unwanted object is on the left.
Keyframe 2
The unwanted object moves toward the center.
Keyframe 3
The unwanted object moves toward the right.
By adjusting the overlay or mask at different points in the timeline, you can make the replacement area follow the changing position.
For more information, see:
How to Add Keyframes in CapCut on Android
How to Remove an Object When the Camera Is Moving
Camera movement makes object removal more difficult.
Imagine that the camera slowly pans from left to right.
The background changes position relative to the frame.
A replacement area that worked at the beginning may no longer match later.
In this situation, you may need to adjust the overlay and mask repeatedly.
Use keyframes to help control the position over time.
Preview the entire video after making the adjustments.
How to Remove a Person From the Background
If a person appears in the background, first determine whether they are close to the edge.
Person Near the Edge
Cropping may be enough.
Person Inside the Frame
Masking or another object-removal technique may be required.
Person Moving
You may need animated masks or keyframes.
Crowded Background
The edit can become significantly more difficult because there may not be enough clean background footage to cover the person naturally.
How to Remove Text or a Sign From a Video
Unwanted text or signs can sometimes be covered if there is a similar background nearby.
For example, a small sign against a plain wall may be relatively easy to cover.
But if the text is printed over a detailed surface, removing it cleanly may be much harder.
The same overlay-and-mask technique can sometimes be used:
- Duplicate the video.
- Find a clean area.
- Position the clean area over the unwanted text.
- Apply a mask.
- Feather the edges.
- Adjust the position if the camera moves.
- Preview the result.
How to Remove an Object Near the Edge of a Video
If the unwanted object is close to an edge, try cropping first.
For example:
Unwanted object → Far left edge
You may be able to remove it simply by cropping the left side.
This is generally easier than creating an overlay and mask.
However, cropping also removes part of the original composition.
If you need to keep the full frame, use another removal technique.
How to Remove an Object From a Static Background
A static background is usually easier to work with.
For example:
- Plain wall
- Empty sky
- Floor
- Table
- Road
- Simple landscape
If another part of the frame looks similar, you may be able to use that clean area to cover the unwanted object.
The more consistent the background, the easier it can be to make the replacement look natural.
How to Remove an Object From a Moving Background
A moving background is more challenging.
Examples include:
- Crowded streets
- Moving water
- Busy traffic
- Camera pans
- Handheld camera movement
- Moving shadows
- Complex patterns
A replacement area may not match the background as the video progresses.
You may need more keyframes and more detailed masking.
In difficult scenes, perfect removal may not be possible with a simple mobile editing technique.
How to Make Object Removal Look Natural
The goal is not simply to cover the unwanted object.
The replacement area should also match the surrounding scene.
Pay attention to:
- Lighting
- Color
- Texture
- Shadows
- Perspective
- Movement
- Background patterns
- Camera motion
For example, covering a dark object with a much brighter area can make the edit obvious.
Choose a replacement area that visually matches the original surroundings.
How to Soften the Edges of an Object Removal
Hard edges can reveal the edit.
If your masking tool provides feathering, gradually soften the mask edge.
However, don't make the feathering too large.
A very soft edge can create a visible blur around the replacement area.
The ideal amount depends on:
- Object size
- Background texture
- Lighting
- Camera movement
- Video resolution
Preview at normal playback speed rather than judging only from a single paused frame.
How to Remove an Object Without Blurring the Entire Video
You don't necessarily need to blur the entire video to hide an unwanted element.
Instead, you can use a localized mask or replacement area.
This allows the rest of the footage to remain unchanged.
For example:
Unwanted object → Masked replacement
rather than:
Entire video → Blur effect
If you want to intentionally blur a specific area, see:
How to Blur a Video in CapCut on Android
Can You Remove an Object Without Affecting the Background?
The goal of object removal is to preserve as much of the surrounding scene as possible.
However, the exact result depends on the technique and footage.
If the background behind the object is simple and there is a clean matching area available, the result can look convincing.
If the object covers important background details that never appear elsewhere in the video, there may not be enough information to recreate those details perfectly using a simple overlay.
How to Remove Multiple Objects
If several unwanted objects appear in the same scene, you may need multiple masks or overlays.
For example:
- Object A → Mask 1
- Object B → Mask 2
- Object C → Mask 3
Keep the edit organized.
Make sure each replacement area matches the surrounding background.
Multiple complex masks can increase the amount of work required.
How to Remove an Object From Only Part of a Video
You don't necessarily need to apply the removal technique to the entire video.
If the unwanted object appears only from 10 to 15 seconds:
- Identify the beginning.
- Identify the ending.
- Focus your editing on that section.
- Keep the rest of the video unchanged.
This can reduce unnecessary editing.
You can also split the video into sections when a major change in the scene requires different treatment.
For more information, see:
How to Cut and Trim Videos in CapCut on Android
AI Object Removal in CapCut
CapCut offers AI-powered object-removal tools in some of its editing workflows, but feature availability and the exact workflow depend on the CapCut version and platform.
Current CapCut documentation describes AI Remove for desktop workflows, while its mobile guidance also describes using overlays and masks to remove people or objects.
If your Android version shows an AI Remove or similar object-removal option, follow the controls presented in your version of the app.
If that option is unavailable, the overlay-and-mask method remains a useful manual approach for suitable footage.
Don't assume that every CapCut version has the same AI tools.
Why AI or Manual Object Removal May Not Look Perfect
Object removal can become difficult when:
- The object is very large
- The background is highly detailed
- The object moves quickly
- The camera moves significantly
- The object overlaps another important subject
- Shadows move across the scene
- The background changes
- There is no clean replacement area
In these situations, you may need more detailed editing or a different approach.
Object Removal vs Background Replacement
These techniques solve different problems.
Object Removal
Removes or hides a specific unwanted element.
Background Replacement
Removes the existing background behind a subject and replaces it.
For example:
Object removal: Remove one person from a street.
Background replacement: Remove the entire street behind a person.
If you want to replace a complete video background, see:
How to Remove Video Background in CapCut on Android
Object Removal vs Blur
Blur is useful when you don't necessarily need to reconstruct the background.
For example, you might blur:
- A face
- A license plate
- A private document
- A screen
- A sensitive area
Object removal attempts to make the element disappear instead.
Use blur when privacy is the priority.
Use object removal when you want the scene to appear as though the element wasn't there.
Object Removal vs Freeze Frame
A freeze-frame technique can sometimes help with difficult backgrounds, depending on the scene.
For example, if a clean frame exists before an unwanted object appears, a still frame or layered approach may provide a useful source for covering the object.
However, freeze frames can look unnatural if the background or camera is moving.
Use this technique carefully.
For more information, see:
How to Freeze a Frame in CapCut on Android
Common Problems When Removing Objects in CapCut
The Object Is Still Visible
The mask or overlay may not completely cover the unwanted element.
Try adjusting:
- Mask size
- Overlay position
- Mask position
- Feathering
- Keyframes
Preview the complete clip.
The Mask Edge Is Obvious
The replacement area may not blend with the background.
Try reducing or increasing feathering slightly and choosing a better matching area.
The Object Reappears Later
This often happens when the object moves.
A fixed mask may no longer cover it.
Add keyframes and adjust the mask or overlay position.
The Background Looks Repeated
This can happen when the same small area is used to cover a large section.
Try finding a better replacement area or using multiple layers.
The Removal Looks Blurry
Excessive feathering, scaling, or low-resolution source footage can make the replacement area appear soft.
Use a suitable source area and avoid unnecessary enlargement.
The Background Does Not Match
The replacement area may have different lighting, color, texture, or perspective.
Try selecting a cleaner area that more closely matches the original background.
The Camera Movement Breaks the Edit
A replacement area that works in one frame may become incorrect when the camera moves.
Use keyframes to adjust the overlay and mask throughout the clip.
The Person Moves Too Quickly
Fast movement can make manual masking difficult.
You may need more keyframes or a different editing approach.
Multiple People Are in the Scene
Removing one person can be difficult when other people overlap or move behind them.
Consider whether the background provides enough clean information to create a convincing replacement.
CapCut Does Not Show the Same Tools
CapCut's interface and feature availability can change between versions, devices, regions, and plans.
Update the app if appropriate and check the tools available after selecting the video clip.
Tips for Better Object Removal
Choose the Easiest Footage
If you can choose between several recordings, use the clip with the simplest background.
Remove Small Objects First
Small objects are often easier to hide than large objects.
Use a Matching Replacement Area
Look for a part of the scene with similar color, texture, lighting, and perspective.
Keep the Mask Small
Don't cover more of the frame than necessary.
Use Feathering Carefully
Soft edges can help, but too much feathering can make the replacement look blurry.
Use Keyframes for Movement
If the object or camera moves, adjust the mask and overlay throughout the clip.
Preview at Normal Speed
An edit that looks acceptable when paused may become obvious during playback.
Check the Entire Video
Don't only check the frame where you created the mask.
Keep the Original Footage
Always keep your original video so you can try another editing method later.
Frequently Asked Questions
Can I remove an object from a video in CapCut on Android?
Yes. CapCut's Android app can be used for object-removal-style edits using techniques such as overlays and masking. The exact tools available depend on the current version.
Can I remove a person from a video in CapCut?
Yes. You can use techniques such as duplicate video layers and masking to hide an unwanted person when the surrounding footage provides a suitable replacement area.
Can I remove a moving person from a video?
It is possible, but moving subjects are more difficult. You may need to animate the mask or overlay using keyframes.
Can I remove an object without cropping the video?
Yes. Masking and overlay techniques can allow you to keep the original frame while covering the unwanted object.
Can I remove an object from the middle of a video?
Yes. If the unwanted object is in the middle of the frame, you can use masking or another removal technique instead of cropping.
Can I remove a person from the edge of a video?
Yes. If the person is close enough to the edge, cropping may be the easiest solution. If you need to preserve the full frame, an overlay and mask may be more appropriate.
Can I remove text from a video in CapCut?
Depending on the scene, you may be able to cover unwanted text using an overlay and mask. The result depends on the background behind the text.
Can I remove a logo from a video in CapCut?
You may be able to hide a logo using cropping, masking, an overlay, or another editing technique when the surrounding background provides enough clean information.
Is object removal the same as background removal?
No. Object removal targets a specific element, while background removal removes the background behind a subject.
Is object removal the same as blur?
No. Blur hides or obscures an area. Object removal attempts to make the unwanted element appear absent from the scene.
Does CapCut have AI object removal?
CapCut provides AI-powered object-removal functionality in some of its workflows, but availability and exact controls depend on the platform and current version. Current CapCut documentation describes AI Remove for desktop workflows.
Why can't I find AI Remove on Android?
The feature may not be available in your current mobile version or may be offered differently from the desktop workflow. CapCut's features can change between platforms, versions, regions, and plans.
Can I remove an object without making the video blurry?
Yes, but the result depends heavily on the source footage and removal technique. Using a suitable clean replacement area and carefully adjusting the mask can help preserve a natural-looking result.
Why does the background look duplicated after removing an object?
The replacement area may be too repetitive or may not match the surrounding scene. Try using a different area of the footage or adjust the mask and overlay.
Can I remove multiple objects?
Yes, but multiple objects may require multiple masks or overlays. The more complex the scene, the more difficult the edit can become.
Can I remove an object from only part of the video?
Yes. You can focus the editing on the portion where the unwanted object appears instead of changing the entire video.
Do I need keyframes to remove an object?
Not always. A stationary object in a static scene may only require a fixed mask. Moving objects or moving cameras may require keyframes.
What should I do if object removal looks unnatural?
Try a different replacement area, adjust the mask size, change feathering, add keyframes, or use another removal technique. Some complex scenes may not be suitable for simple mobile object removal.
Final Thoughts
Removing an unwanted object or person from a video can be done in CapCut on Android, but the difficulty depends heavily on the footage.
For simple scenes, an overlay combined with a carefully positioned mask can hide an unwanted element effectively. If the object or camera moves, keyframes can help keep the replacement area aligned throughout the video.
The most important part is choosing a suitable replacement area. The surrounding background should match the unwanted area in color, texture, lighting, and perspective as closely as possible.
Remember that object removal is different from cropping, blurring, and background removal. Choose the technique based on what you are trying to accomplish.
For difficult scenes, especially those involving large moving subjects or complex backgrounds, a simple mobile masking technique may not produce a perfect result.
Always preview the complete video before exporting, and keep the original footage so you can try another approach if necessary.
Once you're comfortable with masks, overlays, and keyframes, you can use these tools together to create much more precise video edits in CapCut.
Related Articles

How to Fix CapCut Video Lagging After Export on Android
Fix CapCut video lagging after export on Android. Learn how to troubleshoot choppy playback, frame-rate mismatches, heavy effects, storage issues, and export settings.
GetApkFree Team

How to Fix CapCut Preview Not Matching Export on Android
Fix CapCut preview not matching the exported video on Android. Troubleshoot missing effects, text, transitions, timing, colors, and rendering differences.
GetApkFree Team

How to Fix Couldn't Apply AI Background in CapCut on Android
Getting "Couldn't Apply AI Background" in CapCut on Android? Check usage limits, clip selection, video quality, app updates, and practical troubleshooting steps.
GetApkFree Team

How to Fix CapCut Effects Not Applying on Android
CapCut effects not working on Android? Check clip selection, effect layers, timeline timing, conflicting adjustments, and app performance with these practical fixes.
GetApkFree Team