
This article is about
CapCut Premium
capcutdownload.com.pk · Tools
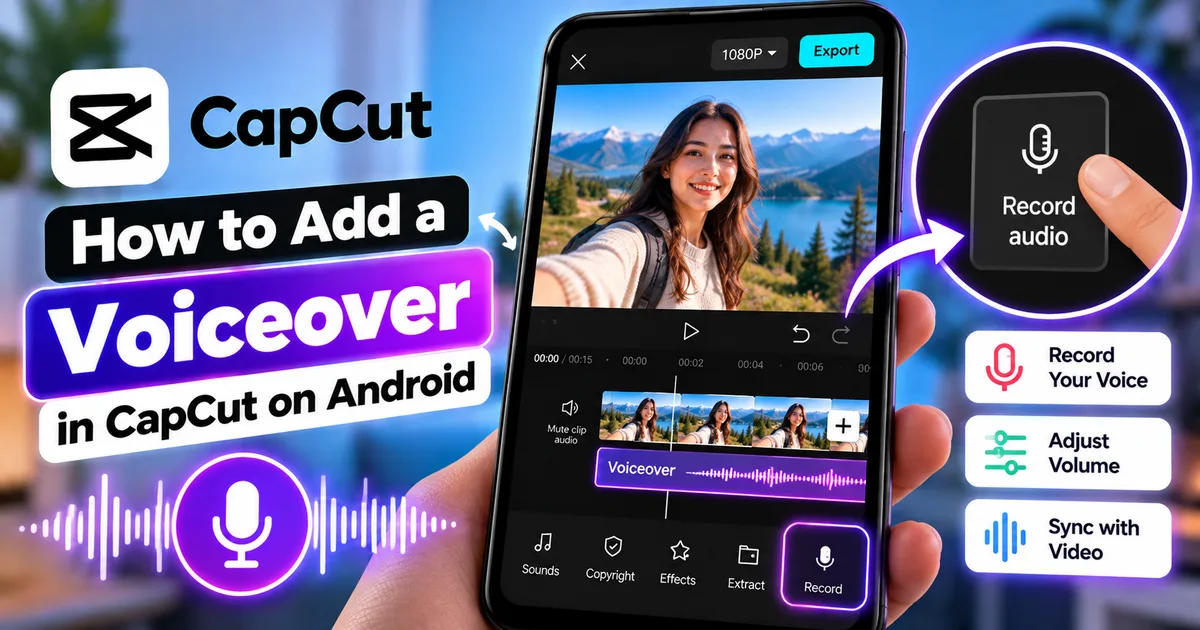
How to Add a Voiceover in CapCut on Android
GetApkFree Team
Learn how to add a voiceover in CapCut on Android, record your own narration, adjust voice volume, sync narration with video, and fix common recording problems.
- Source
- Developer
- Package
- CapCut Premium
How to Add a Voiceover in CapCut on Android
Want to explain what's happening in your video, narrate a tutorial, record commentary, or add your own voice to a montage?
You can do all of these things by adding a voiceover in CapCut on Android.
A voiceover lets you record your own narration and place it alongside the video's existing audio and visual content. This can be useful for tutorials, YouTube videos, gameplay commentary, travel videos, educational content, product demonstrations, reaction videos, and short-form videos.
CapCut provides a voice recording workflow that lets you record narration directly inside the editing project. After recording, you can adjust the voiceover's position and volume and combine it with other audio elements.
In this guide, you'll learn how to add a voiceover in CapCut on Android, record clear narration, place the voiceover correctly on the timeline, adjust its volume, use voiceover with background music, fix common recording problems, and improve the quality of your narration.
Quick Answer
To add a voiceover in CapCut on Android:
- Open CapCut.
- Create a new project.
- Import your video.
- Tap the Audio option.
- Find the Record Audio or voice recording option.
- Allow microphone access if CapCut asks for permission.
- Position the playhead where you want the narration to begin.
- Start recording.
- Speak clearly into your phone's microphone.
- Stop the recording when you're finished.
- Preview the voiceover.
- Adjust its volume and position if necessary.
- Export the finished video.
The exact location or wording of the recording controls can vary between CapCut versions.
What Is a Voiceover in CapCut?
A voiceover is recorded narration that is added to a video after or during the editing process.
For example, imagine you are creating a tutorial.
The video shows what you're doing while your recorded voice explains the steps.
The viewer can see the action while listening to your explanation.
A voiceover can be used for:
- Tutorials
- YouTube videos
- Gameplay commentary
- Travel videos
- Product demonstrations
- Educational videos
- Explainer videos
- Reaction videos
- Vlogs
- Storytelling
- Social media videos
- Short-form content
The main advantage is that your voice can provide additional context without requiring you to appear on camera.
Voiceover vs Text-to-Speech in CapCut
Voiceover and text-to-speech are related but different.
Voiceover
You record your own voice.
For example:
You speak into your phone's microphone and CapCut places the recording on the timeline.
Text-to-Speech
You type text and CapCut generates spoken audio from that text using an available voice.
If you want to learn about generated narration instead, see our guide on how to use Text-to-Speech in CapCut on Android.
Use voiceover when you want your actual voice and natural delivery.
Use text-to-speech when you want computer-generated narration.
Voiceover vs Voice Changer
A voiceover is a recording of narration.
A voice changer modifies an existing voice or audio using available voice effects.
For example:
Voiceover: Record your narration.
Voice changer: Apply a voice effect to audio.
If you want to modify your voice instead, see how to change your voice in CapCut on Android.
How to Add a Voiceover in CapCut on Android
Follow these steps to record your own narration.
Step 1: Open CapCut
Launch CapCut on your Android phone.
From the home screen, start a new project.
Step 2: Import Your Video
Select the video you want to narrate.
Add it to your project.
The video will appear on the timeline.
Step 3: Position the Playhead
Move the playhead to the point where you want your narration to begin.
This is important because the recording will be placed according to the current timeline position.
For example, if you want your narration to start after the introduction, move the playhead to that point before recording.
Step 4: Open the Audio Controls
Look for the Audio option in the editing toolbar.
Depending on your CapCut version, the available audio controls may have a slightly different layout.
Look for an option such as Record Audio or the voice recording control.
Step 5: Allow Microphone Access
If Android asks CapCut for microphone permission, allow the permission if you want to record your voice directly inside the app.
Without microphone access, CapCut cannot record your narration through the phone's microphone.
Step 6: Start Recording
Tap the recording control.
Wait briefly if necessary, then begin speaking.
Try to maintain a consistent distance from the phone.
Speak clearly and avoid moving your phone around while recording.
Step 7: Stop the Recording
When you've finished your sentence or narration, stop the recording.
CapCut will add the recorded audio to the project timeline.
You should now see the voiceover as a separate audio element.
Step 8: Preview the Voiceover
Play the section of the video containing your narration.
Listen for:
- Clear speech
- Background noise
- Incorrect timing
- Missing words
- Excessive volume
- Low volume
- Long pauses
If something isn't right, you can record the section again.
Step 9: Adjust the Voiceover
Select the recorded voiceover.
Depending on your current CapCut version, you may have controls for volume and other audio adjustments.
Adjust the recording so that the narration is clearly audible without overpowering other audio.
Step 10: Export the Video
Once the narration sounds correct, preview the entire video.
Check both the video and audio.
When you're satisfied, tap Export and choose the available output settings.
How to Record a Voiceover While Watching the Video
A major benefit of recording inside an editing project is that you can use the video as a visual reference.
For example, suppose you're explaining a tutorial.
You can watch the actions on the screen while recording your narration.
This makes it easier to match your spoken explanation with what viewers see.
Before recording, move the playhead to the appropriate point.
Then start the recording and follow the action on screen.
How to Record a Voiceover for a Tutorial
Voiceovers are particularly useful for tutorials.
For example, you could record:
"First, open the project and select the video clip."
Then show the corresponding action in the video.
A good tutorial voiceover should explain what viewers need to do without simply repeating every visible action.
Try to add useful context.
Instead of saying:
"Tap this button."
You could explain:
"Tap this button to open the audio controls, where you can add your narration."
This gives the viewer more information.
How to Record a Voiceover for YouTube Videos
Voiceover can be used for many YouTube formats.
Examples include:
- Tutorials
- Reviews
- Explainers
- Gameplay
- Travel videos
- List videos
- Commentary
- Educational content
- Screen recordings
You can record narration over your existing footage instead of recording yourself on camera.
This can make the editing process more flexible.
How to Add Voiceover to a Gameplay Video
Gameplay videos often benefit from commentary.
A basic workflow is:
- Import your gameplay recording.
- Place the playhead where commentary should begin.
- Open the audio controls.
- Start recording.
- Explain what's happening.
- Stop recording.
- Review the narration.
- Adjust the voiceover volume.
- Balance the game audio.
- Export the video.
If the original game audio is too loud, reduce it so your commentary remains understandable.
How to Add Voiceover to a Travel Video
Travel videos can use voiceovers to explain locations, experiences, or events.
For example, instead of relying only on text captions, you can narrate:
- Where you are
- What you're seeing
- What happened
- Travel tips
- Personal experiences
- Interesting facts
Keep the narration synchronized with the footage.
If you're showing a specific location, try to talk about it while the relevant footage is visible.
How to Add Voiceover to a Product Video
A product demonstration can use voiceover to explain features while the viewer watches the product.
For example:
- Show the product.
- Explain what it is.
- Demonstrate a feature.
- Explain how it works.
- Show the result.
This approach can be useful for tutorials, reviews, demonstrations, and promotional videos.
How to Add Voiceover Over Background Music
You can combine narration with background music.
However, the music should generally remain quieter than the main narration when speech is important.
A simple audio priority can be:
Voiceover → Primary
Music → Background
Sound effects → Supporting
If the music is too loud, your narration can become difficult to understand.
Select the music track and reduce its volume when necessary.
For more information, see how to add music to a video in CapCut on Android.
How to Add Voiceover With Sound Effects
Voiceovers can also be combined with sound effects.
For example:
Voiceover → "Now tap the button."
Sound effect → Click
This can make tutorials and short-form videos more engaging.
However, avoid placing loud sound effects over important words.
If an effect interferes with your narration, reduce its volume or move it to another point in the timeline.
See how to add sound effects to a video in CapCut on Android.
How to Adjust Voiceover Volume in CapCut
After recording your narration, select the voiceover audio track.
Look for the volume control.
Increase or decrease the volume until the narration is clearly audible.
Don't judge the voiceover by itself.
Listen to it together with:
- Original video audio
- Background music
- Sound effects
- Other narration
The correct volume depends on the complete audio mix.
How to Make Voiceover Louder
If your narration is difficult to hear:
- Select the voiceover.
- Open the volume controls.
- Increase the volume gradually.
- Play the video with the other audio tracks.
- Reduce competing audio if necessary.
- Preview again.
Avoid simply increasing the narration to an extremely high level if background music is also too loud.
Sometimes lowering the music provides a cleaner result.
How to Lower Background Music During Voiceover
If background music competes with your narration, reduce the music volume.
A simple workflow is:
- Select the music track.
- Adjust its volume.
- Play the section containing speech.
- Listen carefully.
- Lower the music further if necessary.
- Preview the transition between speaking and non-speaking sections.
The goal is to create enough space for the voice without completely removing the music.
How to Sync Voiceover With Video
Good synchronization is important.
If your narration describes something that happens on screen, the spoken explanation should occur at approximately the same time as the action.
For example:
Video action: Open the menu.
Voiceover: "Open the menu to access the editing controls."
If the narration is too early or too late, select the audio clip and move it along the timeline.
Preview the section again after moving it.
How to Move a Voiceover on the Timeline
If your narration starts at the wrong time, select the recorded audio clip.
Then move it along the timeline until it begins at the desired point.
For longer videos, you may have several separate voiceover clips.
Keeping each section separate can make timing adjustments easier.
How to Trim a Voiceover
You may not need the entire recording.
For example, you might have several seconds of silence before speaking.
You can trim the audio to remove unnecessary sections.
A useful workflow is:
- Select the voiceover.
- Find the unwanted beginning or ending.
- Trim the audio.
- Preview the result.
- Check the timing again.
For video editing fundamentals, see how to cut and trim videos in CapCut on Android.
How to Record Voiceover in Short Sections
You don't have to record an entire script in one take.
Recording shorter sections can make editing easier.
For example:
Section 1: Introduction
Section 2: First explanation
Section 3: Second explanation
Section 4: Conclusion
If you make a mistake in Section 3, you only need to record that section again.
This can be much easier than re-recording the entire narration.
How to Record a Voiceover Without Showing Your Face
One of the biggest benefits of voiceover is that you don't need to appear on camera.
You can combine narration with:
- Screen recordings
- B-roll
- Product footage
- Gameplay
- Photos
- Animations
- Tutorials
- Travel footage
Your voice provides the explanation while the visuals show the subject.
How to Write a Voiceover Before Recording
Preparing a script can make your recording more consistent.
Before opening the recording tool, write down the main points you want to explain.
A simple script structure is:
Introduction
Explain what the video is about.
Main Content
Explain the important information in the correct order.
Demonstration
Describe what viewers are seeing.
Conclusion
Summarize the main point or tell viewers what to do next.
You don't necessarily need to read every word exactly as written.
A short outline can sometimes produce a more natural delivery.
How to Get Clearer Voiceover Audio
The quality of your recording depends heavily on your recording environment.
Try to record in a relatively quiet room.
Avoid:
- Fans
- Loud air conditioners
- Traffic
- Television
- People talking nearby
- Echo-heavy rooms
Keep the phone at a consistent distance from your mouth.
Speak clearly and at a comfortable volume.
How to Reduce Background Noise Before Recording
The easiest way to reduce unwanted noise is to prevent it from being recorded in the first place.
Before recording:
- Find a quiet room.
- Close windows if outside noise is noticeable.
- Turn off unnecessary fans or noisy devices.
- Keep the phone stable.
- Avoid touching the phone while speaking.
- Record a short test first.
A cleaner recording usually requires less correction later.
If your project contains unwanted audio noise, you can also explore CapCut's available audio enhancement tools.
See our guide on how to remove background noise in CapCut on Android.
How to Make Your Voiceover Sound Natural
A good voiceover does not need to sound like a professional radio broadcast.
Focus on:
- Clear pronunciation
- Natural pacing
- Appropriate pauses
- Consistent volume
- Comfortable speaking speed
- Good microphone distance
Avoid rushing through the script.
Give viewers enough time to understand what you're saying and connect it with the visuals.
How to Add Voiceover to a Video With Existing Audio
Your video may already contain camera audio.
You don't necessarily have to remove it.
You can combine:
Original audio + Voiceover
or:
Original audio + Voiceover + Music
The best choice depends on the video.
For example, natural environmental sound can add realism to travel footage while your voice explains what viewers are seeing.
For a tutorial, you may want the original recording audio to be very quiet or muted.
How to Mute Original Video Audio During Voiceover
If the original audio is distracting:
- Select the original video clip.
- Open its volume controls.
- Reduce the volume.
- Keep the voiceover at an appropriate level.
- Preview the result.
You can also keep a small amount of natural sound if it contributes to the video.
Voiceover vs Background Music
These two audio elements have different purposes.
Voiceover
Provides information, narration, explanation, or commentary.
Background Music
Creates atmosphere and supports the visual content.
When both are present, the voiceover generally needs to remain understandable.
If the music is competing with speech, reduce the music volume.
Voiceover vs Sound Effects
Sound effects are usually short audio elements used to emphasize actions or transitions.
Voiceover carries spoken information.
For example:
Voiceover:
"Now select the video clip."
Sound effect:
Click
Both can work together as long as the sound effect doesn't overpower the narration.
Common Voiceover Problems in CapCut
I Can't Find the Voiceover or Record Audio Option
First select your project and look through the Audio tools.
Depending on your CapCut version, the feature may have a different name or position.
Make sure you're editing the video project rather than another screen in the app.
CapCut Can't Access My Microphone
Check Android's microphone permissions for CapCut.
If microphone access is blocked, the app may not be able to record your narration.
After changing the permission, return to CapCut and try recording again.
My Voiceover Is Too Quiet
Select the voiceover and check its volume.
Also check whether background music or other audio is too loud.
Sometimes reducing competing audio produces a better result than dramatically increasing the narration volume.
My Voiceover Is Too Loud
Reduce the voiceover volume gradually.
Then listen to it with the rest of the audio.
A recording that sounds comfortable by itself may be too loud when combined with music.
My Voiceover Is Out of Sync
Select the voiceover clip and move it along the timeline.
Check the point where the narration should begin.
Then preview the surrounding section again.
There Is a Long Silence Before My Voice
You may have started recording before you actually began speaking.
Trim the unnecessary silence or move the voiceover start point.
My Voiceover Contains Background Noise
Try recording again in a quieter environment.
Keep the phone away from noisy devices and avoid touching the microphone during recording.
You can also investigate CapCut's available noise-reduction and voice-enhancement tools.
My Voiceover Recording Stopped
This can happen for different reasons, including interruptions, app issues, device resources, or recording problems.
Try recording a shorter section first.
If necessary, restart CapCut and test again.
My Voiceover Sounds Different From My Normal Voice
Phone microphones, room acoustics, distance, and audio processing can change how a voice sounds in a recording.
Try changing your microphone distance and recording environment.
My Voiceover Is Behind the Video
Move the audio clip earlier on the timeline.
Use the visual action as your reference point and preview the result.
My Voiceover Is Ahead of the Video
Move the audio clip slightly later.
Check the synchronization again.
Tips for Better CapCut Voiceovers
Write Your Main Points First
A short script or outline helps prevent mistakes and unnecessary pauses.
Record in a Quiet Environment
Good recording conditions are more important than simply increasing the volume afterward.
Keep a Consistent Distance
Don't move the phone closer and farther away while speaking.
Speak Naturally
Don't rush through the narration.
Record in Short Sections
Short recordings are easier to replace when you make a mistake.
Listen With the Music
Always evaluate your narration together with the other audio tracks.
Leave Small Pauses
Short pauses can make narration easier to understand.
Preview the Entire Video
A voiceover may sound good in one section but become poorly synchronized later.
Keep Your Original Project
Keeping the editable project makes it easier to replace narration later.
Frequently Asked Questions
Can I record a voiceover directly in CapCut on Android?
Yes. CapCut provides a voice recording workflow that allows you to record narration directly within a mobile editing project.
How do I add my own voice to a CapCut video?
Import your video, open the Audio controls, choose the available voice recording or Record Audio option, and record your narration at the desired point in the timeline.
Do I need a separate microphone?
No. You can use your Android phone's built-in microphone. An external microphone may provide different or improved recording quality depending on the equipment and environment.
Can I add voiceover without showing my face?
Yes. Voiceover can be used with screen recordings, gameplay, B-roll, photos, tutorials, and other footage without showing the narrator.
Can I add background music under my voiceover?
Yes. You can combine narration with background music and adjust the music volume so the voice remains clear.
Can I add sound effects with a voiceover?
Yes. Sound effects can be placed alongside voiceover and other audio tracks.
Can I record voiceover in multiple parts?
Yes. Recording shorter sections can make it easier to replace individual mistakes and synchronize narration with different parts of the video.
Can I move a voiceover after recording?
Yes. Select the recorded audio and reposition it on the timeline when the available editing controls allow it.
Can I trim a voiceover in CapCut?
Yes. You can edit the recorded audio and remove unwanted portions such as unnecessary silence or mistakes.
Can I make my voiceover louder?
Yes. Select the voiceover and adjust its volume using the available audio controls.
Can I lower music under my voiceover?
Yes. Select the music track and reduce its volume so that the narration remains easier to understand.
Why can't CapCut record my voice?
Check whether CapCut has microphone permission on your Android device. Also check that another application isn't interfering with microphone access and try restarting the app if necessary.
Is voiceover the same as text-to-speech?
No. Voiceover normally refers to recorded narration, while text-to-speech converts written text into generated speech.
Can I use voiceover for YouTube videos?
Yes. Voiceover is useful for tutorials, commentary, reviews, educational videos, gameplay, travel videos, and many other YouTube formats.
Can I use voiceover for Shorts and Reels?
Yes. Voiceover can be added to short-form videos for narration, commentary, explanations, storytelling, and other content.
How can I make my voiceover clearer?
Record in a quiet environment, keep a consistent microphone distance, speak clearly, avoid touching the phone while recording, and balance the narration against other audio.
Final Thoughts
Adding a voiceover in CapCut on Android is a practical way to explain, narrate, or comment on a video without needing to appear on camera.
The basic workflow is simple: import your video, open the audio controls, choose the voice recording option, record your narration, adjust the audio, synchronize it with the visuals, and export the finished video.
For better results, prepare your main talking points before recording, use a quiet environment, keep your microphone distance consistent, and record in shorter sections when possible.
If your video also contains music or sound effects, make sure they don't overpower the narration.
And remember that voiceover is different from text-to-speech. A voiceover uses your recorded narration, while text-to-speech generates spoken audio from written text.
Once you become comfortable with voiceovers, you can combine narration with CapCut's other tools such as text, captions, music, sound effects, overlays, transitions, keyframes, and visual effects to create more complete videos.
Related Articles

How to Fix CapCut Video Lagging After Export on Android
Fix CapCut video lagging after export on Android. Learn how to troubleshoot choppy playback, frame-rate mismatches, heavy effects, storage issues, and export settings.
GetApkFree Team

How to Fix CapCut Preview Not Matching Export on Android
Fix CapCut preview not matching the exported video on Android. Troubleshoot missing effects, text, transitions, timing, colors, and rendering differences.
GetApkFree Team

How to Fix Couldn't Apply AI Background in CapCut on Android
Getting "Couldn't Apply AI Background" in CapCut on Android? Check usage limits, clip selection, video quality, app updates, and practical troubleshooting steps.
GetApkFree Team

How to Fix CapCut Effects Not Applying on Android
CapCut effects not working on Android? Check clip selection, effect layers, timeline timing, conflicting adjustments, and app performance with these practical fixes.
GetApkFree Team