
This article is about
CapCut Premium
capcutdownload.com.pk · Tools
How to Use Auto Reframe in CapCut on Android
GetApkFree Team
Learn how to use Auto Reframe in CapCut on Android to automatically keep subjects in frame, convert videos to different aspect ratios, and fix common reframing problems.
- Source
- Developer
- Package
- CapCut Premium
How to Use Auto Reframe in CapCut on Android
Have you ever recorded a wide video and then needed to turn it into a vertical video for short-form content?
The problem is that simply changing the aspect ratio can leave your subject partially outside the frame. If the person moves from one side of the video to the other, manually adjusting the framing can also take a lot of time.
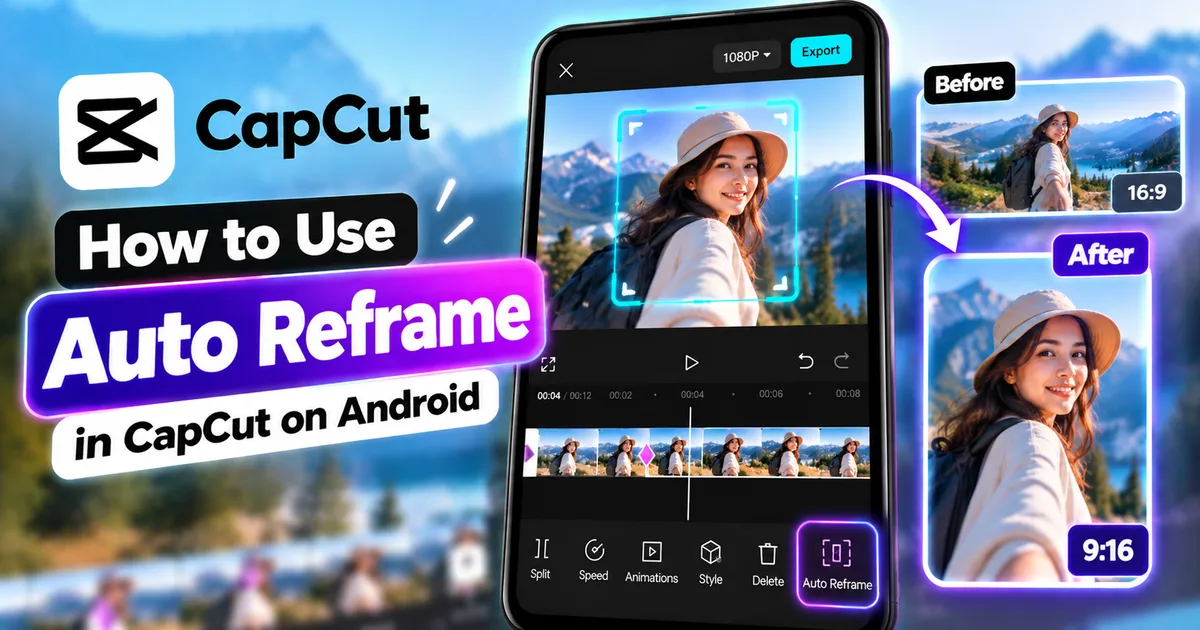
CapCut's Auto Reframe feature is designed to help with this problem. It uses automated subject-aware reframing to adjust the composition for a different aspect ratio while keeping the important subject within the frame.
This can be useful when converting landscape footage into vertical content for platforms such as Shorts, Reels, or TikTok.
In this guide, you'll learn what Auto Reframe does, how to use Auto Reframe in CapCut on Android, how to choose a new aspect ratio, how it differs from manual cropping and resizing, what to do when Auto Reframe is unavailable, and how to check the final result.
Quick Answer
To use Auto Reframe in CapCut on Android:
- Open CapCut.
- Start a new project.
- Import the video you want to reframe.
- Select the video clip.
- Find the Auto Reframe option in the editing tools.
- Choose the desired aspect ratio.
- Apply the Auto Reframe effect.
- Preview the entire video.
- Check that the main subject remains properly positioned.
- Make any additional adjustments if necessary.
- Export the finished video.
The exact location and availability of Auto Reframe can vary depending on your CapCut version, account, region, and plan.
What Is Auto Reframe in CapCut?
Auto Reframe is an automated video-framing feature designed to adapt a video to a different aspect ratio while keeping the important subject within the visible composition.
For example, imagine you have a horizontal video:
16:9 landscape
but you want to create a vertical version:
9:16 portrait
Simply changing the project ratio can cause parts of the original video to fall outside the vertical frame.
Auto Reframe is designed to help solve this by automatically adjusting the framing.
Instead of manually moving the video every time the subject changes position, the feature can intelligently reframe the footage.
What Does Auto Reframe Do?
Auto Reframe can help with several common editing situations.
For example, it can be useful when:
- Converting landscape video to vertical video
- Preparing footage for short-form content
- Keeping a person visible while they move
- Reframing a talking-head video
- Adapting videos for different platforms
- Reducing the need for manual repositioning
- Creating different aspect-ratio versions of the same footage
The exact behavior depends on the video and the options available in your current CapCut version.
Auto Reframe vs Resize
Auto Reframe and resize are related, but they are not the same thing.
Resize
Resizing or changing the project ratio changes the shape or dimensions of the editing frame.
For example:
16:9 → 9:16
You may then need to manually reposition or scale the video.
Auto Reframe
Auto Reframe is intended to automatically adjust the composition for the new frame while keeping the important subject in view.
For example:
Landscape video → 9:16 → subject-aware reframing
This can save time when the subject moves around the original frame.
For a detailed guide to manual resizing, see:
How to Resize a Video in CapCut on Android
Auto Reframe vs Crop
Cropping removes portions of the visible video frame.
For example, you might manually crop the left and right sides of a landscape video to create a vertical composition.
Auto Reframe is different because it is designed to adjust the framing automatically according to the subject.
Crop
You decide which part of the frame remains visible.
Auto Reframe
CapCut attempts to determine where the important subject is and adjust the framing accordingly.
Both can be useful, depending on the video.
Auto Reframe vs Zoom
Zoom changes the apparent scale of the video.
For example:
Normal → Zoom in → Close-up
Auto Reframe is primarily concerned with adapting the composition to a target frame while keeping the subject visible.
You can use both techniques in the same editing project.
For a manual zoom tutorial, see:
How to Add a Zoom Effect in CapCut on Android
How to Use Auto Reframe in CapCut on Android
The exact interface can change between CapCut versions, but the general workflow is straightforward.
Step 1: Open CapCut
Launch CapCut on your Android phone.
From the home screen, start a new project.
Step 2: Import Your Video
Select the video you want to reframe.
Add it to your project timeline.
If you're testing Auto Reframe, a video with a clearly visible subject is usually easier to evaluate.
Step 3: Select the Video Clip
Tap the video clip on the timeline.
Make sure the actual video layer is selected.
Selecting a text layer, sticker, or another element can show different editing controls.
Step 4: Find Auto Reframe
Look through the available video editing tools for Auto Reframe.
Depending on your current CapCut version, interface layout, account, or region, the option may appear in a different location.
If you don't see Auto Reframe, continue reading the troubleshooting section below.
Step 5: Choose the Target Aspect Ratio
Select the aspect ratio you want to use.
For example, you may choose:
- 9:16 for vertical short-form video
- 16:9 for landscape video
- 1:1 for square content
- Other ratios supported by your version
The best ratio depends on where you intend to publish the video.
Step 6: Apply Auto Reframe
After selecting the desired format, apply Auto Reframe.
CapCut will process the video and attempt to adjust the framing around the important subject.
Processing time can vary depending on the video and your device.
Step 7: Preview the Result
Play the entire video.
Don't judge the result from only the first few seconds.
Check:
- The beginning
- The middle
- The ending
- Subject movement
- Faces
- Important objects
- Text
- Logos
- Background elements
The goal is to make sure the important content remains visible throughout the video.
Step 8: Make Additional Adjustments if Needed
Auto Reframe is an automated tool, so you should still review the result.
If the framing isn't exactly what you want, you may need to make additional manual adjustments.
You can combine automated reframing with other CapCut editing tools.
Step 9: Export the Video
When you're satisfied with the result, preview the complete project one more time.
Then tap Export.
Choose suitable output settings and save the finished video.
How to Auto Reframe a Horizontal Video to Vertical
One of the most useful applications of Auto Reframe is converting horizontal footage into a vertical composition.
Imagine you recorded a person speaking in a wide landscape frame.
The original video might look like this:
16:9
When converted to vertical:
9:16
much of the original horizontal space cannot remain visible.
Instead of manually moving the frame throughout the video, Auto Reframe can attempt to keep the subject properly positioned.
Basic Workflow
- Import the landscape video.
- Select the video clip.
- Open Auto Reframe.
- Select a vertical aspect ratio such as 9:16.
- Apply the feature.
- Preview the entire video.
- Check subject positioning.
- Make manual corrections if necessary.
- Export the final video.
How to Use Auto Reframe for YouTube Shorts
YouTube Shorts use a vertical viewing format.
If your original recording is horizontal, Auto Reframe can help adapt the footage to a vertical composition.
For example, you might have:
Original: 16:9 landscape
Short: 9:16 vertical
After reframing, check whether:
- The speaker remains visible
- Faces are not cut off
- Text remains inside the frame
- Important objects remain visible
- The subject doesn't move outside the frame
Do not assume that automated reframing is perfect.
Always watch the complete video.
How to Use Auto Reframe for Instagram Reels
Auto Reframe can also be useful when adapting existing footage for vertical short-form content.
A landscape recording may contain a lot of horizontal space that isn't useful in a vertical frame.
Auto Reframe can attempt to keep the important subject visible while changing the composition.
After applying it:
- Watch the complete video.
- Check the subject's position.
- Check text and captions.
- Check overlays.
- Check transitions.
- Check the beginning and ending.
- Export only after confirming the framing.
How to Use Auto Reframe for TikTok
If you're adapting existing footage for TikTok, a vertical project can make the content more suitable for mobile viewing.
Auto Reframe can help when the subject moves within a wider original recording.
For example, if someone walks across a landscape video, a manually fixed crop may eventually lose the person.
An automated reframing tool can attempt to follow the subject.
However, you should still review the entire result.
How to Auto Reframe a Talking-Head Video
Talking-head videos are one of the situations where automatic reframing can be useful.
Imagine that the speaker moves slightly while talking.
With a fixed crop, the person's face may gradually move toward the edge of the frame.
Auto Reframe can attempt to maintain the speaker's position.
For better results:
- Keep the speaker clearly visible
- Avoid extremely crowded backgrounds
- Check the entire video
- Review the face position
- Check subtitles
- Make manual adjustments when necessary
How to Auto Reframe a Moving Person
Auto Reframe can be particularly useful when the subject moves.
For example:
Person on left → Person in center → Person on right
A fixed crop may not work equally well for all three positions.
An automated reframing system can attempt to adjust the composition as the subject moves.
However, the quality of the result depends on factors such as:
- Subject visibility
- Background complexity
- Camera movement
- Lighting
- Number of important objects
- Video quality
- Target aspect ratio
Always preview the final video.
How to Auto Reframe a Product Video
Auto Reframe can also be useful for product demonstrations.
For example, you might record a product in a wide frame and later need a vertical version.
After applying Auto Reframe, check whether the product remains visible throughout the video.
This is particularly important if the product moves or the camera moves around it.
If the product is small in the original recording, aggressive reframing can make the final footage appear soft.
How to Auto Reframe a Gaming Video
Gaming footage can be more difficult to reframe because there may be several important areas on screen.
For example, the important content could include:
- A character
- A score
- A map
- An objective
- A notification
- A gameplay event
Auto Reframe may not always know which element is most important to you.
After applying the feature, carefully inspect the result.
If the most important gameplay information is missing, manual editing may be a better option.
How to Auto Reframe Without Losing Important Content
Automatic reframing can change what part of the original frame is visible.
Before exporting, check whether you have lost:
- Faces
- Hands
- Products
- Text
- Logos
- Important objects
- Gameplay information
- Captions
If something important disappears, don't simply export the video.
Adjust the framing or use another editing approach.
How to Auto Reframe Without Black Bars
When changing aspect ratios, black or empty areas can appear if the original footage doesn't fill the new frame.
Auto Reframe is designed to adapt the composition to the new frame.
However, the result still depends on the source footage and target format.
If you see unwanted empty areas:
- Check the target aspect ratio.
- Review the framing.
- Check the video scale.
- Consider cropping or scaling.
- Consider using a background.
- Preview the entire project.
For manual aspect-ratio changes, see:
How to Resize a Video in CapCut on Android
Can Auto Reframe Keep a Moving Subject Centered?
Auto Reframe is designed to adjust the composition around important subjects.
This makes it useful for videos where the subject moves.
However, "centered" does not necessarily mean the subject will remain exactly in the mathematical center of the screen at every moment.
The composition may instead attempt to keep the subject appropriately positioned within the target frame.
Always check the final result.
Auto Reframe and Keyframes
Auto Reframe and keyframes are two different approaches.
Auto Reframe
Automates the reframing process.
Keyframes
Give you manual control over movement and position over time.
Keyframes can be useful when you want precise control over where the frame moves.
For example:
Keyframe 1 → Subject left
Keyframe 2 → Subject center
Keyframe 3 → Subject right
If you need detailed manual animation, see:
How to Add Keyframes in CapCut on Android
Auto Reframe and Crop
Crop is a manual framing tool.
You decide what part of the image remains visible.
Auto Reframe attempts to automate this type of composition adjustment.
A useful workflow can therefore be:
Auto Reframe → Preview → Manual Crop or Position Adjustment → Export
This is especially useful when the automatic result is close but needs a small correction.
Auto Reframe and Resize
Resize changes the project dimensions or aspect ratio.
Auto Reframe goes further by attempting to adjust the video composition for the new frame.
For example:
Resize: Change 16:9 to 9:16.
Auto Reframe: Change to 9:16 while attempting to keep the main subject properly framed.
These tools can therefore solve related but different problems.
Is Auto Reframe Free in CapCut?
Availability and pricing can change over time and may differ by account and region.
CapCut's current help documentation indicates that Auto Reframe is a CapCut Pro feature in current versions and may require an active Pro subscription.
If the feature displays a Pro or subscription prompt in your version, you will need the required plan to use it.
Basic tools such as crop and zoom remain separate from Auto Reframe.
Always check the current CapCut interface and subscription information shown in your own account.
Why Can't I Find Auto Reframe in CapCut?
There are several possible reasons.
Your CapCut Version Is Different
CapCut regularly changes its interface and feature availability.
Update the app if an update is available.
The Feature Is Located Elsewhere
Look through the video editing controls after selecting the clip.
The location of the feature can change between versions.
The Feature Requires Pro
If Auto Reframe is currently restricted to Pro on your account, CapCut may show a subscription prompt instead of allowing the feature to run.
Regional Availability
Some CapCut features can vary by region.
If the feature isn't available in your location, updating the app may not make it appear.
Account or Feature Availability
Certain features can also depend on account eligibility or current CapCut product availability.
If the feature is missing, check CapCut's current help documentation and the options displayed in your app.
Auto Reframe Is Not Working
If Auto Reframe doesn't work correctly, try the following:
- Update CapCut.
- Restart the app.
- Check your internet connection if processing requires online services.
- Make sure the video is properly imported.
- Try a shorter or simpler clip.
- Check whether your account has access to the feature.
- Check whether the feature requires Pro.
- Try the operation again.
- Preview the result carefully.
If the problem continues, CapCut's current feature availability and troubleshooting guidance should be checked because requirements can change.
Auto Reframe Is Framing the Wrong Subject
This can happen when there are multiple people or important objects in the same frame.
For example, a video could contain:
- Two people
- A presenter and a product
- Several players
- A person and a pet
- Multiple objects
The automated system may not always prioritize the element you care about.
If the wrong subject receives attention, consider manually adjusting the framing or using keyframes.
Auto Reframe Cuts Off My Face
If your face is partially outside the final frame:
- Preview the entire video.
- Check whether the problem occurs throughout the clip.
- Try a different target aspect ratio.
- Adjust the framing manually.
- Reduce excessive scaling.
- Consider using keyframes for precise control.
Don't export until the complete video looks correct.
Auto Reframe Makes My Video Look Too Zoomed In
Changing from a wide frame to a narrow frame can require substantial reframing.
If the subject fills most of the new frame, the result may appear more zoomed in than the original.
This is normal when a large portion of the original frame cannot fit inside the target aspect ratio.
If the result is too tight, consider using a wider composition or a background instead of filling every pixel with the original footage.
Auto Reframe Loses the Subject
If the subject disappears from the frame:
- Check whether the subject is clearly visible.
- Check whether another object becomes more prominent.
- Review the entire clip.
- Try another framing approach.
- Use manual positioning or keyframes when necessary.
Automated tools are useful, but they should always be reviewed before publishing.
Tips for Better Auto Reframing
Start With Good Source Footage
Higher-quality footage gives you more flexibility when changing the composition.
Keep the Main Subject Clearly Visible
A clearly visible subject can make automated reframing easier.
Avoid Excessive Cropping
A dramatic change from landscape to vertical can remove a large portion of the original frame.
Check the Entire Video
Never judge Auto Reframe from a single frame.
Review Text and Captions
A reframed video may change the available space around text.
Check Moving Subjects
Make sure the subject remains visible throughout the video.
Keep Your Original Video
Always keep the original recording so you can create another version if the automated result isn't suitable.
Use Manual Tools When Necessary
Auto Reframe is a convenience tool, not a replacement for every manual editing situation.
If precise control matters, use crop, position, zoom, or keyframes.
Frequently Asked Questions
What is Auto Reframe in CapCut?
Auto Reframe is an automated feature designed to adjust video composition for a different aspect ratio while attempting to keep the important subject within the frame.
Can I use Auto Reframe on Android?
CapCut currently documents Auto Reframe for its mobile app, including Android. Availability can depend on the current version, account, region, and plan.
Is Auto Reframe free in CapCut?
Current CapCut help documentation indicates that Auto Reframe may require CapCut Pro. Availability and subscription requirements can change, so check the current options shown in your CapCut account.
Can Auto Reframe convert landscape video to vertical?
Yes. Auto Reframe is designed to adapt video composition to different aspect ratios, including converting landscape footage to vertical formats when the feature is available.
Can Auto Reframe follow a moving person?
Auto Reframe is designed to adjust the composition around the important subject, which can help with moving subjects. However, the result depends on the footage and should be reviewed.
Is Auto Reframe the same as cropping?
No.
Cropping manually removes parts of the visible frame.
Auto Reframe automates the reframing process to help keep the important subject visible.
Is Auto Reframe the same as resizing?
No.
Resizing changes the dimensions or aspect ratio of the project.
Auto Reframe is designed to adjust the composition for the new frame.
Can I use Auto Reframe for YouTube Shorts?
Yes. A vertical format such as 9:16 can be used when adapting footage for vertical short-form content.
Can I use Auto Reframe for Instagram Reels?
Yes. Auto Reframe can be useful when adapting wider footage to a vertical composition.
Can I use Auto Reframe for TikTok?
Yes. Auto Reframe can help adapt existing footage to a vertical format suitable for short-form content.
Why is Auto Reframe asking me to pay?
CapCut's current help documentation indicates that Auto Reframe is currently part of CapCut Pro in supported versions. If you see a subscription prompt, your account may require Pro access to use the feature.
Why don't I have Auto Reframe in CapCut?
The feature may depend on your CapCut version, region, account, or subscription. CapCut also changes its interface and feature availability over time.
Does Auto Reframe always keep the subject perfectly centered?
No. Auto Reframe attempts to maintain suitable subject framing, but the result can vary depending on the footage, movement, background, and target aspect ratio.
Can I manually adjust Auto Reframe?
Depending on your current CapCut version and workflow, you can continue editing the result with other framing tools. Manual crop, position, zoom, and keyframes can provide more precise control.
Is Auto Reframe better than manual cropping?
Auto Reframe and manual cropping serve different purposes.
Auto Reframe can save time when you need automated subject-aware framing.
Manual cropping gives you direct control over exactly what remains visible.
Final Thoughts
Auto Reframe can be useful when you need to adapt existing video footage to a different aspect ratio without manually repositioning the composition throughout the entire clip.
It is especially useful for situations such as converting landscape videos into vertical content, reframing talking-head videos, adapting footage for Shorts and Reels, and keeping moving subjects within a new frame.
However, automated reframing should not be treated as a set-and-forget process.
Always preview the complete video and check faces, products, text, captions, logos, and other important elements before exporting.
If Auto Reframe is unavailable or doesn't produce the framing you want, you can still use CapCut's manual tools such as crop, resize, zoom, position controls, and keyframes.
The best workflow depends on the footage, the destination format, and how much control you need over the final composition.
Related Articles

How to Fix CapCut Video Lagging After Export on Android
Fix CapCut video lagging after export on Android. Learn how to troubleshoot choppy playback, frame-rate mismatches, heavy effects, storage issues, and export settings.
GetApkFree Team

How to Fix CapCut Preview Not Matching Export on Android
Fix CapCut preview not matching the exported video on Android. Troubleshoot missing effects, text, transitions, timing, colors, and rendering differences.
GetApkFree Team

How to Fix Couldn't Apply AI Background in CapCut on Android
Getting "Couldn't Apply AI Background" in CapCut on Android? Check usage limits, clip selection, video quality, app updates, and practical troubleshooting steps.
GetApkFree Team

How to Fix CapCut Effects Not Applying on Android
CapCut effects not working on Android? Check clip selection, effect layers, timeline timing, conflicting adjustments, and app performance with these practical fixes.
GetApkFree Team