
This article is about
CapCut Premium
capcutdownload.com.pk · Tools
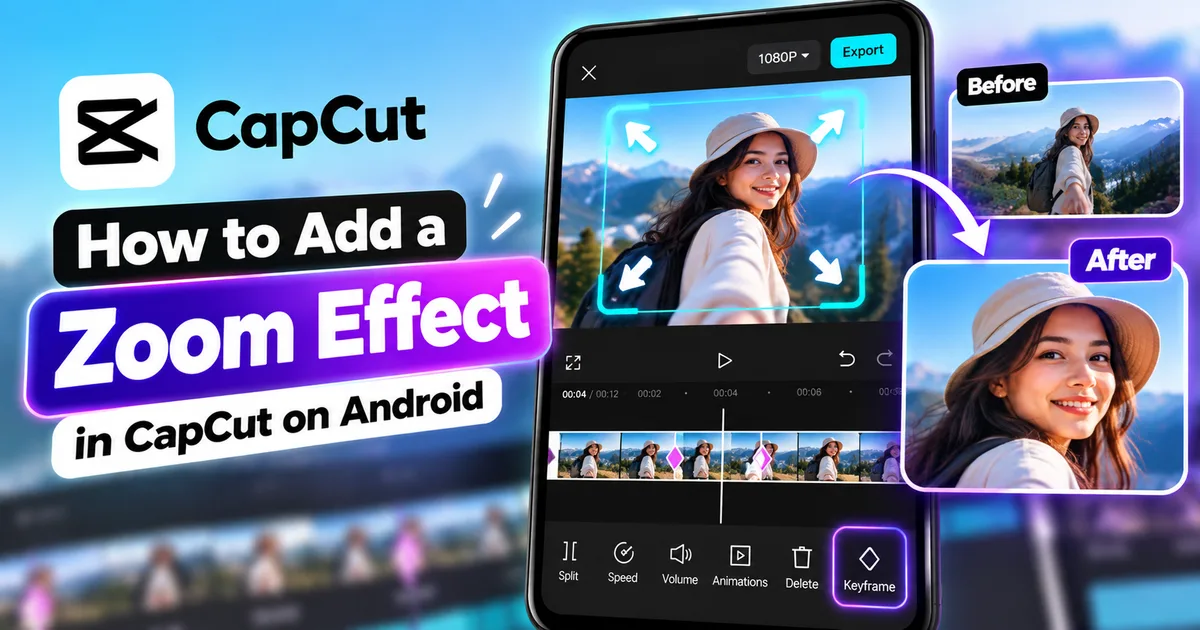
How to Add a Zoom Effect in CapCut on Android
GetApkFree Team
Learn how to add a zoom effect in CapCut on Android using keyframes, create smooth zoom in and out effects, zoom on a subject, and fix common problems.
- Source
- Developer
- Package
- CapCut Premium
How to Add a Zoom Effect in CapCut on Android
Want to make a person, object, or specific moment stand out in your video?
CapCut on Android lets you create zoom effects that can gradually move the viewer's focus toward or away from part of the footage. You can use a zoom effect to emphasize a reaction, highlight an object, create a dramatic moment, or make a short-form video feel more dynamic.
For a smooth animated zoom, CapCut's mobile workflow uses keyframes. You can set the starting position, move to another point in the timeline, add another keyframe, and then change the video's scale. CapCut automatically creates the movement between those points.
In this guide, you'll learn how to add a zoom effect in CapCut on Android, create smooth zoom-in and zoom-out effects, zoom toward a person or object, control zoom speed, create a photo zoom effect, and fix common zoom problems.
Quick Answer
To create a zoom effect in CapCut on Android, open CapCut and create a new project. Import your video and select the clip.
Move the playhead to the point where you want the zoom to begin and add a keyframe. Then move the playhead to the point where you want the zoom to finish, add another keyframe, and use two fingers on the preview to enlarge or reduce the video.
CapCut will animate the change between the keyframes.
The distance between the keyframes controls how quickly the zoom happens.
The exact position and appearance of the keyframe controls can change between CapCut versions.
What Is a Zoom Effect in CapCut?
A zoom effect changes the apparent scale of video footage over time.
Instead of keeping the video at the same size throughout the clip, you can gradually make the footage appear closer or farther away.
For example:
Normal size → gradual zoom in → close-up
or:
Close-up → gradual zoom out → wider view
A zoom effect can be useful for:
- Highlighting a person's face
- Emphasizing an object
- Creating a dramatic moment
- Making a talking-head video more dynamic
- Emphasizing a reaction
- Creating movement in a static image
- Making Shorts and Reels more engaging
- Creating cinematic-style edits
- Drawing attention to a detail
A zoom can be subtle or dramatic depending on how much you change the scale and how quickly the movement happens.
Zoom Effect vs Zooming While Editing
These are not exactly the same thing.
When you pinch the preview while editing, you can change the scale of the clip.
If you use keyframes, however, the scale can change over time.
For example:
Normal scale
→ Keyframe
→ Larger scale
→ Keyframe
The result is an animated zoom instead of a permanently enlarged clip.
How to Add a Zoom Effect in CapCut on Android
Follow these steps to create a basic zoom-in effect.
Step 1: Open CapCut
Launch CapCut on your Android phone.
From the home screen, start a new project.
Step 2: Import Your Video
Select the video you want to edit from your phone's gallery.
Add it to the project timeline.
The video will appear in the editor.
Step 3: Select the Video Clip
Tap the video clip on the timeline.
This gives you access to the editing controls for that clip.
Make sure the correct clip is selected before adding the keyframes.
Step 4: Move the Playhead to the Starting Point
Move the playhead to the moment where you want the zoom to begin.
For example, if you want the zoom to start two seconds into the video, place the playhead at that point.
Step 5: Add the First Keyframe
Look for the keyframe control in the editing interface.
Tap it to create the first keyframe.
This keyframe establishes the starting position and scale of the video.
For a normal zoom-in effect, leave the video at its original scale at this point.
Step 6: Move the Playhead Forward
Move the playhead to the point where you want the zoom to finish.
For example, you might move it one or two seconds forward.
The distance between the starting and ending keyframes affects how quickly the zoom happens.
Step 7: Add Another Keyframe
Add another keyframe at the new position.
You now have a starting point and an ending point for the zoom animation.
Step 8: Zoom In on the Video
With the playhead positioned at the second keyframe, use two fingers on the video preview to enlarge the footage.
Increase the scale until the subject or area you want to emphasize is framed correctly.
CapCut will animate the change between the first and second keyframes.
Step 9: Preview the Zoom
Play the section of the video.
Watch how the footage moves from the original scale to the larger scale.
If the zoom is too fast, increase the distance between the keyframes.
If it is too slow, move the keyframes closer together.
Step 10: Export the Video
When the zoom looks correct, preview the complete project.
Then tap Export and choose appropriate output settings.
How to Create a Smooth Zoom In
A smooth zoom gradually brings the viewer closer to the subject.
A basic workflow is:
- Add your video.
- Select the clip.
- Move to the starting point.
- Add a keyframe.
- Leave the video at the original scale.
- Move the playhead forward.
- Add another keyframe.
- Increase the scale.
- Reposition the footage if necessary.
- Preview the result.
The movement between the two keyframes creates the animated zoom.
How to Create a Zoom Out Effect in CapCut
You can reverse the process to create a zoom-out effect.
For example:
Large scale → smaller scale
Basic Workflow
- Import your video.
- Select the clip.
- Move to the point where the zoom-out should begin.
- Add a keyframe.
- Increase the video scale.
- Move the playhead forward.
- Add another keyframe.
- Reduce the scale back toward the original size.
- Preview the result.
- Adjust the keyframe positions if necessary.
The video will gradually move from the larger scale to the smaller scale.
How to Control Zoom Speed in CapCut
The distance between keyframes affects the speed of the zoom.
For example:
Short Distance Between Keyframes
Keyframe A → Keyframe B
If the keyframes are close together, the zoom happens more quickly.
This can work well for:
- Quick reactions
- Beat-based edits
- Dramatic moments
- Short visual emphasis
Longer Distance Between Keyframes
Keyframe A →----------------→ Keyframe B
If the keyframes are farther apart, the zoom takes longer.
This can work well for:
- Talking-head videos
- Travel videos
- Cinematic footage
- Slow reveals
- Dramatic scenes
Choose the timing based on the pace of your video.
How to Zoom in on a Person in CapCut
You can use a zoom effect to draw attention to a person's face or body.
For example, imagine someone is talking in a wide shot.
You could begin with the entire person visible and gradually zoom toward their face.
Basic Workflow
- Import the video.
- Find the moment where the person's face should become more prominent.
- Add a starting keyframe.
- Move forward on the timeline.
- Add another keyframe.
- Increase the scale.
- Reposition the footage so the person's face remains visible.
- Preview the movement.
Be careful when zooming toward a face.
If you enlarge the footage too much, the face may become cropped or the video may appear soft.
How to Zoom in on an Object in CapCut
A zoom can also be used to highlight an object.
For example, you could zoom toward:
- A product
- A phone screen
- A document
- A piece of equipment
- A gaming detail
- A sign
- A particular part of a scene
Start with a wider view and gradually increase the scale while positioning the object inside the frame.
Check the entire movement rather than only the first and last frames.
How to Zoom in on a Specific Part of a Video
If you want to highlight a particular area, use the keyframe position and scale together.
For example:
Wide frame
→ Start keyframe
→ Move playhead
→ Increase scale
→ Reposition the video
→ End keyframe
The important part is to keep the subject inside the visible frame while the scale changes.
How to Zoom Without Losing the Subject
A common problem with zooming is that the subject can move outside the frame.
This can happen when:
- A person moves
- The camera moves
- The object changes position
- The original video is already tightly framed
After creating the zoom, watch the entire animation.
If the subject moves out of the frame, adjust the scale or reposition the clip at the appropriate keyframes.
For more advanced movement control, you can also use additional keyframes.
How to Create a Zoom Effect With Multiple Keyframes
You don't have to use only two keyframes.
Multiple keyframes can create more complex movement.
For example:
Normal
→ Zoom in
→ Hold
→ Zoom farther
→ Zoom out
A possible sequence could be:
Keyframe 1 → Original scale
Keyframe 2 → Slightly larger
Keyframe 3 → Larger
Keyframe 4 → Original scale
This gives you more control over how the camera-like movement develops.
However, too many keyframes can make the movement difficult to manage.
Start with two keyframes and add more only when necessary.
How to Create a Slow Zoom Effect
For a slow zoom, use a larger distance between the starting and ending keyframes.
For example:
Starting keyframe at 2 seconds
Ending keyframe at 7 seconds
The zoom will happen gradually over the interval.
Slow zooms can work well for:
- Talking-head videos
- Travel footage
- Landscape shots
- Storytelling
- Cinematic scenes
- Emotional moments
Avoid making the scale change so small that the movement becomes impossible to notice.
How to Create a Fast Zoom Effect
For a fast zoom, place the keyframes closer together.
For example:
Starting keyframe at 3 seconds
Ending keyframe at 3.5 seconds
The zoom happens quickly between those points.
Fast zooms can work well for:
- Reactions
- Beat drops
- Memes
- Gaming videos
- Short-form edits
- Dramatic reveals
A very fast zoom can become distracting, so preview the result carefully.
How to Create a Zoom and Zoom Out Effect
You can combine both movements in the same section.
For example:
Normal
→ Zoom in
→ Hold
→ Zoom out
Basic Workflow
- Add a starting keyframe.
- Move forward.
- Add a second keyframe and zoom in.
- Move forward again.
- Add a third keyframe while maintaining the larger scale.
- Move forward again.
- Add a fourth keyframe.
- Return toward the original scale.
- Preview the result.
This can create a camera-like push-in followed by a pull-back.
How to Create a Zoom Effect on a Photo in CapCut
Zoom effects aren't limited to video clips.
You can also use keyframes to create movement on a still image.
This can be useful for:
- Photo slideshows
- Travel photos
- Presentations
- Memories
- Product images
- Storytelling videos
Basic Workflow
- Create a new CapCut project.
- Add a photo.
- Select the photo on the timeline.
- Move to the beginning.
- Add a keyframe.
- Keep the original scale.
- Move the playhead forward.
- Add another keyframe.
- Increase the scale.
- Reposition the image if necessary.
- Preview the result.
This creates movement even though the original image is static.
How to Create the Ken Burns-Style Effect in CapCut
A common photo-editing technique uses slow zooming and movement across a still image.
You can create a similar effect in CapCut by using keyframes.
For example:
Photo starts wide
→ Gradually zoom in
→ Move toward the subject
→ End on a closer view
You can also combine scale and position changes to make the image appear to move.
Keep the movement slow and smooth for a more natural result.
How to Zoom Into a Face in a Photo
If you're working with a portrait photo, you can gradually zoom toward the person's face.
Start with the full image.
Then add another keyframe later in the timeline and enlarge the photo.
Reposition the image so the face remains near the desired area of the frame.
Preview the entire animation to make sure the face doesn't move unexpectedly.
How to Create a Zoom Effect for YouTube Shorts
Zoom effects can be useful in Shorts because they can quickly direct attention toward important moments.
For example, you can zoom toward:
- A reaction
- A product
- A result
- A funny moment
- A surprising detail
- A gaming action
Keep the movement relatively simple.
Short-form videos are already fast-paced, so excessive zooming can make the video difficult to watch.
How to Create a Zoom Effect for Instagram Reels
A zoom can add movement to a Reel without requiring a camera movement in the original footage.
For example, you could start with a wider shot and gradually zoom toward the subject.
If your project uses a vertical 9:16 format, check that the subject remains inside the frame during the zoom.
See our guide on how to resize a video in CapCut on Android if you need to change the project's aspect ratio.
How to Create a Zoom Effect for Talking-Head Videos
Zooming can help break up a long talking-head recording.
For example:
Normal shot
→ Gradual zoom toward speaker
→ Close-up
→ Return to normal
This can add visual variety without requiring a new camera angle.
Use subtle zooms rather than constantly moving in and out.
A small change in scale can be enough to make a static recording feel more dynamic.
How to Create a Zoom Effect for Gaming Videos
Gaming videos can use fast zooms to emphasize important moments.
For example, you could zoom toward:
- A winning move
- A score
- A character
- A weapon or item
- A surprising event
- A final result
Match the zoom with the timing of the gameplay and, if appropriate, with music or sound effects.
See our guide on how to add sound effects to a video in CapCut on Android.
How to Create a Zoom Effect With Music
A zoom can become more noticeable when it is synchronized with music.
For example:
Music beat → Zoom begins
or:
Beat drop → Fast zoom
Basic Workflow
- Add your music.
- Identify an important beat.
- Place the starting keyframe before the beat.
- Place the ending keyframe at or around the beat.
- Adjust the scale.
- Preview the movement with the music.
The goal is to make the visual movement feel connected to the audio.
See our guide on how to add music to a video in CapCut on Android.
How to Create a Zoom Effect With Sound Effects
A short sound effect can emphasize a zoom.
For example:
Zoom in → Whoosh sound
or:
Fast zoom → Impact sound
Keep the audio subtle enough that it supports the visual effect instead of overpowering the video.
How to Combine Zoom With Other CapCut Tools
Zoom effects can be combined with many other editing tools.
For example:
- Zoom + Text
- Zoom + Stickers
- Zoom + Sound Effects
- Zoom + Music
- Zoom + Filters
- Zoom + Transitions
- Zoom + Overlays
- Zoom + Keyframes
- Zoom + Freeze Frame
For example, you could freeze a frame and then slowly zoom toward the subject.
See our guide on how to freeze a frame in CapCut on Android.
Zoom Effect vs Keyframes
These terms are related but different.
Zoom Effect
A zoom effect describes the visual movement where the footage appears to move closer or farther away.
Keyframes
Keyframes are a tool that can be used to animate properties such as scale and position over time.
In CapCut, keyframes can therefore be used to create a zoom effect.
For more information about keyframes, see our guide on how to add keyframes in CapCut on Android.
Zoom Effect vs Zoom Transition
A zoom effect can happen within a single clip.
A zoom transition is used as part of the change between clips.
For example:
Clip 1 → Zoom effect → Clip continues
is different from:
Clip 1 → Zoom transition → Clip 2
If you want to learn more about transitions, see our guide on how to add transitions in CapCut on Android.
Zoom Effect vs Crop
Zooming and cropping can produce visually similar results, but they are not exactly the same.
Zoom
Zoom changes the scale of the footage inside the frame.
Crop
Crop removes part of the visible image.
A zoom effect can be animated over time, while a crop can simply change which part of the image remains visible.
How to Make a Zoom Effect Look Smooth
A smooth zoom depends heavily on timing and scale.
Try these techniques:
Use a Reasonable Scale Change
Don't immediately enlarge the footage dramatically.
A smaller scale change often looks more natural.
Give the Zoom Enough Time
If the zoom is too fast, it can feel abrupt.
Move the ending keyframe farther away when you want a slower movement.
Keep the Subject Positioned Correctly
Reposition the footage so the subject remains visible.
Preview at Normal Speed
A zoom that looks good while scrubbing may feel different during normal playback.
Avoid Too Many Keyframes
Start with two keyframes and add more only when necessary.
How to Make a Zoom Effect Look Cinematic
A cinematic zoom usually benefits from subtle movement.
Instead of dramatically enlarging the video, use a smaller scale change over a longer period.
You can combine the zoom with:
- Music
- Color adjustments
- Slow motion
- Transitions
- Ambient sound
- Subtle effects
The goal is controlled movement rather than an obvious digital zoom.
How to Avoid Losing Video Quality When Zooming
Digital zoom enlarges the existing pixels in the footage.
If you zoom in too far, the video can become soft or pixelated.
For better results:
- Start with high-resolution footage.
- Avoid excessive scaling.
- Use the original video whenever possible.
- Don't repeatedly export and re-import the same file.
- Preview the final result before exporting.
If your footage is already blurry, see our guide on how to improve video quality in CapCut on Android.
How Much Should You Zoom in CapCut?
There is no single zoom level that works for every video.
The appropriate amount depends on:
- Original video resolution
- Subject position
- Project aspect ratio
- Desired visual style
- Duration of the zoom
- Distance between the camera and subject
For a subtle effect, use a small scale change.
For a dramatic effect, a larger change may be appropriate.
Always check the final image for softness or unwanted cropping.
How to Zoom Without Making the Video Shaky
A poorly timed zoom can feel uncomfortable even when the scale change itself is smooth.
To reduce this problem:
- Use fewer keyframes.
- Keep the scale changes consistent.
- Avoid sudden position changes.
- Use a longer duration for gradual zooms.
- Preview the movement several times.
If the original footage is already shaky, stabilize it before creating a zoom effect.
See our guide on how to stabilize shaky video in CapCut on Android.
How to Create a Zoom-In and Freeze Effect
You can combine a zoom with a freeze frame to emphasize a particular moment.
For example:
Moving video
→ Freeze
→ Zoom in
→ Text appears
→ Sound effect
→ Video continues
This can work well for:
- Tutorials
- Reaction videos
- Gaming clips
- Comedy edits
- Sports clips
- Shorts
The freeze gives the viewer time to see the moment while the zoom directs attention toward the important area.
How to Add Text During a Zoom
You can add text while the zoom is happening.
For example, you can zoom toward a product while a short label appears.
Make sure the text remains readable throughout the animation.
If the zoom changes the visible area significantly, check whether the text needs to be repositioned.
See our guide on how to add text in CapCut on Android.
How to Add a Sticker During a Zoom
You can also use a sticker to emphasize the subject of the zoom.
For example:
Zoom toward a face → Reaction sticker appears
or:
Zoom toward an object → Arrow sticker appears
Check the sticker's timeline so it appears at the correct moment.
See our guide on how to add stickers in CapCut on Android.
CapCut Zoom Effect Not Working
If your zoom isn't moving as expected, check the keyframes first.
Make sure:
- You added a starting keyframe.
- You added an ending keyframe.
- The scale is different between the keyframes.
- The playhead is positioned correctly.
- You are editing the correct clip.
- You are previewing the section containing the keyframes.
If both keyframes have exactly the same scale, there may be little or no visible zoom.
The Zoom Is Too Fast
If the zoom happens too quickly, move the ending keyframe farther away from the starting keyframe.
For example:
Starting keyframe → 2 seconds → Ending keyframe
will generally produce a slower movement than placing the ending keyframe only a fraction of a second after the starting point.
Preview the result after moving the keyframe.
The Zoom Is Too Slow
If the zoom takes too long, move the keyframes closer together.
This reduces the amount of time available for the scale change.
A faster zoom can work well for action or short-form content.
The Zoom Is Too Strong
If the video becomes excessively enlarged, reduce the scale at the ending keyframe.
A smaller change often produces a more natural result.
Also check whether important parts of the image have been cropped.
The Subject Moves Out of the Frame
This can happen when the original subject is moving.
The solution may require additional keyframes to control the position of the footage.
For example:
Keyframe 1 → Start position
Keyframe 2 → Zoom + adjusted position
Keyframe 3 → Further position adjustment
This can help keep a moving subject visible during the zoom.
The Video Looks Blurry After Zooming
Digital zoom can make footage look softer because you're enlarging the existing image.
Try:
- Starting with higher-resolution footage.
- Reducing the zoom amount.
- Avoiding unnecessary scaling.
- Exporting at an appropriate resolution.
If the source video is already low quality, extreme zooming will make the problem more noticeable.
The Keyframe Option Is Missing
If you cannot find the keyframe control, select the video clip first.
Different selections can display different editing controls.
If the control still isn't visible, check the current CapCut interface and make sure you're working with a supported editing element.
CapCut's interface can change between versions.
The Zoom Looks Good While Editing but Bad After Export
If the zoom looks correct in the editor but different after export:
- Check the export resolution.
- Preview the exported file.
- Make sure the correct clip was exported.
- Check whether another layer or effect changes the appearance.
- Avoid exporting through multiple compression steps.
Tips for Better CapCut Zoom Effects
Start With the Original Footage
Use the highest-quality source video available.
Keep Zooms Purposeful
Zoom toward something important rather than zooming randomly.
Use Two Keyframes First
A simple two-keyframe zoom is easier to control.
Adjust Timing
Move the keyframes closer or farther apart depending on the desired speed.
Don't Over-Zoom
Extreme digital zoom can make footage look soft.
Keep Subjects Visible
Check the entire animation for unwanted cropping.
Match the Zoom to the Music
A zoom can feel more natural when synchronized with an important beat.
Preview the Complete Video
Don't judge the effect from one frame.
Keep the Original Project
Save the original version so you can create another edit later.
Frequently Asked Questions
How do I zoom in on a video in CapCut on Android?
Select the video clip, add a keyframe at the point where the zoom should begin, move the playhead forward, add another keyframe, and increase the video's scale using the preview controls.
How do I make a smooth zoom in CapCut?
Use two keyframes and make a gradual scale change between them. Move the keyframes farther apart for a slower zoom.
How do I zoom out in CapCut?
Start with a larger scale at the first keyframe and reduce the scale at a later keyframe.
Can I zoom in on a specific person?
Yes. Increase the scale and reposition the video so the person remains inside the visible frame.
Can I zoom in on an object?
Yes. You can use keyframes to gradually enlarge the footage and position the object inside the frame.
Can I create a zoom effect on a photo?
Yes. Keyframes can be used to gradually scale and reposition a photo.
How do I control zoom speed?
The distance between the starting and ending keyframes controls how quickly the scale changes.
Why is my CapCut zoom effect too fast?
Your keyframes may be too close together. Move the ending keyframe farther away to make the zoom take longer.
Why is my CapCut zoom effect too slow?
Move the ending keyframe closer to the starting keyframe to make the scale change happen faster.
Why does my video become blurry when I zoom in?
Digital zoom enlarges the existing image. Excessive scaling can make the footage look soft, especially when the original video has limited resolution.
Can I zoom in and then zoom back out?
Yes. You can use multiple keyframes to create a zoom-in followed by a zoom-out.
Can I add text during a zoom?
Yes. You can add text layers and control their timing separately from the zoom.
Can I add stickers during a zoom?
Yes. Stickers can be added and timed to appear during the zoom.
Can I combine zoom with a freeze frame?
Yes. A freeze frame can be followed by a zoom to emphasize a particular moment.
Is a zoom effect the same as a zoom transition?
No. A zoom effect can happen within a clip, while a zoom transition is used to move from one clip to another.
Does zooming reduce video quality?
Zooming can reduce perceived quality when the footage is enlarged significantly. Starting with high-resolution footage and avoiding excessive scaling can help.
Can I use zoom effects in YouTube Shorts?
Yes. Zoom effects can be used to emphasize reactions, objects, actions, and other important moments in Shorts.
Can I use zoom effects in Instagram Reels?
Yes. Zoom effects can add movement and emphasis to vertical Reel-style videos.
Can I use zoom effects in gaming videos?
Yes. Zooms can emphasize scores, actions, characters, results, or other important moments in gaming footage.
Final Thoughts
Adding a zoom effect in CapCut on Android is a simple way to direct attention and add movement to otherwise static footage.
The basic workflow is:
- Open CapCut.
- Create a new project.
- Import your video.
- Select the video clip.
- Move to the starting point.
- Add a keyframe.
- Move the playhead forward.
- Add another keyframe.
- Change the scale.
- Reposition the footage if necessary.
- Preview the zoom.
- Adjust the keyframe timing.
- Export the video.
Remember that the distance between keyframes controls the timing of the zoom. A larger distance creates a more gradual movement, while a shorter distance creates a faster zoom.
For the best results, avoid excessive scaling and keep the subject visible throughout the animation. A subtle zoom can often look more natural than a dramatic one.
You can also combine zoom effects with music, sound effects, text, stickers, transitions, freeze frames, and other CapCut tools to create more engaging videos.
Starting with high-quality original footage and using the zoom for a clear visual purpose will help you create cleaner and more effective edits.
Related Articles

How to Fix CapCut Video Lagging After Export on Android
Fix CapCut video lagging after export on Android. Learn how to troubleshoot choppy playback, frame-rate mismatches, heavy effects, storage issues, and export settings.
GetApkFree Team

How to Fix CapCut Preview Not Matching Export on Android
Fix CapCut preview not matching the exported video on Android. Troubleshoot missing effects, text, transitions, timing, colors, and rendering differences.
GetApkFree Team

How to Fix Couldn't Apply AI Background in CapCut on Android
Getting "Couldn't Apply AI Background" in CapCut on Android? Check usage limits, clip selection, video quality, app updates, and practical troubleshooting steps.
GetApkFree Team

How to Fix CapCut Effects Not Applying on Android
CapCut effects not working on Android? Check clip selection, effect layers, timeline timing, conflicting adjustments, and app performance with these practical fixes.
GetApkFree Team