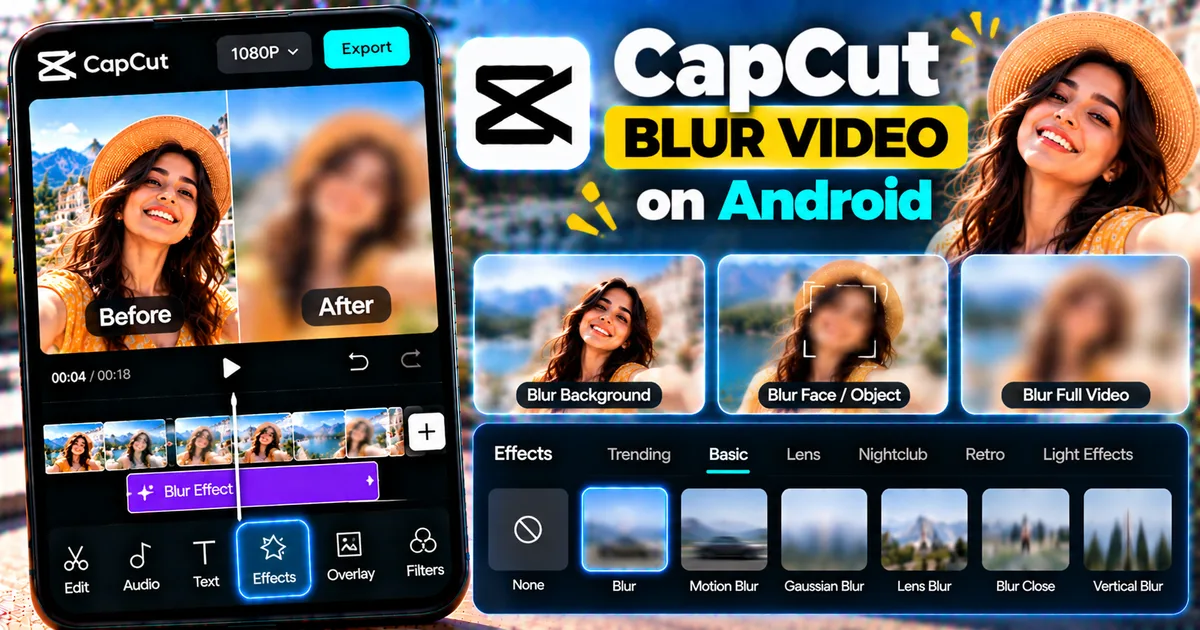

This article is about
CapCut Premium
capcutdownload.com.pk · Tools
How to Blur a Video in CapCut on Android
GetApkFree Team
Learn how to blur a video in CapCut on Android, blur the entire video or selected areas, adjust blur intensity, and create smooth background blur effects.
- Source
- Developer
- Package
- CapCut Premium
How to Blur a Video in CapCut on Android
Blurring a video can be useful when you want to hide sensitive information, cover a distracting area, create a cinematic look, or draw attention to the main subject.
CapCut on Android provides several ways to use blur effects. You can blur an entire video, apply blur to part of a clip, create a blurred background effect, or use masking techniques for more precise editing.
This guide explains how to blur a video in CapCut on Android and how to control the effect for different editing situations.
Quick Answer
To blur a video in CapCut on Android, create a new project and add your video. Open the Effects section, find a suitable Blur effect, and apply it to the clip. Adjust the blur strength if the available controls allow it.
If you only want to blur part of the video, you can use a duplicate layer together with a blur effect and mask the area that needs to be blurred.
The exact names and locations of CapCut tools can change between app versions.
What Can You Blur in CapCut?
CapCut can be used for several different types of blur effects.
You can blur:
- An entire video
- Part of a video
- A face
- A license plate
- A screen
- A document
- A background
- A distracting object
- A specific area of the frame
The method you use depends on what you want to blur.
If you want the whole frame to be blurry, a normal blur effect is usually enough.
If you only want to hide a particular area, masking provides more control.
How to Blur an Entire Video in CapCut on Android
The simplest method is to apply a blur effect to the video.
Step 1: Open CapCut
Launch CapCut on your Android phone.
Tap to create a new project.
Step 2: Add Your Video
Select the video you want to edit from your device.
Add it to the timeline.
The video will appear in the CapCut editor.
Step 3: Open Effects
Look at the editing toolbar and open Effects.
Browse or search the available video effects for a blur effect.
CapCut's effect library can change over time, so the exact blur options available on your device may be different from those shown in another version.
Step 4: Select a Blur Effect
Choose a blur effect that matches the look you want.
CapCut provides different blur-related effects and styles.
Preview the result after applying the effect.
Step 5: Adjust the Blur
If the selected effect provides an intensity or similar control, adjust it until the video reaches the desired level of blur.
A light blur can soften the footage without completely hiding details.
A stronger blur can make the content much less recognizable.
Step 6: Adjust the Duration
Check the effect layer on the timeline.
If you only want the blur during part of the video, adjust the effect's duration so it covers only the required section.
If you want the entire video blurred, extend the effect across the full clip.
Step 7: Preview the Video
Play the video from beginning to end.
Check that:
- The blur is strong enough
- The blur covers the intended duration
- There are no unexpected gaps
- The effect does not disappear too early
- The video still looks the way you expect
Step 8: Export
When you are satisfied with the result, tap Export.
Choose the appropriate available resolution and frame rate for your project and save the finished video.
How to Blur Part of a Video in CapCut
Sometimes you do not want to blur the entire video.
For example, you might need to hide:
- A person's face
- A phone number
- A license plate
- An address
- A computer screen
- A document
- A private message
In these situations, you need a more targeted workflow.
A common technique is to use two layers.
The lower layer contains the blurred version.
The upper layer contains the normal version with a mask controlling which area remains visible.
Step-by-Step: Blur a Specific Area
Step 1: Add Your Video
Create a new CapCut project and add your video.
Step 2: Duplicate the Video
Create a second copy of the video so that you have two layers.
The exact duplication controls can vary by CapCut version.
You should end up with one video layer above another.
Step 3: Apply Blur
Apply a blur effect to one of the layers.
The blurred layer will provide the blurred version of the footage.
Step 4: Select the Other Layer
Select the other video layer and open the available Mask controls.
Choose a suitable mask shape such as a circle or rectangle.
Step 5: Position the Mask
Resize and position the mask so that the correct part of the video remains visible while the blurred layer is exposed in the desired area.
This technique allows you to control where the blur appears.
Step 6: Adjust Feather
If the mask edge looks too sharp, increase the Feather value slightly.
A softer edge can make the blur blend more naturally into the surrounding footage.
Do not use excessive feathering because it can make the boundary unnecessarily soft.
Step 7: Preview the Result
Play the video and check whether the blurred area stays where you want it.
If the subject moves, you may need to animate the mask.
How to Blur a Moving Object in CapCut
Blurring a stationary object is relatively simple.
A moving object requires additional work.
For example, suppose you want to blur a license plate while a car moves through the frame.
A static mask may work at the beginning but move away from the license plate later.
In that situation, you can use keyframes or a supported tracking workflow.
Using Keyframes
A basic keyframe workflow is:
- Position the mask over the object.
- Add a keyframe at the beginning.
- Move forward in the timeline.
- Reposition the mask.
- Add another keyframe.
- Repeat as the object moves.
- Preview the complete video.
CapCut can interpolate movement between keyframes.
The more complicated the movement, the more adjustments you may need.
How to Blur a Face in CapCut
A face can be blurred using a targeted blur workflow involving a blur effect and mask.
For a moving face, the mask needs to remain aligned with the face throughout the video.
Depending on the current CapCut version, tracking tools may help automate some of this movement.
For privacy-sensitive footage, always watch the entire video before exporting to make sure the face remains covered.
A dedicated face-blurring guide can also be useful when the main goal is privacy rather than general video editing.
How to Blur a Background in CapCut
Background blur is different from simply making the entire video blurry.
The goal is usually to keep the main subject clear while making the background softer.
A common CapCut workflow uses duplicated layers, a blur effect, and background removal.
The basic concept is:
Normal subject + Blurred background
Subject-focused video
Basic Background Blur Workflow
- Add your video.
- Duplicate the video layer.
- Apply blur to the background layer.
- Select the foreground layer.
- Use Remove BG or a comparable subject-isolation tool when available.
- Align the layers.
- Adjust the blur intensity.
- Preview the result.
- Export the video.
CapCut's current mobile guidance describes a similar workflow using a blur effect, an original-video overlay, and background removal.
How Strong Should the Blur Be?
There is no universal blur setting.
The right strength depends on your goal.
Light Blur
Useful for:
- Aesthetic effects
- Softening backgrounds
- Creating a subtle cinematic look
Medium Blur
Useful when you want to make background details less noticeable.
Strong Blur
Useful when the main goal is to hide information or make details difficult to recognize.
For privacy-related editing, do not assume that a light blur completely hides sensitive information.
Preview the exported result before sharing it.
How to Blur a Video Background for Reels
Background blur can be useful when the original footage does not fill the entire vertical frame.
For example, you may have a horizontal video that you want to place inside a vertical project.
A blurred version of the footage can fill the surrounding background while the original video remains visible in the center.
A basic layout can look like:
Blurred background ↓ Original video ↓ Vertical final frame
This can create a more polished result than leaving large empty areas around the original video.
How to Blur Video Sides in CapCut
If a horizontal video is placed inside a vertical project, you may see empty areas on the sides.
One option is to create a blurred background using a duplicated version of the footage.
The blurred copy fills the frame while the original video sits above it.
This approach is commonly used for social-media videos.
How to Blur a Specific Section of a Video
You may want the blur to appear only during a particular part of the video.
For example:
0:00–0:05 — Normal
0:05–0:10 — Blur
0:10–0:15 — Normal
In this situation, place the blur effect only over the required section of the timeline.
Preview the beginning and end of the effect carefully so that the blur starts and stops where intended.
How to Blur a License Plate
If you need to hide a license plate, use a targeted blur rather than blurring the entire video.
A practical workflow is:
- Add the video.
- Duplicate the video layer.
- Apply a blur effect.
- Add a mask.
- Position the mask over the license plate.
- Adjust the size.
- Add Feather if appropriate.
- Track or keyframe the mask if the vehicle moves.
- Preview the entire video.
Make sure the blur remains over the plate throughout the entire clip.
How to Blur Text or a Screen
You can use a targeted blur workflow to obscure information displayed on a phone, computer, document, or other screen.
This can be useful when creating tutorials or demonstrations where you need to hide:
- Passwords
- Email addresses
- Phone numbers
- Personal messages
- Account information
- Private documents
Always inspect the entire clip before publishing it.
How to Blur a Video Without Making Everything Blurry
If you only need to hide one object, do not apply a full-screen blur and export the entire video.
Instead, use a targeted workflow with:
- A duplicate layer
- Blur
- Mask
- Feather
- Keyframes or tracking when necessary
This provides much more control.
How to Adjust Blur Intensity
When the selected blur effect provides an intensity control, adjust it while watching the preview.
Move gradually between lower and higher values.
For aesthetic blur, start with a subtle setting.
For privacy-related blur, make sure the information is genuinely obscured rather than merely softened.
How to Remove Blur From a Video
If you added a blur effect and want to remove it:
- Locate the blur effect on the timeline.
- Select it.
- Use the available delete or remove control.
- Preview the original footage.
If the blur was created through multiple layers, you may also need to remove or disable the additional layer or effect.
CapCut Blur Not Working
If your blur effect does not appear, check the following.
Check the Correct Layer
Make sure the effect has been applied to the video layer you intend to edit.
Check the Effect Duration
The blur may exist on the timeline but not cover the current playback position.
Check the Effect Strength
If the effect is extremely subtle, it may be difficult to notice.
Restart CapCut
Close and reopen the app if the effect behaves unexpectedly.
Check for an App Update
CapCut's interface and available features change over time, so make sure your app is reasonably up to date if a feature appears to be missing.
CapCut Blur Looks Too Strong
If the video becomes almost impossible to see, reduce the blur intensity when the selected effect provides that control.
For background blur, make sure the foreground subject is properly separated from the background.
If the subject edges look unnatural, check the background-removal result and mask settings.
CapCut Blur Looks Uneven
Uneven blur can happen when the mask does not remain aligned with the target area.
Check the mask position at several points in the timeline.
If the subject moves, add additional keyframes or use an available tracking feature.
CapCut Blur Is Not Covering the Entire Object
Increase the mask size slightly and preview the result.
Remember that the target can move during the clip.
A mask that covers the entire object at the beginning may no longer cover it later.
Blur vs Mosaic or Pixelation
Blur and pixelation are different visual effects.
Blur
Softens the details in an area.
Pixelation
Breaks the area into visible blocks.
The appropriate choice depends on the visual style and the reason for hiding the information.
For privacy-sensitive footage, inspect the final result carefully regardless of which effect you choose.
Blur vs Background Removal
These tools solve different problems.
Blur
Makes an area less visually detailed.
Background Removal
Attempts to separate the main subject from the background.
You can combine both.
For example, you can remove the background around a person and use another layer with blur to create a soft background.
Blur vs Mask
A mask does not necessarily blur anything by itself.
Instead, it controls where a layer or effect is visible.
This makes masking useful when you want to restrict a blur effect to one specific region.
The combination can be:
Blur effect + Mask = Targeted blur
Can You Blur Only Part of a Video in CapCut?
Yes.
A targeted blur workflow can be used to blur a particular area while leaving the rest of the frame clear.
This is useful for faces, license plates, private information, and distracting objects.
Can You Blur the Background Without Blurring the Person?
Yes, when the background-removal workflow successfully isolates the subject.
The exact result depends on the quality of the original footage and how accurately CapCut separates the subject from the background.
Hair, transparent objects, motion, and complicated backgrounds can make separation more difficult.
Can You Blur a Moving Face in CapCut?
Yes, but the blur area needs to follow the face.
Depending on the available tools in your version, you can use mask tracking or keyframes.
Always preview the full clip to verify that the blur remains aligned.
Does Blur Reduce Video Quality?
Applying a blur effect intentionally changes detail in the selected area.
It does not mean the entire video will automatically become low quality.
The final output also depends on the original footage and your export settings.
If you need high-quality output, use appropriate export settings for your source video.
How to Export a Blurred Video
After completing the blur effect:
- Preview the complete video.
- Check that the blur covers the intended areas.
- Tap Export.
- Choose an appropriate resolution.
- Choose the frame rate when available.
- Start the export.
- Check the exported file.
Do not immediately share the video without checking the exported version if the blur is being used to hide private information.
Tips for Better Blur Effects
Use the Smallest Necessary Area
If only one object needs to be hidden, target that area instead of blurring the whole frame.
Use Feather Carefully
A small amount of feathering can make a targeted blur look more natural.
Check Moving Subjects
A stationary mask may not remain aligned with a moving object.
Avoid Excessive Blur
For creative effects, too much blur can make the video look unnatural.
Preview Before Export
Always check the full video.
Check the Exported File
The exported video is the version viewers will actually see.
Frequently Asked Questions
How do I blur a video in CapCut on Android?
Open a project, add your video, open Effects, find a blur effect, apply it, adjust the available settings, and export the finished video.
Can I blur only part of a video?
Yes. You can use a duplicate layer, blur effect, and mask to target a specific area.
Can I blur a face in CapCut?
Yes. A targeted blur workflow can be used for faces, including moving faces when tracking or keyframes are used appropriately.
Can I blur the background in CapCut?
Yes. CapCut supports background-blur workflows that can combine blur effects with background removal.
Can I blur a license plate?
Yes. Use a targeted blur and make sure the mask remains over the plate throughout the clip.
Can I blur text in a video?
Yes. A targeted blur can be used to hide text or other information in a specific region.
Why is my CapCut blur not working?
Check that you selected the correct layer, the blur effect covers the correct part of the timeline, and the effect strength is noticeable. Restarting or updating the app may also help.
Can I adjust blur strength?
Many blur effects provide an intensity or similar control, although the exact settings vary by effect and CapCut version.
Can I blur a moving object?
Yes, but the blur area needs to follow the object. Keyframes or tracking can help keep the mask aligned.
Is blur enough to hide private information?
Not necessarily. A weak blur may still leave information recognizable. For privacy-sensitive footage, use a sufficiently strong effect and inspect the final exported video carefully.
Final Thoughts
Blurring a video in CapCut on Android can be as simple as applying a blur effect to an entire clip or as advanced as combining duplicate layers, masks, background removal, and keyframes.
For a simple aesthetic effect, use a standard blur effect and adjust its intensity.
For privacy or targeted editing, use a mask-based workflow so that only the required area is blurred.
The most important step is to preview the complete video before exporting. If the subject or object moves, make sure the blur continues to cover it throughout the clip.
Related Articles

How to Fix CapCut Video Lagging After Export on Android
Fix CapCut video lagging after export on Android. Learn how to troubleshoot choppy playback, frame-rate mismatches, heavy effects, storage issues, and export settings.
GetApkFree Team

How to Fix CapCut Preview Not Matching Export on Android
Fix CapCut preview not matching the exported video on Android. Troubleshoot missing effects, text, transitions, timing, colors, and rendering differences.
GetApkFree Team

How to Fix Couldn't Apply AI Background in CapCut on Android
Getting "Couldn't Apply AI Background" in CapCut on Android? Check usage limits, clip selection, video quality, app updates, and practical troubleshooting steps.
GetApkFree Team

How to Fix CapCut Effects Not Applying on Android
CapCut effects not working on Android? Check clip selection, effect layers, timeline timing, conflicting adjustments, and app performance with these practical fixes.
GetApkFree Team