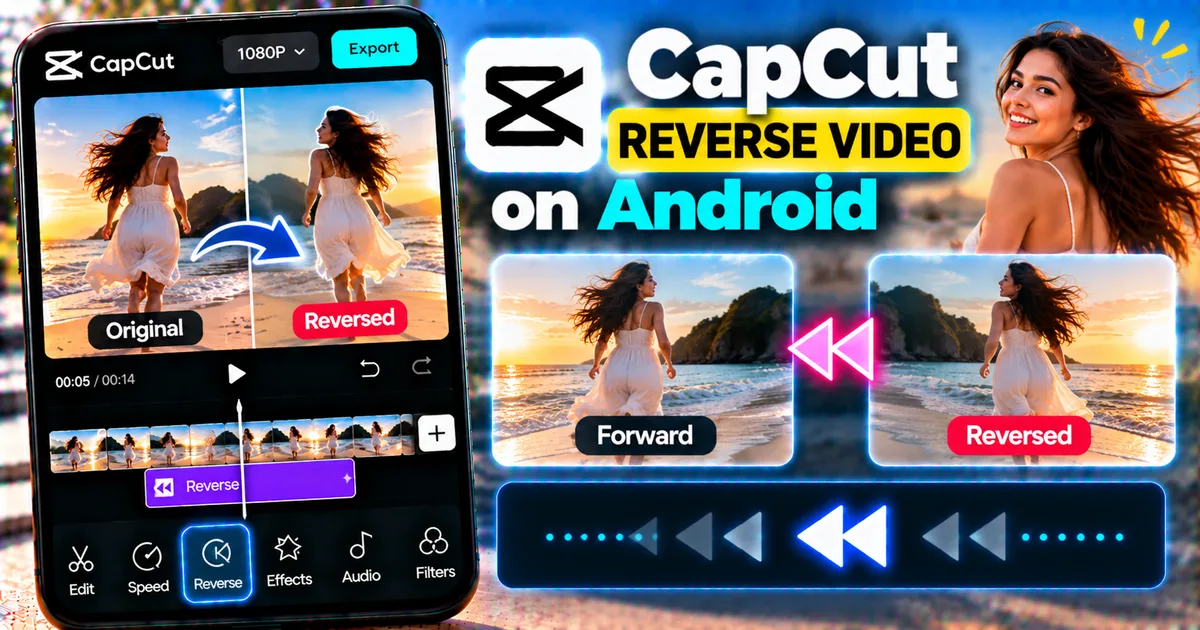

This article is about
CapCut Premium
capcutdownload.com.pk · Tools
How to Reverse a Video in CapCut on Android
GetApkFree Team
Learn how to reverse a video in CapCut on Android, make clips play backward, reverse part of a video, add effects, and fix common reverse problems.
- Source
- Developer
- Package
- CapCut Premium
How to Reverse a Video in CapCut on Android
Want to make a video play backward? CapCut includes a Reverse tool that can turn an ordinary clip into a backward-playing video with just a few steps.
A reversed video can be useful for creative edits, rewind effects, magic tricks, funny clips, transitions, social media videos, and other projects.
In this guide, you'll learn how to reverse a video in CapCut on Android, reverse only part of a clip, combine reverse effects with other editing tools, and troubleshoot common problems.
Quick Answer
To reverse a video in CapCut on Android, open CapCut, create a new project, and add your video. Select the video clip on the timeline, open the editing controls, find Reverse, and tap it. Wait for CapCut to process the clip, preview the result, and export the finished video.
The exact location of the Reverse button can vary between CapCut versions.
What Does Reverse Do in CapCut?
The Reverse tool changes the playback direction of a video.
For example, if the original video shows:
Person walks forward → Person turns around → Person sits down
The reversed version plays:
Person sits down → Person turns around → Person walks backward
The video content itself is not simply mirrored. Instead, the sequence of frames plays in the opposite direction.
This makes Reverse different from the Mirror or Flip tools.
Reverse vs Mirror in CapCut
These two tools can sound similar, but they do different things.
Reverse
Reverse changes the order in which the video plays.
The beginning becomes the ending and the ending becomes the beginning.
Mirror
Mirror flips the visual image horizontally or vertically while keeping the playback sequence.
For example, a person walking from left to right can appear to walk from right to left after mirroring.
If you want the footage to actually play backward, use Reverse.
How to Reverse a Video in CapCut on Android
Follow these steps to reverse a complete video clip.
Step 1: Open CapCut
Launch CapCut on your Android phone.
From the home screen, start a new project.
Step 2: Select Your Video
Choose the video you want to reverse from your phone's media library.
Tap Add to place it into the CapCut timeline.
Step 3: Select the Video Clip
Tap the video clip on the timeline.
The editing toolbar will appear.
If you do not see the Reverse option immediately, scroll through the available editing tools.
Step 4: Find Reverse
Look for the Reverse option in the editing controls.
CapCut's current mobile guidance places Reverse among the editing tools available after selecting a clip, although the exact interface can change between versions.
Step 5: Tap Reverse
Tap Reverse.
CapCut will begin processing the clip.
Depending on the length, resolution, and complexity of the video, processing can take some time.
Step 6: Wait for Processing
Do not close CapCut while the reverse operation is processing.
Wait until the process finishes.
Step 7: Preview the Reversed Video
Play the clip from the beginning.
The footage should now play backward.
Check the entire clip instead of watching only the first few seconds.
Step 8: Export the Video
When you are satisfied with the result, tap Export.
Choose the available resolution and frame rate settings that suit your project.
Then save the finished video to your device.
How to Reverse Part of a Video in CapCut
You do not have to reverse the entire video.
You can reverse only a selected section by splitting the original clip first.
For example:
Normal → Normal → Reverse → Normal
This can create a more interesting effect than reversing the complete video.
Step 1: Add the Video
Create a project and add your video to the timeline.
Step 2: Move the Playhead
Move the playhead to the point where you want the reversed section to begin.
Step 3: Split the Video
Use the Split tool to divide the clip.
Then move the playhead to where you want the reversed section to end.
Split the video again.
You should now have separate sections.
For example:
Clip 1 | Clip 2 | Clip 3
Step 4: Select the Middle Clip
Select the section you want to play backward.
Step 5: Apply Reverse
Open the editing controls and tap Reverse.
Wait for CapCut to finish processing.
Step 6: Preview the Sequence
Play the entire video.
The result should look like:
Normal clip → Reversed clip → Normal clip
This technique gives you more control over where the reverse effect appears.
How to Reverse a Short Clip for a Rewind Effect
A short reversed section can create a rewind-style effect.
For example, you could show a person throwing a ball normally and then briefly reverse the footage.
A basic workflow is:
- Add your original video.
- Trim the section you want to use.
- Split the clip.
- Duplicate the selected section if necessary.
- Apply Reverse to the reversed copy.
- Place it after or before the original section.
- Add a suitable sound effect.
- Preview the result.
The exact arrangement depends on the effect you want.
How to Make a Magic Trick Reverse Video
Reverse effects are popular for creative edits because an ordinary action can look unusual when played backward.
For example, you could record:
- An object being picked up
- A person throwing something
- Liquid being poured
- Paper being torn
- A person jumping
- A door closing
- An object falling
Reverse the footage and the action may appear to happen in an unexpected direction.
For the best result, record the action with a clear beginning and ending.
How to Reverse a Water or Liquid Video
Water and liquid can produce interesting reverse effects.
For example, you can record water being poured into a glass and then reverse the clip.
The reversed footage can create the appearance that the liquid is leaving the glass and returning to its original container.
The effect works best when the original recording is steady and the action is clearly visible.
How to Reverse a Walking Video
You can also reverse walking footage.
Record a person walking in one direction and then apply Reverse.
The person will appear to move backward through the sequence.
For a more polished result, combine the reversed clip with music, sound effects, or a transition.
How to Reverse a Video With Music
You can add music to a reversed video just like you would with other CapCut projects.
A simple workflow is:
- Reverse the video.
- Add background music.
- Adjust the music volume.
- Align important visual moments with the music.
- Preview the complete project.
- Export the result.
Remember that reversing a video does not automatically reverse a separate music track.
If the original video contains recorded audio, the reversed clip may also produce unusual backward-sounding audio.
What Happens to Audio When You Reverse a Video?
When a video clip is reversed, its original audio can also be affected depending on the editing workflow.
Backward speech usually sounds distorted or unintelligible.
If you want normal music or narration over the reversed footage, consider muting the original clip audio and adding a separate audio track.
This can make the final result much easier to listen to.
How to Remove the Original Audio From a Reversed Video
If the backward audio sounds distracting:
- Select the reversed video clip.
- Open the audio or volume controls.
- Reduce the original clip volume or mute it.
- Add another audio track if needed.
- Preview the result.
This is particularly useful for social-media edits where the visual reverse effect is more important than the original recording audio.
How to Add Sound Effects to a Reversed Video
Sound effects can make reverse edits more convincing.
For example, you could add:
- Whoosh
- Reverse sound
- Impact
- Camera sound
- Transition sound
- Comedic sound
Place the sound effect at the moment where the reversed action begins.
You can learn more about adding sound effects in CapCut here:
https://getapkfree.com/blog/how-to-add-sound-effects-capcut-android
How to Combine Reverse With Speed Changes
You can combine a reversed section with speed adjustments.
For example:
Normal speed → Fast → Reverse → Slow motion
This can create a more dynamic social-media edit.
However, applying several processing-heavy effects to the same clip can make editing and processing more demanding.
For best results, preview the complete sequence before exporting.
How to Reverse a Slow-Motion Video
You can reverse a slow-motion clip and create a backward slow-motion effect.
A possible workflow is:
- Add the slow-motion footage.
- Select the clip.
- Apply Reverse.
- Wait for processing.
- Preview the reversed movement.
- Adjust speed if necessary.
- Export.
If you need help creating slow-motion footage in CapCut, see:
https://getapkfree.com/blog/how-to-make-slow-motion-capcut-android
How to Reverse a Clip After Cutting It
You can first cut or split a long video and then reverse only the section you need.
For example:
Original video: Clip A + Clip B + Clip C
You can reverse only Clip B.
This is often easier than reversing the entire video and trying to remove the unwanted portions afterward.
For detailed cutting and trimming instructions:
https://getapkfree.com/blog/how-to-cut-trim-video-capcut-android
How to Reverse a Video After Adding Effects
You can sometimes reverse footage that already contains effects, but complex projects may create processing problems.
If Reverse fails, try temporarily removing heavy effects, overlays, speed adjustments, or keyframe changes before reversing the clip.
CapCut's current troubleshooting guidance specifically notes that complex effects, speed adjustments, keyframes, large clips, memory, storage, and app version can affect reverse processing.
After the reverse operation succeeds, you can reapply the required effects.
How to Reverse a Video and Add a Transition
You can use a reversed clip as part of a transition sequence.
For example:
Clip 1 → Transition → Reversed Clip
You can also use a short reversed section before transitioning into another scene.
For standard transitions in CapCut, see:
https://getapkfree.com/blog/how-to-add-transitions-capcut-android
How to Reverse a Video for Instagram Reels
A reversed clip can be used as part of a Reel.
A simple workflow is:
- Create a new project.
- Import your video.
- Trim the footage.
- Reverse the selected clip.
- Add text if necessary.
- Add music or sound effects.
- Check the vertical framing.
- Preview the entire Reel.
- Export.
Keep the reversed section short if it is being used as an attention-grabbing effect.
How to Reverse a Video for YouTube Shorts
The same basic technique works for Shorts.
You can reverse:
- A complete clip
- A short action
- A reaction
- A transition moment
- A visual trick
After applying Reverse, check the complete video and make sure the reversed section fits the story.
How to Reverse Multiple Clips
You can reverse multiple clips individually.
For example:
Clip 1 → Normal
Clip 2 → Reverse
Clip 3 → Normal
Clip 4 → Reverse
Select each clip separately and apply Reverse where needed.
This gives you more control than reversing the entire timeline.
How to Create a Repeat-and-Reverse Effect
One creative technique is to play a short action normally and then play the same action backward.
For example:
Normal clip → Reversed clip
This can create a loop-like effect.
To create it:
- Select a short action.
- Keep the original clip.
- Duplicate the section if needed.
- Apply Reverse to the duplicate.
- Place the reversed version immediately after the original.
- Preview the connection.
- Add a transition or sound effect if appropriate.
The result can look like the action happens forward and then returns backward.
How to Create a Boomerang-Style Effect
A similar technique can be used to create a simple back-and-forth sequence.
For example:
Forward → Reverse
This creates a visual loop where the action moves forward and then returns.
You can combine this with music and transitions for short-form content.
Reverse vs Slow Motion
Reverse and slow motion affect different parts of playback.
Reverse
Changes the direction of playback.
Slow Motion
Reduces the playback speed.
You can use both together.
For example:
Reverse + Slow Motion
This makes the clip play backward at a slower pace.
Reverse vs Speed Up
Speed up makes the video play faster.
Reverse changes the playback direction.
You can combine the two:
Reverse + Fast
or:
Reverse + Slow
The appropriate combination depends on the style of your edit.
Reverse vs Mirror
Remember:
Reverse = changes playback direction.
Mirror = flips the visual image.
If a person walks from left to right:
Reverse may make the person appear to retrace the action.
Mirror may make the person appear on the opposite side of the frame while keeping the action sequence moving forward.
Choose the correct tool for the result you want.
CapCut Reverse Not Working
Sometimes the Reverse feature may fail or take a long time to process.
CapCut's current troubleshooting guidance identifies several possible causes, including large or high-resolution clips, low device storage or memory, outdated app versions, and complex effects or speed adjustments.
Try these solutions.
Check Device Storage
Make sure your phone has enough free storage.
Video processing and exporting can require additional temporary space.
Close Other Apps
If your device is running many demanding applications, close unnecessary apps before processing the video.
Restart CapCut
Close CapCut completely and reopen it.
Then load the project and try Reverse again.
Update CapCut
Check whether an updated version of CapCut is available.
An outdated version can sometimes cause feature problems.
Remove Heavy Effects Temporarily
If the clip contains complicated effects, overlays, speed changes, or keyframes, temporarily remove them and try reversing the original clip.
After the reverse operation succeeds, you can add the effects again.
Try a Shorter Clip
If a very long video fails to reverse, split or trim it into a shorter section and try processing that section.
Export and Re-Import
If the original clip continues to cause problems, one possible workaround is to export a clean copy of the clip and import that exported video into CapCut before trying Reverse again.
CapCut Reverse Takes Too Long
Reverse processing requires CapCut to process the video frames.
Longer or higher-resolution videos can require more processing than short clips.
If Reverse appears to be taking unusually long:
- Wait for processing to finish.
- Check your device storage.
- Close unnecessary apps.
- Restart CapCut.
- Try a shorter clip.
- Remove complex effects temporarily.
- Try updating CapCut.
CapCut Reverse Is Stuck
If the reverse process appears stuck:
- Wait briefly to see whether processing continues.
- Check available storage.
- Close other apps.
- Restart CapCut.
- Reopen the project.
- Try a shorter clip.
- Remove heavy effects.
- Update CapCut if an update is available.
Avoid repeatedly force-closing the app while a project is actively processing unless necessary.
Reversed Video Looks Different From the Original
A reversed video naturally looks different because the action now plays in the opposite direction.
However, if you notice unexpected changes, check whether other effects, speed settings, transitions, or edits are affecting the clip.
Preview the original and reversed sections separately.
How to Export a Reversed Video
After the reverse operation is complete:
- Preview the entire video.
- Check the reversed sections.
- Check the audio.
- Confirm the video orientation.
- Tap Export.
- Choose suitable output settings.
- Wait for processing.
- Check the exported file.
Do not judge the final result only from the editing preview.
Open the exported file and watch it from beginning to end.
Tips for Better Reverse Videos
Use Short Clips
Short actions are often easier to reverse and can create stronger visual effects.
Record Stable Footage
A stable recording usually produces a cleaner-looking reverse effect.
Remove Unnecessary Footage
Trim the clip before reversing it if you only need a specific moment.
Consider the Audio
Backward speech can sound strange. Muting the original audio and adding music or sound effects may work better.
Use Reverse With Other Editing Tools
Reverse can become more interesting when combined with:
- Speed
- Slow motion
- Transitions
- Music
- Sound effects
- Text
- Overlays
- Keyframes
Preview Before Exporting
Always watch the complete project.
Frequently Asked Questions
How do I reverse a video in CapCut on Android?
Add the video to a CapCut project, select the clip, find the Reverse tool in the editing controls, tap it, wait for processing, and preview the result.
Can I reverse only part of a video?
Yes. Split the video into sections and apply Reverse only to the section you want to play backward.
Can I reverse multiple clips?
Yes. Select individual clips and apply Reverse to each one as needed.
Does CapCut reverse the audio too?
The behavior of the clip's original audio can depend on the editing workflow and version. If you do not want backward-sounding audio, mute the original clip and add a separate audio track.
Can I reverse a slow-motion video?
Yes. A clip can be reversed and then combined with speed adjustments where appropriate.
Can I reverse a video and then add music?
Yes. You can add music after reversing the video.
Why is CapCut Reverse not working?
Possible causes include low storage or memory, large or high-resolution clips, outdated app versions, and complex effects or speed adjustments.
Why is CapCut taking so long to reverse my video?
Long or high-resolution videos can require more processing. Try a shorter clip, free up storage, close other apps, or temporarily remove complex effects.
Is Reverse the same as Mirror?
No. Reverse changes the playback direction, while Mirror flips the visual image.
Can I create a boomerang effect with Reverse?
Yes. You can place an original clip followed by a reversed version to create a simple forward-and-backward effect.
Final Thoughts
Reversing a video in CapCut on Android is a simple way to create unusual and engaging edits.
The basic process is straightforward: import your video, select the clip, tap Reverse, wait for processing, preview the result, and export.
For more control, split the video first and reverse only the section you need. You can then combine the reversed footage with music, sound effects, speed changes, transitions, text, and other editing tools.
If Reverse fails, start with the simplest version of the clip. Check storage and memory, remove heavy effects temporarily, update CapCut, or try reversing a shorter section.
Most importantly, preview the entire exported video before sharing it.
Related Articles

How to Fix CapCut Video Lagging After Export on Android
Fix CapCut video lagging after export on Android. Learn how to troubleshoot choppy playback, frame-rate mismatches, heavy effects, storage issues, and export settings.
GetApkFree Team

How to Fix CapCut Preview Not Matching Export on Android
Fix CapCut preview not matching the exported video on Android. Troubleshoot missing effects, text, transitions, timing, colors, and rendering differences.
GetApkFree Team

How to Fix Couldn't Apply AI Background in CapCut on Android
Getting "Couldn't Apply AI Background" in CapCut on Android? Check usage limits, clip selection, video quality, app updates, and practical troubleshooting steps.
GetApkFree Team

How to Fix CapCut Effects Not Applying on Android
CapCut effects not working on Android? Check clip selection, effect layers, timeline timing, conflicting adjustments, and app performance with these practical fixes.
GetApkFree Team