
This article is about
CapCut - Download
ByteDance Pte. Ltd. · Education
How to Remove Video Background in CapCut on Android
GetApkFree Team
Learn how to remove a video background in CapCut on Android without a green screen using Auto Removal, Custom Removal, and background replacement.
- Version
- Latest
- Source
- Google Play
- Package
- external.capcut.en.softonic.com.capcut-download
How to Remove Video Background in CapCut on Android
You don't always need a green screen to remove the background from a video.
CapCut includes background-removal tools that can automatically detect the main subject and remove the surrounding background. This can be useful when you record yourself with an ordinary room, outdoor scene, or other background behind you.
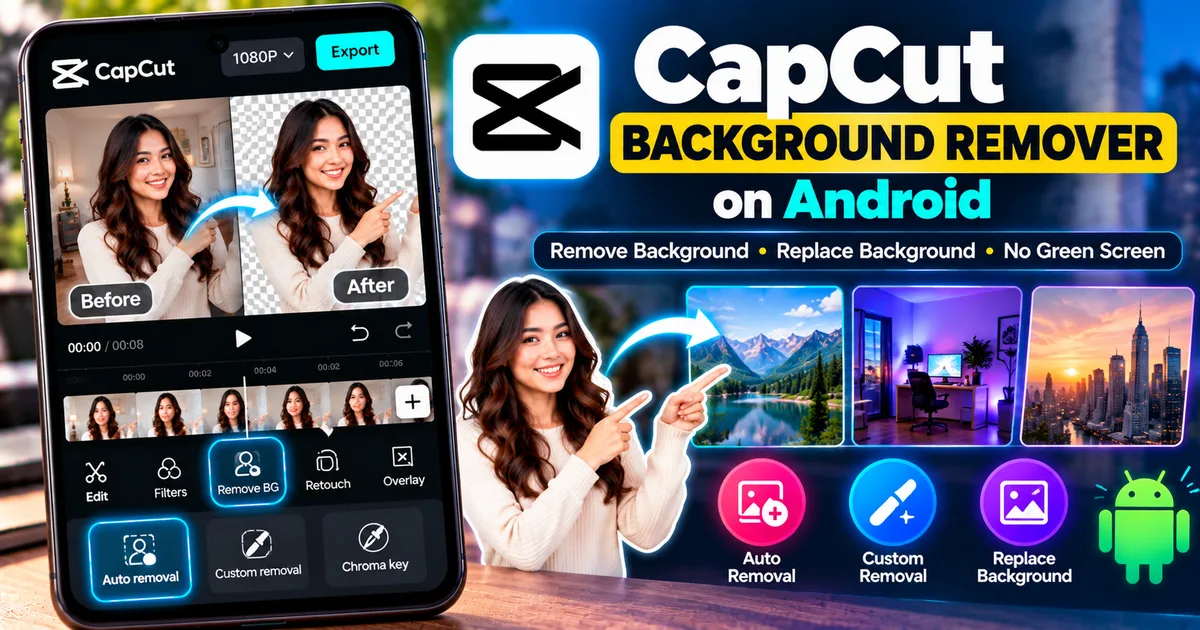
On Android, CapCut provides a Remove BG workflow with options such as Auto Removal, Custom Removal, and Chroma Key. Auto Removal is designed for footage where you want CapCut to identify the subject without requiring a solid-color background.
This guide explains how to remove a video background in CapCut on Android, replace it with another background, improve the cutout, and troubleshoot common problems.
Can CapCut Remove a Video Background Without a Green Screen?
Yes.
CapCut's Auto Removal tool can identify the main subject in supported video footage and remove the background without requiring a green or blue screen.
This is different from Chroma Key.
Chroma Key works by selecting and removing a particular color, which is why it is commonly used with green-screen footage.
Auto Removal instead attempts to identify the subject automatically.
This makes it useful for videos recorded against ordinary backgrounds.
What Is CapCut's Background Removal Tool?
CapCut's background removal tools are designed to separate a subject from the original background.
Depending on the current version and editing context, CapCut provides options such as:
- Auto Removal
- Custom Removal
- Chroma Key
Auto Removal is useful when you want CapCut to automatically identify the subject.
Custom Removal provides more manual control for refining the result.
Chroma Key is useful when the video was recorded against a solid-color background such as green or blue.
The exact interface can change between CapCut versions and platforms.
How to Remove a Video Background in CapCut on Android
The following workflow uses CapCut's mobile background-removal tools.
Step 1: Open CapCut
Launch CapCut on your Android phone.
Create a new project.
Step 2: Import Your Video
Select the video whose background you want to remove.
Tap Add to place the video into the editing timeline.
For the best results, use footage where the main subject is reasonably clear and separated from the background.
Step 3: Select the Video
Tap the video clip in the timeline.
The editing controls should appear.
Make sure you have selected the correct clip before opening the background-removal tools.
Step 4: Open Remove BG
Look for the background-removal option.
Depending on your CapCut version, you may see:
Edit → Remove BG
or a similar Cutout/Remove BG option.
CapCut's current mobile guidance places background-removal tools under the editing controls.
Step 5: Choose Auto Removal
Select:
Auto Removal
CapCut will process the video and attempt to identify the main subject.
The processing time can vary depending on the length of the video, the device, and the complexity of the footage.
Wait for the process to finish.
Step 6: Preview the Cutout
After processing, play the video.
Look carefully at the edges of the subject.
Pay particular attention to:
- Hair
- Hands
- Fingers
- Clothing
- Shoes
- Objects being held
- Moving body parts
- Fine details
A background removal can look good on a still frame but reveal problems when the subject moves.
Step 7: Add a New Background
Once the original background has been removed, you can place another visual behind the subject.
Depending on your project, this could be:
- A photo
- Another video
- A solid color
- A designed background
- A graphic
- A virtual environment
The new background should be placed behind the subject layer.
Step 8: Resize and Position the Subject
Adjust the size and position of the foreground video.
Make sure the subject looks natural relative to the replacement background.
For example, if you place a person inside a large office image, don't make the person so large that the composition looks unrealistic.
Step 9: Preview the Complete Video
Play the entire project from beginning to end.
Don't check only the first few seconds.
Background-removal errors can appear when the subject changes position or when the camera moves.
Step 10: Export the Video
When the result looks correct, tap Export.
Choose the available resolution, frame rate, and other settings appropriate for your project.
The exact export options can vary depending on the current CapCut version, device, account, and project.
How to Replace a Video Background in CapCut
Removing the original background is only the first part.
You can then place a new background behind the subject.
For example:
Original video: A person sitting in a bedroom.
New background: A modern office.
The basic structure becomes:
- Top layer: person with background removed
- Bottom layer: new office background
This creates the appearance that the person was originally recorded in the new location.
How to Add a Photo as the New Background
A photo can work well when the subject isn't moving through the scene.
For example, you could place yourself in front of:
- A city skyline
- A classroom
- A studio
- A beach
- A mountain landscape
- A branded background
- A product display
Choose a photo with an aspect ratio and perspective that fit the video.
After adding it, place the photo underneath the subject layer.
How to Add Another Video as the Background
You can also replace the background with another video.
This is useful for:
- Travel edits
- Social media videos
- Presentations
- Reaction videos
- Educational content
- Product demonstrations
- Creative effects
Place the replacement footage underneath the subject.
Then adjust the subject's size and position to make the composition look natural.
How to Remove a Background From a Video Without Green Screen
This is one of the main advantages of Auto Removal.
You don't necessarily need to record against a green screen.
For example, suppose you recorded yourself in your bedroom.
You can import the video into CapCut and try:
Edit → Remove BG → Auto Removal
CapCut attempts to identify you as the foreground subject and remove the room behind you.
You can then place another background underneath the cutout.
The quality depends heavily on the original footage.
How to Get Better Background Removal Results
Automatic background removal works better when the subject is easy to distinguish from the background.
Use Good Lighting
Make sure the subject is well lit.
Very dark footage can make edges harder to identify.
Keep the Subject Clearly Visible
Avoid placing the subject in an extremely cluttered environment.
A visually complicated background can make separation more difficult.
Avoid Similar Colors
If your clothing has colors very similar to the background, parts of the subject may be difficult to distinguish.
Use Sharp Footage
Blurred or heavily compressed video can make fine edges harder to process.
Avoid Excessive Motion
Fast movement can make the edges of the subject more difficult to track.
Keep the Camera Stable When Possible
A stable recording can make the subject easier to isolate.
How to Fix Hair and Edge Problems
Hair is one of the most difficult areas for automatic background removal.
Fine strands can blend into the background, particularly when the original video has poor lighting or low resolution.
After using Auto Removal, inspect the hair carefully.
If your version provides manual refinement tools, use them to correct areas that were incorrectly removed or retained.
Don't zoom out too far while checking the result.
Zoom into the subject's edges so you can identify small problems.
How to Use Custom Removal in CapCut
Auto Removal is convenient, but it may not always produce the exact result you want.
CapCut also provides Custom Removal tools in supported workflows.
These tools can give you more control over which areas are retained or removed.
The available controls can include options such as:
- Manual selection
- Brush tools
- Eraser
- Reset
The exact names and controls may vary by version.
A practical workflow is:
- Run Auto Removal first.
- Inspect the result.
- Open Custom Removal if available.
- Add areas that should remain.
- Remove areas that shouldn't remain.
- Preview the result.
- Export after checking the complete video.
Why Is CapCut Removing Part of My Body?
If CapCut removes part of your body or clothing, the system may be confusing that area with the background.
This can happen when:
- Clothing matches the background color.
- Lighting is poor.
- The footage is blurry.
- The subject overlaps heavily with the background.
- The background is visually complicated.
Try refining the cutout using the available Custom Removal tools.
If the result remains poor, using a better source video may be more effective than repeatedly changing the settings.
Why Is the Background Still Visible?
If parts of the old background remain, try:
- Running Auto Removal again.
- Checking whether Custom Removal is available.
- Refining the affected area manually.
- Using better-quality source footage.
- Checking the lighting of the original video.
Small remnants are particularly noticeable around hair, fingers, and clothing.
Auto Removal vs Chroma Key in CapCut
These two tools are designed for different situations.
Auto Removal
Use Auto Removal when:
- You recorded against an ordinary background.
- You don't have a green screen.
- You want automatic subject detection.
- You want a quick background removal.
Chroma Key
Use Chroma Key when:
- You recorded against green or blue.
- The background has a relatively uniform color.
- You want to remove a specific background color.
If you already have green-screen footage, our guide on using Green Screen in CapCut explains the Chroma Key workflow in more detail.
Auto Removal vs Custom Removal
These tools also serve different purposes.
Auto Removal
The app attempts to identify and remove the background automatically.
It's faster and requires less manual work.
Custom Removal
You manually refine the result.
It can be useful when automatic detection doesn't produce a clean cutout.
A useful workflow is to start with Auto Removal and then use Custom Removal when additional refinement is needed.
Can CapCut Remove a Background From a Person?
Yes.
CapCut's background-removal tools can be used to isolate a person from the original background in supported video and image workflows.
The quality depends on factors such as lighting, image quality, subject/background separation, movement, and the complexity of the scene.
Can You Remove the Background From a Moving Video?
Yes.
CapCut's video background-removal workflow is designed to process video rather than only still images.
However, moving subjects can be more difficult to isolate than a static subject.
Always review the entire clip instead of checking only one frame.
Why Does My Cutout Look Rough?
Rough edges can result from:
- Low-resolution footage
- Motion blur
- Poor lighting
- Complex backgrounds
- Similar colors between the subject and background
- Fast movement
- Fine hair or transparent objects
Try using better source footage and refining the edges where supported.
Why Is CapCut Background Removal Slow?
Background removal requires CapCut to analyze the video and separate the subject from the background.
Longer videos and more complicated footage can require more processing.
If processing is unusually slow:
- Close unnecessary apps.
- Make sure your phone has enough free storage.
- Restart CapCut.
- Try a shorter clip.
- Update CapCut if an update is available.
You can also test the feature with a short section of the video first.
How to Make a Transparent Background
A transparent result can be useful when you're creating graphics or compositing elements.
Whether a transparent video export is available depends on the current CapCut workflow and export options.
If your goal is simply to place the subject over another video, you don't necessarily need to export a transparent file.
You can keep the subject as a foreground layer inside the CapCut project and place the new background underneath it.
How to Remove a Photo Background in CapCut
CapCut also supports background removal for images.
The general mobile workflow is:
- Open CapCut.
- Access the photo-editing tools.
- Select Remove Background.
- Choose your photo.
- Let CapCut detect the subject.
- Review the cutout.
- Refine the edges if needed.
- Add a new background.
- Export the image.
CapCut's current Android photo-editing guidance describes Auto Removal and manual refinement options for image backgrounds.
Green Screen or Auto Removal: Which Should You Use?
Use Green Screen/Chroma Key when you intentionally recorded against a clean green or blue background.
Use Auto Removal when you recorded normally and want CapCut to identify the subject automatically.
For example:
Green-screen footage: Use Chroma Key.
Bedroom selfie: Try Auto Removal.
Person walking outdoors: Try Auto Removal.
Product recorded against a solid green background: Chroma Key may be appropriate.
The best method depends on how the original footage was recorded.
Tips for Better Background Replacement
Removing the background is only half of the effect.
The new background should also look believable.
Match the Lighting
If your subject is brightly lit but the replacement background is dark, the composite may look unnatural.
Match the Perspective
Try to choose a background that makes sense from the camera's viewpoint.
Match the Scale
Keep the subject's size realistic relative to the replacement environment.
Add Appropriate Effects
Depending on your project, subtle adjustments such as brightness, contrast, blur, or color matching can help integrate the layers.
Don't overdo the effects.
Common CapCut Background Removal Problems
Background Removal Is Not Available
Update CapCut and check the current editing tools.
Feature placement can change between versions.
Auto Removal Gives a Bad Result
Try better-quality footage or use Custom Removal for additional refinement.
Hair Looks Strange
Inspect the hair at high zoom and refine the affected areas where possible.
Parts of Clothing Disappear
Check whether the clothing color is similar to the background and refine the cutout.
The New Background Looks Unnatural
Adjust the subject's size, position, brightness, and overall composition.
Processing Takes Too Long
Try a shorter clip and close unnecessary apps before processing again.
Frequently Asked Questions
Can I remove a video background in CapCut without a green screen?
Yes. CapCut provides Auto Removal for supported mobile video-editing workflows, allowing you to remove a background without recording against a solid-color screen.
Where is Remove BG in CapCut?
On the current mobile workflow, select your video and look for the Edit and Remove BG controls. The exact interface can change between versions.
Does CapCut automatically remove video backgrounds?
CapCut provides an Auto Removal option that attempts to detect the main subject and remove the background automatically.
Is Chroma Key the same as Auto Removal?
No. Chroma Key removes a selected color, while Auto Removal attempts to identify the subject automatically.
Can I replace the removed background?
Yes. You can place another image, video, or suitable background behind the isolated subject.
Can I fix the background removal manually?
CapCut provides Custom Removal tools in supported workflows, allowing additional refinement after automatic removal.
Does background removal work on moving videos?
It can, but results depend on the footage. Fast movement, motion blur, poor lighting, and complex backgrounds can make the result more difficult.
Final Thoughts
CapCut's background-removal tools can make it possible to isolate a person or other subject without recording against a green screen.
For ordinary video footage, the basic workflow is:
- Open CapCut.
- Create a new project.
- Import your video.
- Select the video clip.
- Open Remove BG.
- Choose Auto Removal.
- Wait for processing to finish.
- Review the cutout.
- Refine the result if necessary.
- Add a new background.
- Adjust the subject's size and position.
- Preview the complete video.
- Export the finished project.
For green-screen footage, Chroma Key may be more appropriate.
For ordinary footage, start with Auto Removal and use Custom Removal when you need additional control.
The quality of the original recording matters. Good lighting, clear footage, strong separation between the subject and background, and limited motion can make the background-removal process much easier.
Related Articles

How to Fix CapCut Video Lagging After Export on Android
Fix CapCut video lagging after export on Android. Learn how to troubleshoot choppy playback, frame-rate mismatches, heavy effects, storage issues, and export settings.
GetApkFree Team

How to Fix CapCut Preview Not Matching Export on Android
Fix CapCut preview not matching the exported video on Android. Troubleshoot missing effects, text, transitions, timing, colors, and rendering differences.
GetApkFree Team

How to Fix Couldn't Apply AI Background in CapCut on Android
Getting "Couldn't Apply AI Background" in CapCut on Android? Check usage limits, clip selection, video quality, app updates, and practical troubleshooting steps.
GetApkFree Team

How to Fix CapCut Effects Not Applying on Android
CapCut effects not working on Android? Check clip selection, effect layers, timeline timing, conflicting adjustments, and app performance with these practical fixes.
GetApkFree Team