
This article is about
CapCut - Download
ByteDance Pte. Ltd. · Education
How to Use Green Screen in CapCut on Android
GetApkFree Team
Learn how to use green screen in CapCut on Android with Chroma Key, replace backgrounds, adjust intensity and shadow, and fix common problems.
- Version
- Latest
- Source
- Google Play
- Package
- external.capcut.en.softonic.com.capcut-download
How to Use Green Screen in CapCut on Android
Green screen effects are a popular way to replace the background of a video without manually cutting out the subject frame by frame.
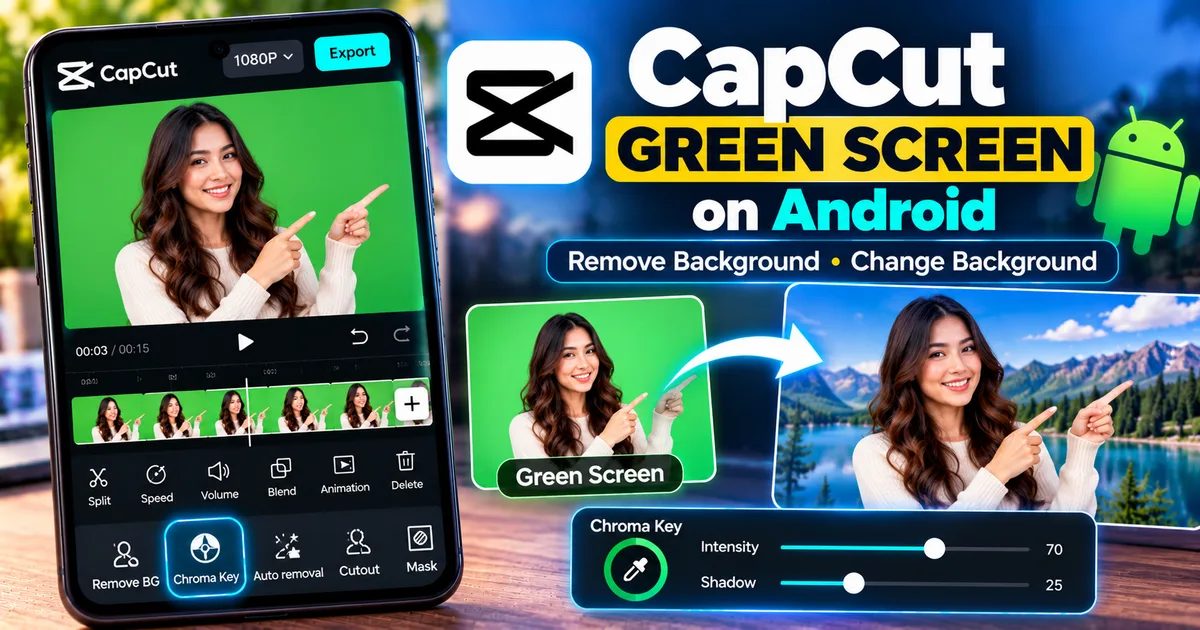
CapCut includes a Chroma Key tool that can remove a selected solid-color background, such as a green screen, and allow you to place the subject over another video, photo, or background.
On Android, you can combine an existing background with a green-screen clip using CapCut's Overlay and Chroma Key tools.
This guide explains how to use green screen in CapCut on Android, how to replace the background, how to improve the result, and how to fix common Chroma Key problems.
What Is Green Screen in CapCut?
A green screen is a video-recording technique where a person or object is filmed in front of a solid green background.
During editing, the green color can be removed so that another background becomes visible behind the subject.
The technical process is called chroma keying.
CapCut's Chroma Key tool lets you select the background color and adjust the removal effect.
Green is commonly used because it is visually different from most skin tones, making it easier to separate a person from the background.
However, the quality of the final result depends heavily on the original recording.
What Is Chroma Key in CapCut?
Chroma Key is CapCut's tool for removing a selected color from video footage.
You can use it to remove:
- Green backgrounds
- Blue backgrounds
- Other relatively uniform solid colors
After removing the selected color, you can place another visual underneath the clip.
For example, you could record yourself standing in front of a green screen and then place yourself inside:
- A city
- A studio
- A classroom
- A travel location
- A gaming environment
- A presentation
- A virtual background
How to Use Green Screen in CapCut on Android
The basic mobile workflow uses an ordinary video or photo as the background and places the green-screen footage above it as an overlay.
Step 1: Open CapCut
Open CapCut on your Android phone.
Create a new project.
Step 2: Add Your New Background
First, select the video or photo that you want to use as the replacement background.
For example, you could select a city video if you want to make it look like your subject is standing in a city.
Tap to add the media to the project.
This becomes the main background layer.
Step 3: Add the Green Screen Video
With the background in your project, open the Overlay option.
Tap:
Overlay → Add overlay
Select the green-screen video from your gallery.
Add it to the project.
Your green-screen video should now appear above the background video.
Step 4: Select the Green Screen Clip
Tap the green-screen clip in the timeline.
Make sure the green-screen layer is selected rather than the background layer.
This is important because the Chroma Key controls need to be applied to the green-screen footage.
Step 5: Open Cutout or Remove BG
With the green-screen clip selected, find the background-removal controls.
Depending on your current CapCut version, the interface may show:
Cutout → Chroma Key
or:
Remove BG → Chroma Key
CapCut's current mobile documentation shows the Chroma Key option under the background-removal tools.
Step 6: Select Chroma Key
Tap Chroma Key.
You should see a color-selection control.
Use the color picker to select the green area of your video.
Try to choose an area containing the main green background rather than an edge where the green mixes with the subject.
Step 7: Adjust Intensity
After selecting the green color, adjust the Intensity control.
Increase it gradually until most of the green background disappears.
Don't immediately push the setting to the maximum.
If the intensity is too strong, parts of your subject may also begin to disappear if they contain colors similar to the selected background.
Step 8: Adjust Shadow
Use the Shadow control to improve the edges around your subject.
This can help reduce unwanted green areas or improve the appearance of the cutout.
Make small adjustments and preview the result after each change.
Step 9: Adjust the Subject
Once the green background has been removed, adjust the position and size of the foreground clip.
Use the preview window to position the subject naturally against the replacement background.
For example, if you are standing in front of a virtual office background, make sure your size and position look realistic.
Step 10: Preview the Entire Video
Play the complete video.
Look carefully at:
- Hair
- Shoulders
- Hands
- Clothing edges
- Moving objects
- Shadows
- Areas around the subject
Green-screen problems are often more noticeable when the subject moves.
Step 11: Export the Video
When you're satisfied with the result, tap the Export button.
Choose the available export settings and save the finished video.
The available resolution, frame-rate, and other export options can vary depending on the current CapCut version, project, and device.
How to Replace a Green Screen Background With a Photo
You don't have to use another video as the replacement background.
You can also use a photo.
For example, you could record yourself in front of a green screen and place yourself in front of a beach photograph.
The workflow is:
- Start a new CapCut project.
- Add the replacement photo.
- Open Overlay.
- Add the green-screen video.
- Select the green-screen video.
- Open Cutout or Remove BG.
- Select Chroma Key.
- Pick the green color.
- Adjust Intensity.
- Adjust Shadow.
- Resize and position the subject.
- Preview the result.
- Export the video.
This is particularly useful for short-form videos and presentations.
How to Replace a Green Screen With Another Video
You can also put your subject over moving footage.
For example:
- Main layer: city walking footage
- Overlay: person recorded in front of a green screen
After removing the green background, the person appears over the city footage.
When doing this, pay attention to movement.
If the background camera is moving but the subject remains completely static, the effect may look unnatural.
How to Make Green Screen Look Better in CapCut
Good Chroma Key results start before you even open CapCut.
Use Even Lighting
Try to illuminate the green background evenly.
Dark areas and bright areas can make the green difficult to remove consistently.
Avoid Shadows on the Green Screen
Strong shadows can create different shades of green.
This can make background removal more difficult.
Keep the Subject Away From the Background
If possible, leave some distance between the person and the green screen.
This can reduce green spill and shadows around the subject.
Avoid Green Clothing
If your subject wears clothing that is similar to the green background, parts of the clothing may disappear when Chroma Key is applied.
Record High-Quality Footage
Low-resolution or heavily compressed footage can produce rough edges.
Start with the highest practical quality available on your recording device.
Keep the Background Consistent
A clean, evenly colored green background is easier to key than a wrinkled or uneven one.
Why Is My Green Screen Not Completely Removed?
If some green remains around the subject, try these steps.
Re-select the Green Color
The color picker may not have selected the most representative shade.
Try selecting another area of the green background.
Adjust Intensity
Increase the Intensity gradually.
Watch the subject carefully while making the adjustment.
If parts of the subject start disappearing, reduce the setting.
Adjust Shadow
Use the Shadow control to clean up remaining green areas and improve the edges.
Improve the Original Footage
If the green screen was poorly lit or heavily compressed, changing CapCut settings alone may not completely solve the problem.
Better source footage can produce a much cleaner result.
Why Is My Subject Disappearing With the Green Screen?
This usually happens when part of the subject contains a color that is similar to the selected background.
For example, if someone is wearing bright green clothing, Chroma Key may interpret parts of that clothing as the background.
Try:
- Selecting the green background more carefully.
- Reducing Intensity.
- Improving the original lighting.
- Using clothing that contrasts with the green screen.
- Re-recording the footage if necessary.
Why Is There a Green Outline Around My Subject?
A green outline or glow can appear when green light reflects onto the subject.
This is sometimes called green spill.
Try adjusting the Chroma Key settings gradually.
Reducing spill at the recording stage is also helpful.
Keep the subject farther away from the green screen and use more even lighting.
Why Is CapCut Chroma Key Not Working?
CapCut's current support documentation identifies several possible causes, including inconsistent background color, incorrect color selection, low contrast between the subject and background, poor video quality, and software or performance issues.
Try the following:
1. Select the Background Again
Use the color picker and choose a representative area of the green screen.
2. Adjust Intensity Gradually
Don't immediately use extreme settings.
Increase the intensity while watching the subject.
3. Adjust Shadow
Make small changes to improve the remaining background and edges.
4. Use Better Footage
If the video is low quality or heavily compressed, try a higher-quality source.
5. Update CapCut
Check whether a newer version of CapCut is available through your normal app source.
6. Check Your Device
If CapCut is slow or the effect behaves unexpectedly, close other demanding apps and make sure your device has enough available storage and resources.
Green Screen vs AI Background Removal in CapCut
CapCut provides more than one way to remove a video background.
Chroma Key
Chroma Key works by selecting a color and removing it.
It is especially useful when the subject was recorded against a solid green or blue background.
AI Background Removal
AI-based background removal attempts to identify the subject automatically.
It can be useful when you don't have a green screen.
The two methods serve different situations.
If you deliberately recorded against a clean green screen, Chroma Key can give you direct control over the color-removal process.
If you recorded a person against a normal background, AI background removal may be more convenient.
Can You Use a Blue Screen Instead of Green?
Yes.
Chroma Key can be used with other solid colors, including blue, when the background provides sufficient separation from the subject.
The important part is selecting the correct background color with the color picker.
Avoid using a background color that strongly overlaps with the subject's clothing or important objects.
Can You Use Green Screen on CapCut Without a Green Screen?
If your footage does not have a solid-color background, Chroma Key isn't necessarily the right tool.
Instead, you can investigate CapCut's other background-removal options, such as AI-based background removal where available.
The best method depends on the footage.
Green-screen footage is specifically suited to Chroma Key.
Ordinary footage may be better suited to an automatic or manual cutout workflow.
Green Screen Ideas for CapCut
Once you understand Chroma Key, you can experiment with different types of videos.
Virtual Studio
Record yourself against green and place yourself in a studio background.
Travel Videos
Place yourself in front of landmarks or scenic footage.
Educational Videos
Put yourself beside charts, screenshots, or educational backgrounds.
Gaming Videos
Use a green screen to place yourself over gameplay footage.
Reaction Videos
Place your reaction over another video or image.
Product Videos
Record yourself presenting a product and replace the background with a branded environment.
Social Media Videos
Combine green-screen effects with captions, music, templates, and transitions.
Tips for Better Green Screen Videos
Before recording, remember these basic rules:
- Keep the green background evenly lit.
- Avoid strong shadows.
- Keep the subject separated from the background.
- Avoid green clothing.
- Use a clean background.
- Record at good quality.
- Keep the camera stable when appropriate.
- Check the entire frame before recording.
These simple steps can reduce the amount of correction required later.
Frequently Asked Questions
Does CapCut have a green screen feature on Android?
Yes. CapCut's mobile app provides a Chroma Key workflow for removing solid-color backgrounds.
Where is Chroma Key in CapCut?
On the current mobile workflow, select the relevant video layer and use the Cutout or Remove BG controls to access Chroma Key.
The exact interface can change between CapCut versions.
Can CapCut remove a green screen automatically?
CapCut provides both Chroma Key and other background-removal methods. Chroma Key is designed for removing a selected solid color, while AI-based removal can be useful for ordinary footage without a green screen.
Why does my green screen look bad?
Common causes include uneven lighting, shadows, poor color selection, low-quality footage, and green spill around the subject.
Can I replace a green screen with a video?
Yes. Place the replacement video underneath the green-screen clip in the timeline, then remove the green background from the upper layer.
Can I replace a green screen with a photo?
Yes. A photo can be used as the background layer underneath the green-screen footage.
Can I use blue screen in CapCut?
Yes. Chroma Key can work with a selected solid background color, provided the color is sufficiently separated from the subject.
Final Thoughts
CapCut makes green-screen editing accessible on Android through its Overlay and Chroma Key tools.
The basic workflow is:
- Create a new project.
- Add your replacement background.
- Add the green-screen footage as an overlay.
- Select the green-screen clip.
- Open Cutout or Remove BG.
- Choose Chroma Key.
- Select the green background with the color picker.
- Adjust Intensity.
- Adjust Shadow.
- Position and resize the subject.
- Preview the complete video.
- Export the finished result.
For the cleanest results, focus on the quality of your original green-screen recording. Even lighting, a consistent background, good separation between the subject and screen, and high-quality footage can make the editing process much easier.
If your footage wasn't recorded against a green or blue background, consider using CapCut's other background-removal tools instead of trying to force a Chroma Key workflow.
Related Articles

How to Fix CapCut Video Lagging After Export on Android
Fix CapCut video lagging after export on Android. Learn how to troubleshoot choppy playback, frame-rate mismatches, heavy effects, storage issues, and export settings.
GetApkFree Team

How to Fix CapCut Preview Not Matching Export on Android
Fix CapCut preview not matching the exported video on Android. Troubleshoot missing effects, text, transitions, timing, colors, and rendering differences.
GetApkFree Team

How to Fix Couldn't Apply AI Background in CapCut on Android
Getting "Couldn't Apply AI Background" in CapCut on Android? Check usage limits, clip selection, video quality, app updates, and practical troubleshooting steps.
GetApkFree Team

How to Fix CapCut Effects Not Applying on Android
CapCut effects not working on Android? Check clip selection, effect layers, timeline timing, conflicting adjustments, and app performance with these practical fixes.
GetApkFree Team